Deep challenges: splits remastered
11/04/2025
Ahmed Shawky
Warning: Undefined variable $post in /home/styleendo/htdocs/styleitaliano-endodontics.org/wp-content/plugins/oxygen/component-framework/components/classes/code-block.class.php(133) : eval()'d code on line 2
Warning: Attempt to read property "ID" on null in /home/styleendo/htdocs/styleitaliano-endodontics.org/wp-content/plugins/oxygen/component-framework/components/classes/code-block.class.php(133) : eval()'d code on line 2
This article will discuss in details, step-by-step management of deep splitting root canals in mandibular premolars, from detection through shaping until obturation of such anatomical complexity.
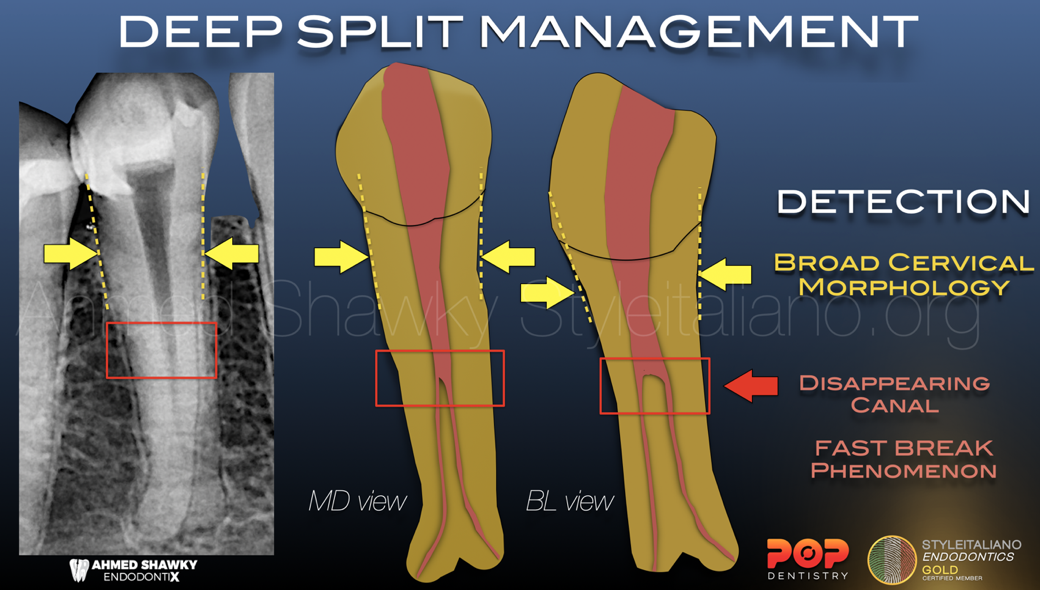
Fig. 1
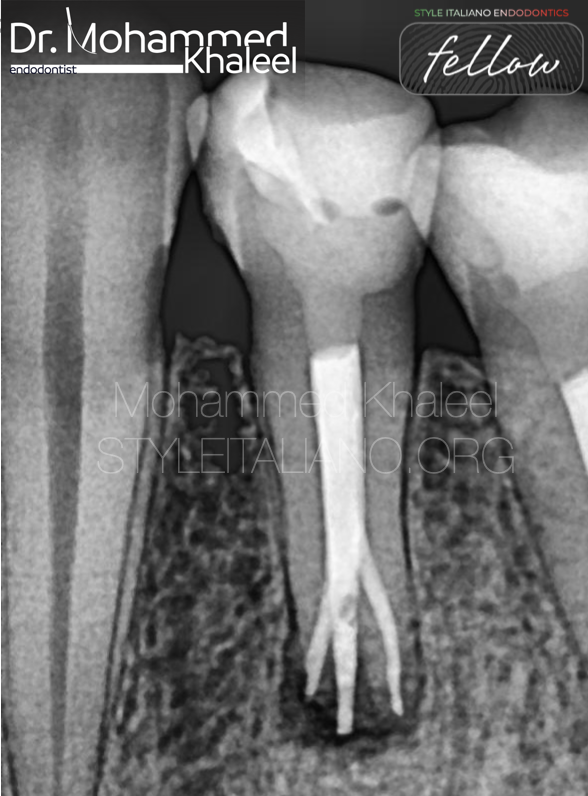
Detection:
The clinician can predict the presence of multiple canals in mandibular premolars (bifurcation or trifurcation) clinically and radiographically
Clinically, the presence of a broad cervical(BL & MD) morphology, as revealed by probing of the cervical area using a periodontal probe, can point to the presence of multiple canals.
Radiographically, the disappearing canal phenomenon (fast break), can denote the presence of a splitting root canal system.
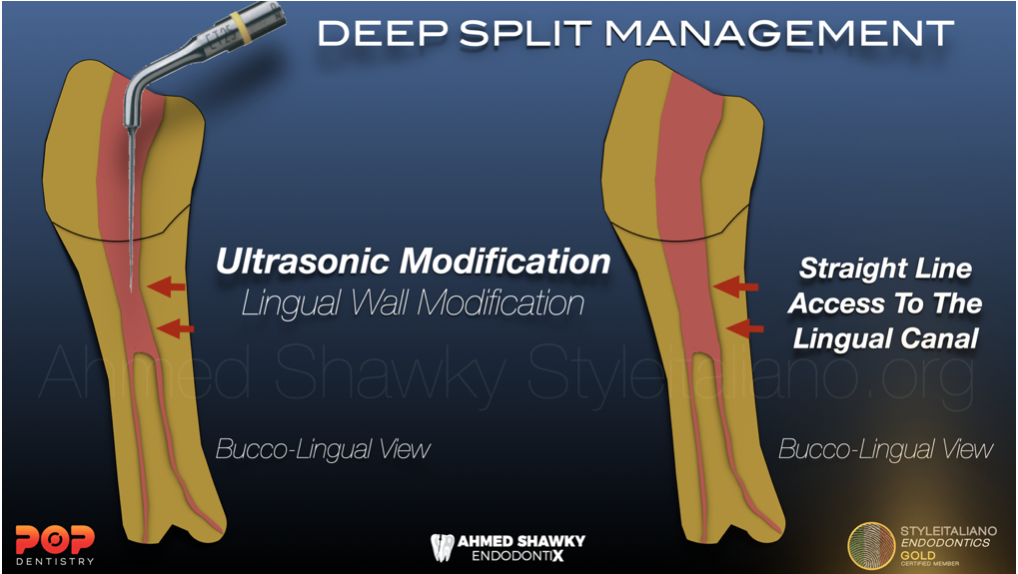
Fig. 2
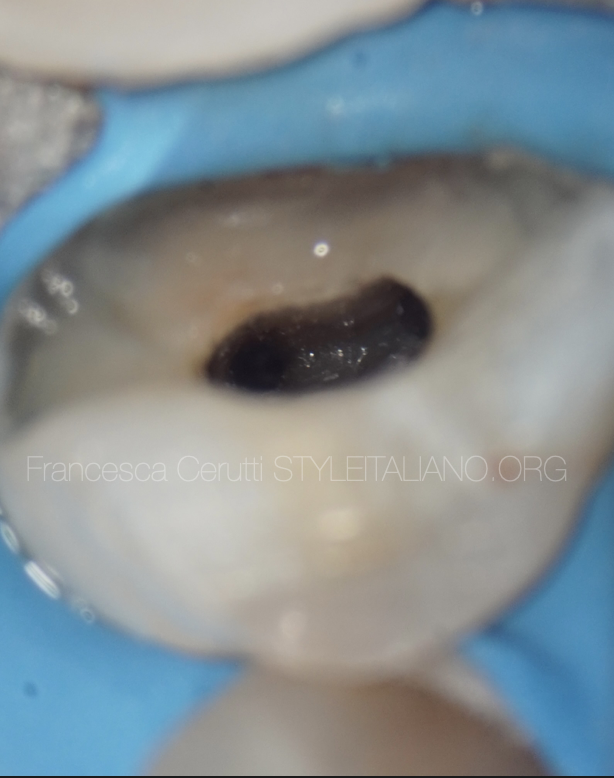
Coronal Access:
The usual access preparation regularly performed in mandibular premolars would not be sufficient for the clinician to negotiate the deep split
therefore, Ultrasonic modification of the cervical portion of the root canal system is essential to be able to instrument the deeper portions of the system, especially the lingual canal(s), which are commonly complicated by the presence of an overlying dentin bulge that needs refinement to avoid any possible stresses during instrumentation.
Ultrasonic refinement is performed using a suitable ultrasonic tip operated at medium power with intermittent cooling.
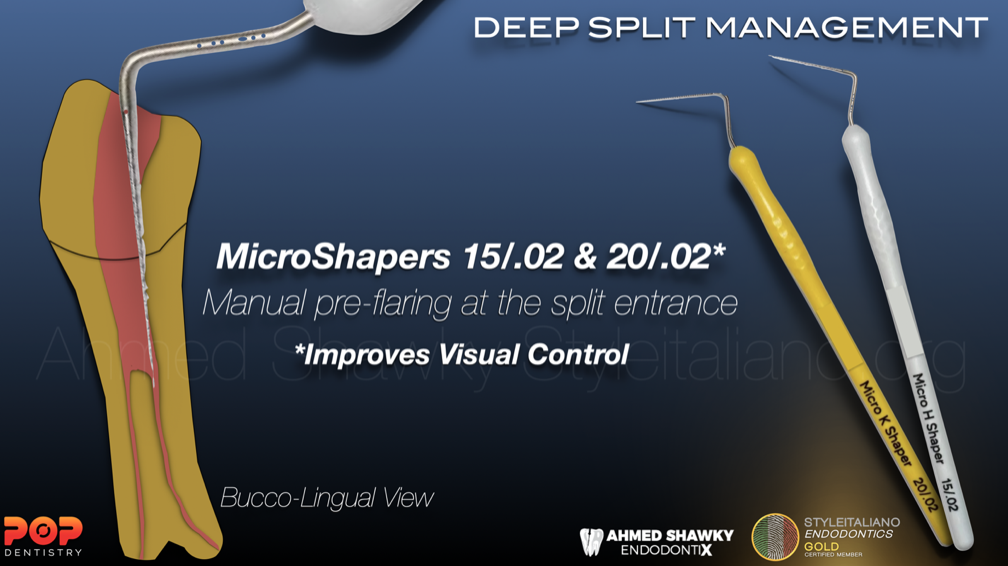
Fig. 3
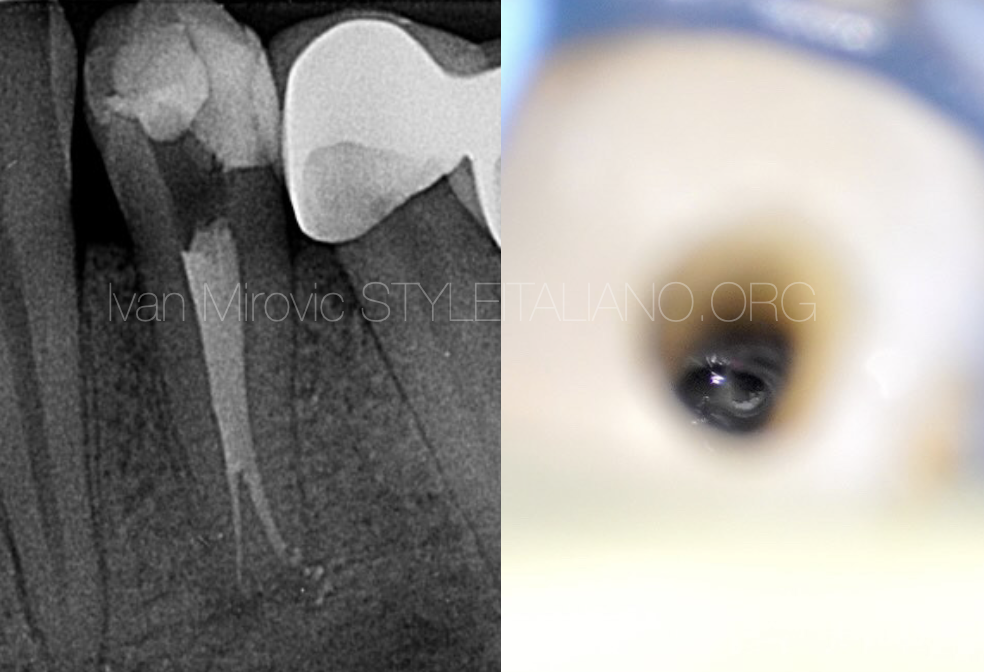
Manual Scouting & Preflaring:
Manual scouting is very important to establish the position and direction of the deep canal entrances as well as to check if more ultrasonic refinement is needed.
Due to visual restriction when using the usual manual files, it is better to use the manual files in a special file holders or using micro-shapers and micro-openers to improve the visual control under the dental operating microscope
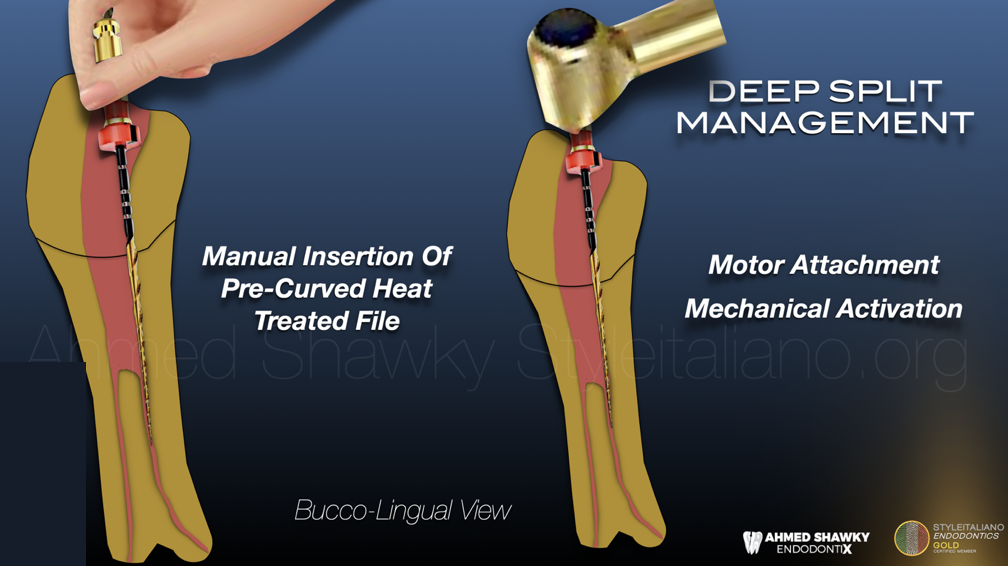
Fig. 4
Shaping:
After manual scouting and Preflaring, now the canal entrances can be mechanically shaped.
A pre-bendable, heat-treated file is needed in order to maintain the pre-curving in a similar way to the manual instruments
And Since it is inconvenient to insert the mechanical file while attached to the endodontic motor, it is easier to manually insert the pre-curved mechanical file, then attaching the motor to the file and finally activating the motor.
These steps are repeated for each of the canals of the system
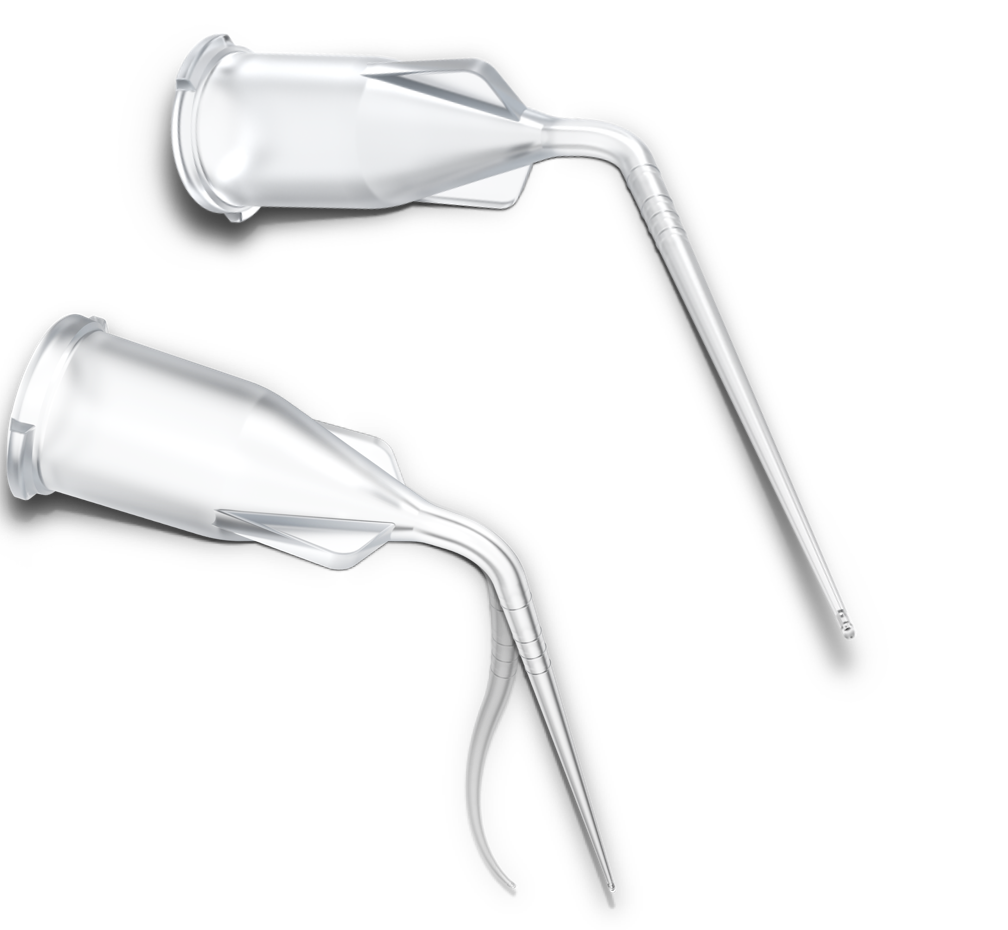
Fig. 5
Irrigant delivery and activation:
To avoid the accident of breaking the metalliuc irrigation needle in such complex anatomy. It is safer to use a polymer prebendable irrigation needle
Similarly with activation, Acoustic activators having prebendable tips are safer (sonic or ultrasonic)
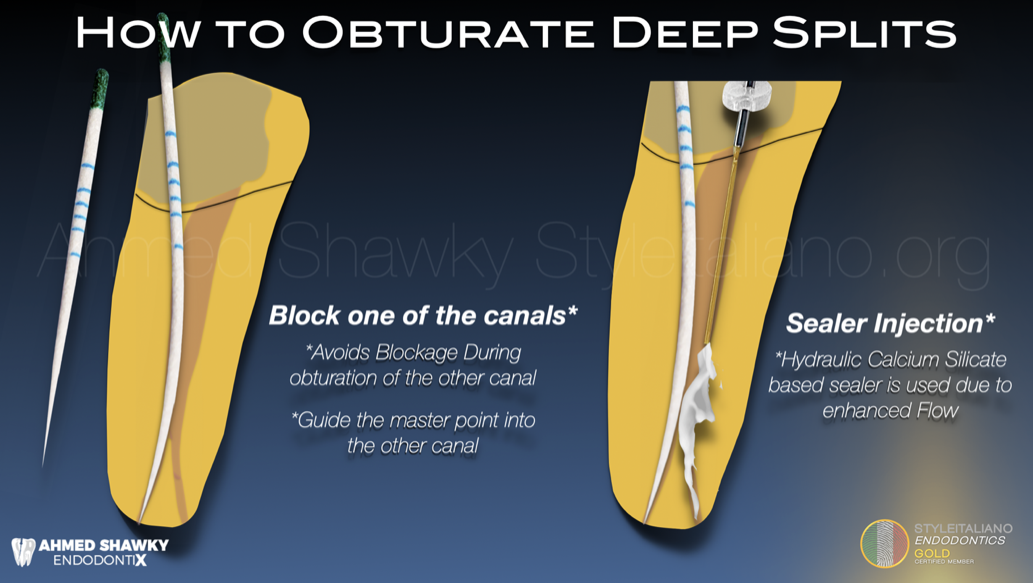
Fig. 6
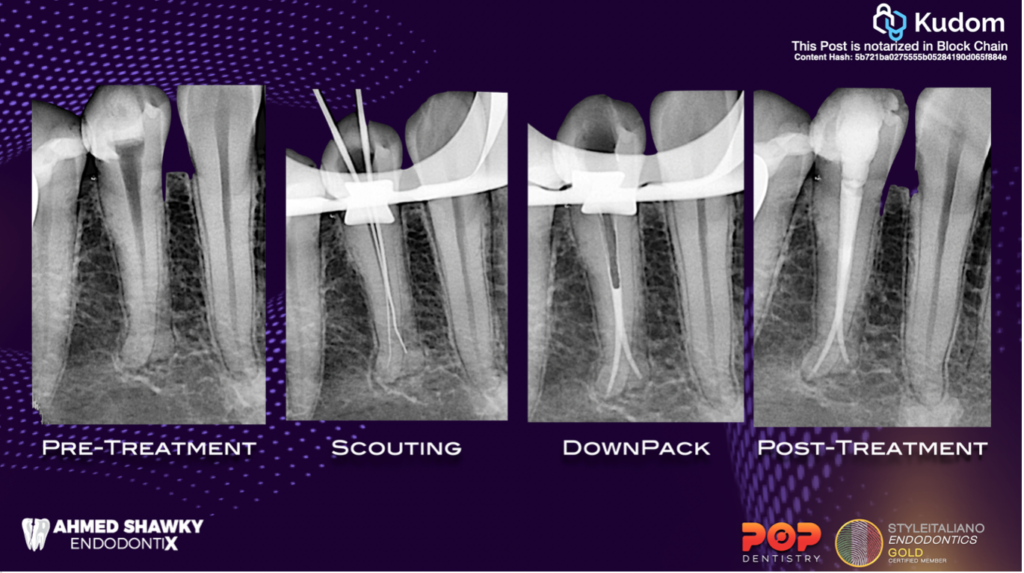
Obturation:
Obturation of deep splits, especially in mandibular premolars are often complicated by the possibility of blockage of one of the canals by filling materials. The following steps can simplify the procedure with minimum technique sensitivity
Step 1: Secure the accessible canal
Use a sterile paper point of the same size and taper as the selected master gutta percha cone. Place it in the accessible canal in order to;
- avoid blockage of the canal by gutta percha &/or sealer
- Guide the master gutta percha point into the other canal
Step 2: Secure the accessible canal
Place the root canal sealer into the empty canal. Calcium silicate based sealer can be a good option to improve the flow into the anatomy
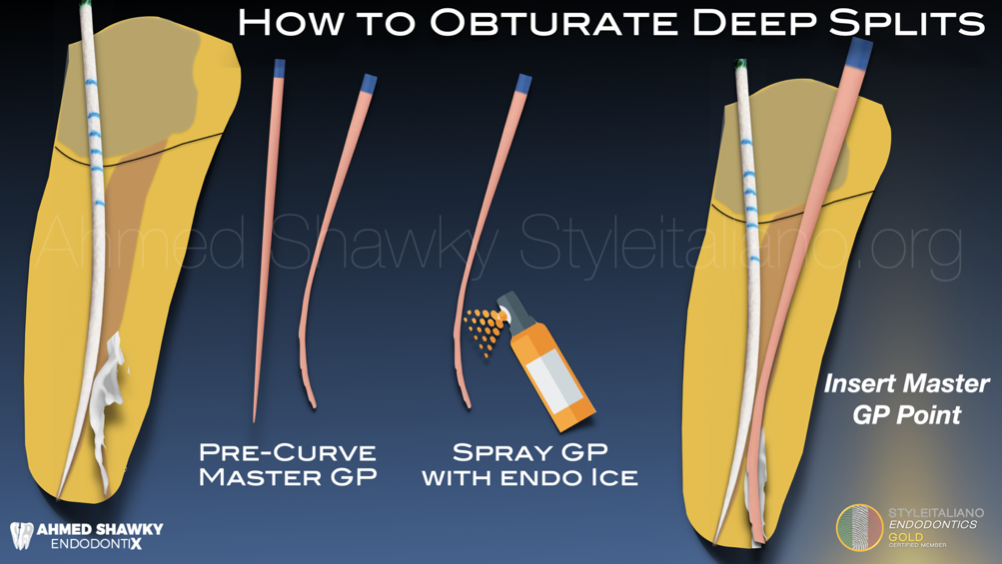
Fig. 7
Step 3: Pre-curve the master Gutta Percha Point
Being a thermo-plastic rubber material, the Gutta percha point can be pre-curved and its shape can be maintained by spraying it with EndoIce (-50) spray
Then insert the pre-curved master point guided by the paper point placed into the other canal
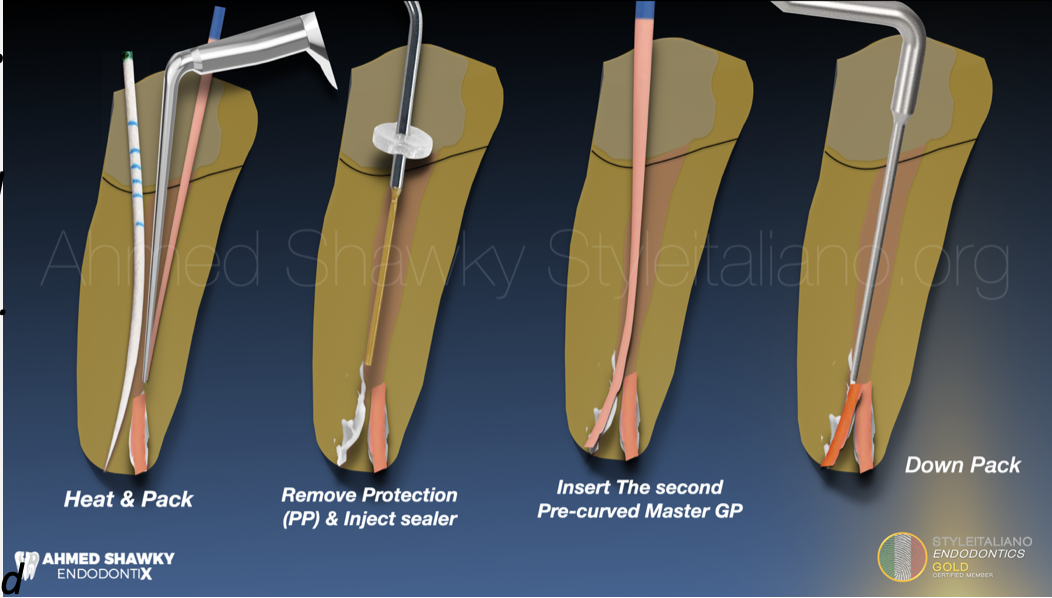
Fig. 8
Step 4: Heat and Down-pack
Use the heat carrier (heat must be adjusted according to the type of sealer used) to down pack gutta percha in the filled canal.
To avoid errors, introduce your heat carrier into the canal to the desired length, activate the heater while moving towards the root canal wall, not towards the paper point.
Wait few seconds to cool down, then activate the heater again while coming out of the canal
Step 5: remove the paper point from the other canal and repeat the same steps
Step 6: Back fill the part of the root canal coronal to the split using Themoplasticized injection molding
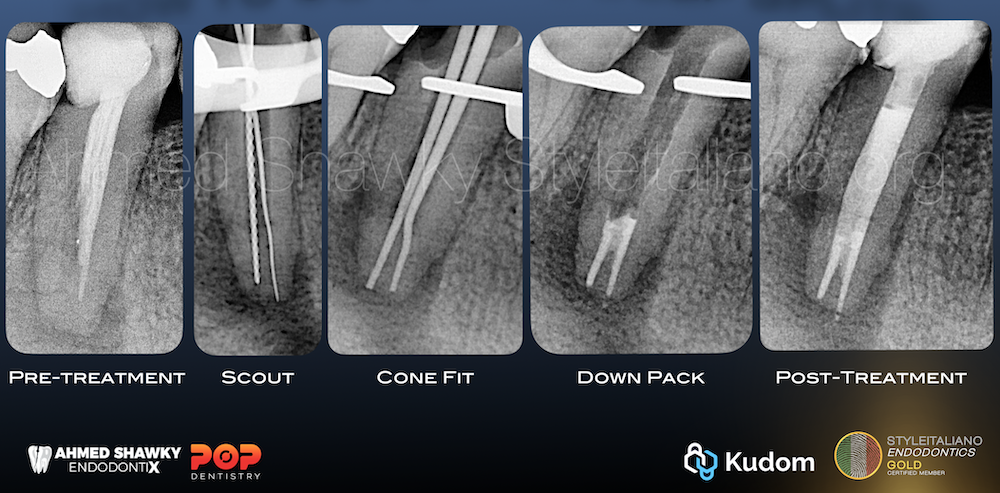
Fig. 9
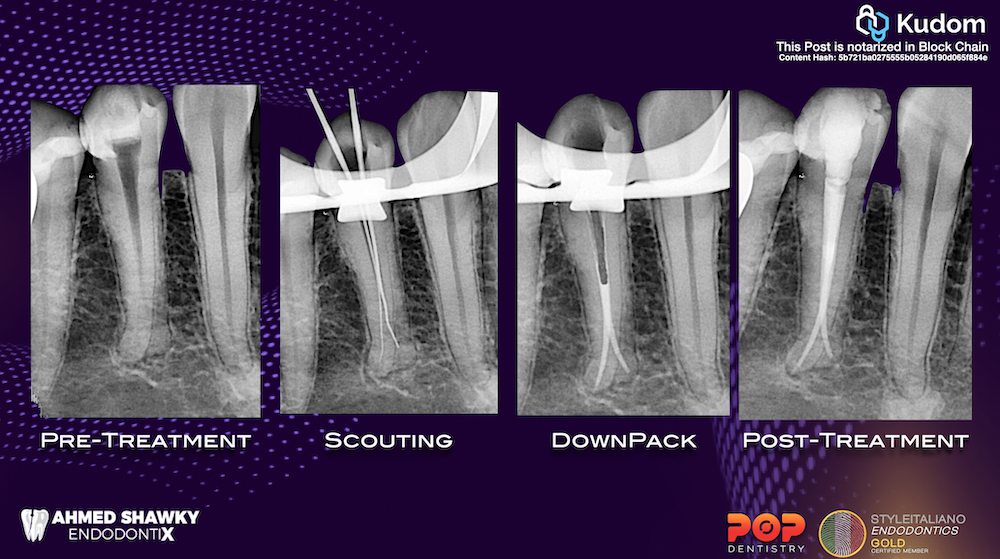
Fig. 10
Conclusions
Conclusions:
Splitting root canal systems are considered a high difficulty situation especially in mandibular premolars
The clinician must be able to detect the probability of such anatomy on the pre-treatment radiograph, have the suitable tools to be able to access and shape the anatomy and have the sufficient clinical expertise to clean and seal such anatomies
Bibliography
- Schilder H. Cleaning and shaping the root canal. Dent Clin North Am. 1974; 18: 269-296
- Schilder H. Filling root canals in three dimensions. Dent Clin North Am. 1967; : 723-744
- Swati Srivastava, Current Strategies in Metallurgical Advances of Rotary NiTi Instruments: A Review J Dent Health Oral Disord Ther 2018, 9(1): 00333