Direct class III restoration using Reflectys composite
11/08/2022
Federico Ceroni
Warning: Undefined variable $post in /var/www/vhosts/styleitaliano-endodontics.org/endodontics.styleitaliano.org/wp-content/plugins/oxygen/component-framework/components/classes/code-block.class.php(133) : eval()'d code on line 2
Warning: Attempt to read property "ID" on null in /var/www/vhosts/styleitaliano-endodontics.org/endodontics.styleitaliano.org/wp-content/plugins/oxygen/component-framework/components/classes/code-block.class.php(133) : eval()'d code on line 2
The reconstruction of an anterior tooth is always a challenge, since the aesthetic requirements of our patients are high and we have to take into account several aspects, such as the shape, the macro and micro anatomy of the tooth, its color, the translucency and we also have to recreate a correct proximal contact.
In direct adhesive dentistry Class III cavities are one of the most complex procedures: to achieve good results it is mandatory to choose the composite that can best reproduce the color of the dentin and enamel of the natural tooth, moreover the operator has to know the characteristics of the selected composite materials and its optical features.
Class III cavities, e choice of color and the layering technique of the composite when we are rehabilitating the 3 classes is very important.
in fact charactedue to their position and extension, do not allow an easy layering of the composite masses, making it harder to obtain a correct result and to have a restoration that perfectly integrates with the surrounding tooth structure. For this reason, it is important to choose the correct shade of composite and to use the layering technique that simplifies the procedure. In fact, in thee cases, often the choice of layering more than one mass can lead to errors in the execution of the enamel layer, making the restoration look gray and poorly integrated.
When designing the cavity it is very important to evaluate the buccal extent of the caries, trying to understand how much enamel will be involved in the preparation of the cavity and therefore the amount of reconstruction that will be visible buccally.
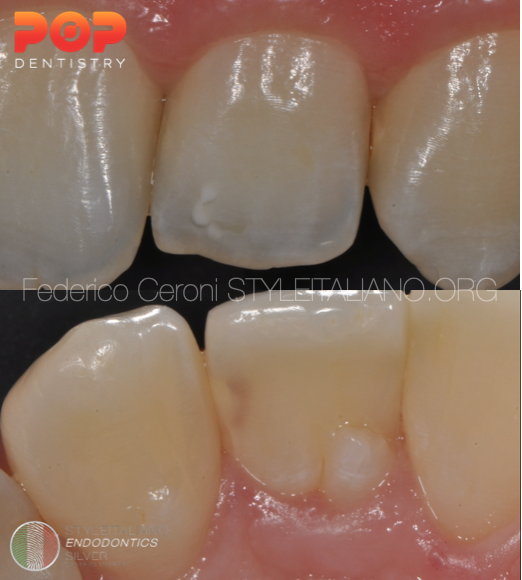
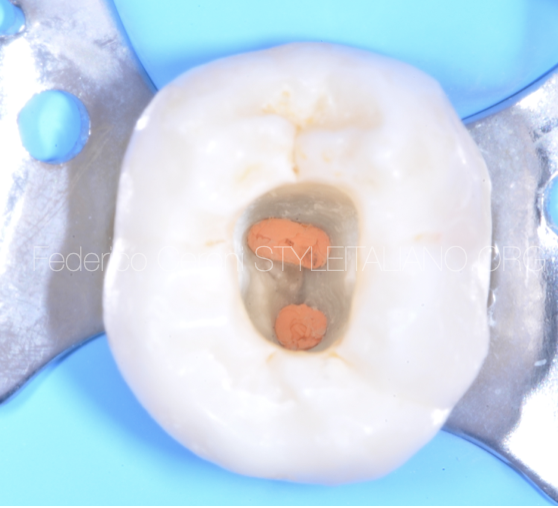
Fig. 1
In this case we can clearly see from the palatal side that there is a distal decay on the upper left lateral incisor. Looking from the buccal aspect, on the other hand, it is possible to see a mesial decay on tooth 23. It is possible to hypothesize that the media decay on tooth number 23 is of a small size, while the one on tooth 22 seems to be more extensive, even if the buccal enamel seems intact.
When preparing a cavity one always has to remember that the residual tooth structure will help in the following layering steps and will work as a guide for modeling the restoration.
In the case of tooth number 22, during the preparation of the cavity, it will be essential to maintain the buccal enamel.
Before positioning the rubber dam, the first step of the therapy will be the choice of the composite shade, that will be the one matching the shade of the middle third of the tooth.
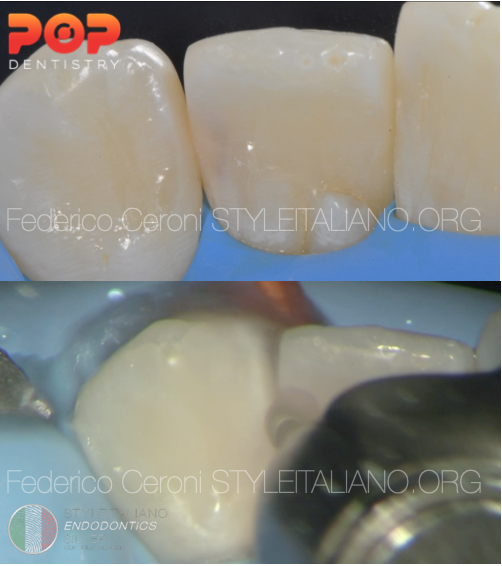
Fig. 2
A correct isolation of the operating field with rubber dam will allow us to keep the cavities dry and will facilitate the subsequent phases of adhesion and stratification.
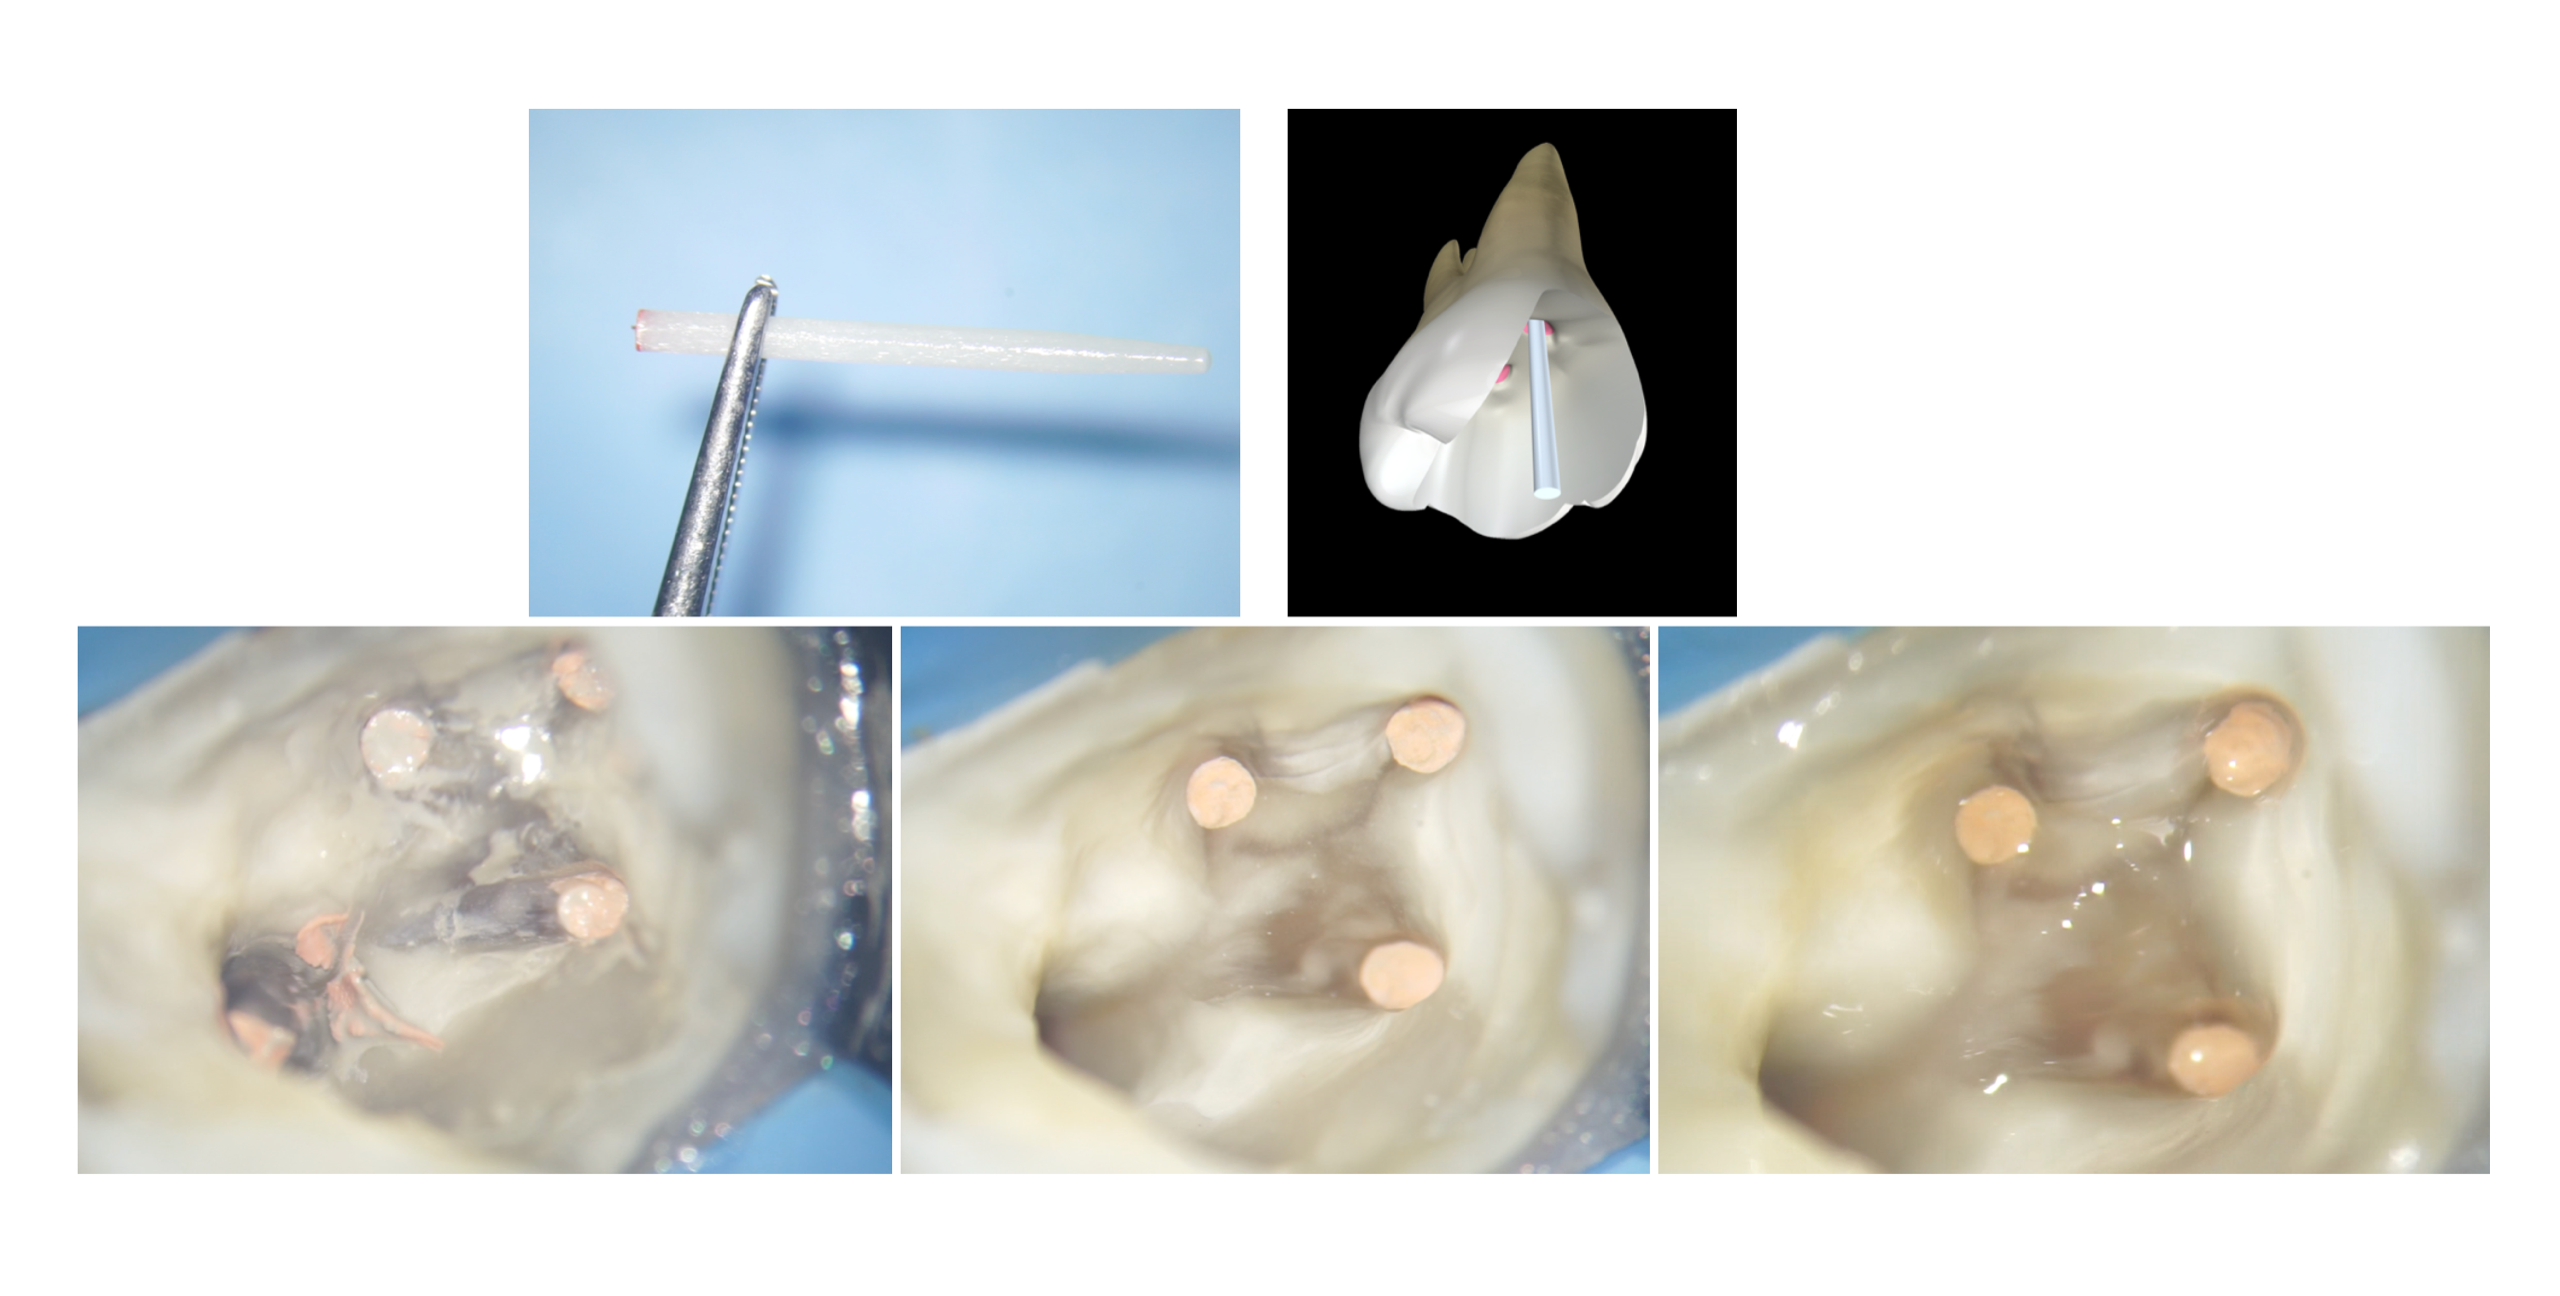
The design of the cavity of the tooth 22 is done with a palatal approach by using a diamond coated bur: starting from palatal will help preserving as much buccal enamel as possible, with the consequent maintenance of a correct translucency of the reconstruction.
After opening the cavity on the tooth 22, one can pass to tooth 23: this approach will help maintaining as much sound dental structure as possible on the canine, resulting in a minimally invasive therapy.
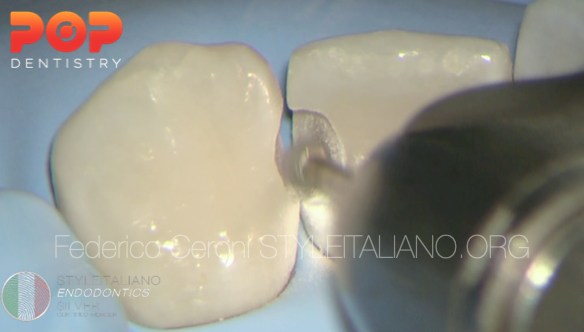
Fig. 3
After the removal of the decay, the edges of the cavity have to be finishied: in this step I prefer working without water, using only an air spray to cool the tooth: this allows me to be more precise in regularizing the edges of the cavity. This is a very important step that allows me to avoid the risk of the formation of white lines of transition between the tooth and the restoration
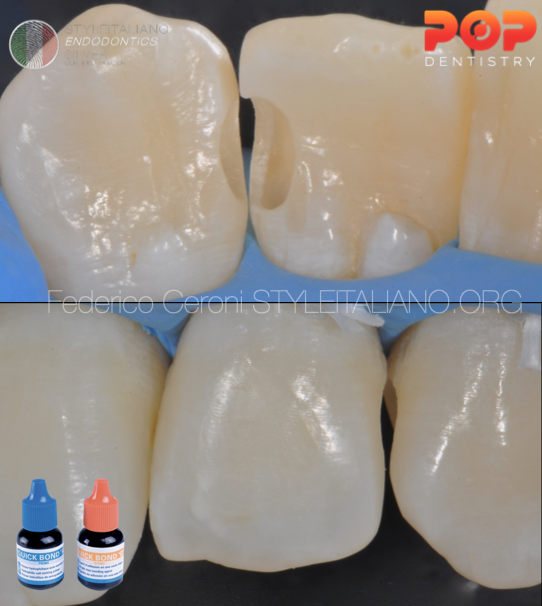
Fig. 4
The preparation involved mainly the palatal aspect of the tooth than the vestibular one, making the aesthetic integration of our reconstruction easier.
After finishing the cavities the adhesive procedures were performed using the quick bond universal adhesive system, no ortophosporic acid was used.
First I applied 3 layers of A prime, left it undisturbed for 5 sec and then dried with a blast of air, then I applied 2 layers of B bond also dried with a blast of air and cured for 20 sec with a light-curing unit.
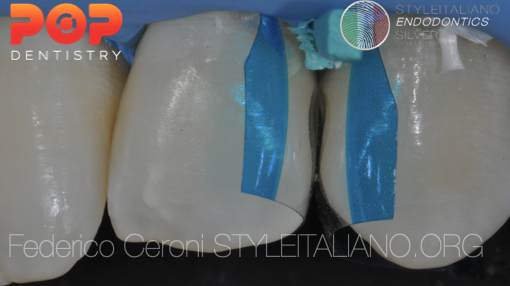
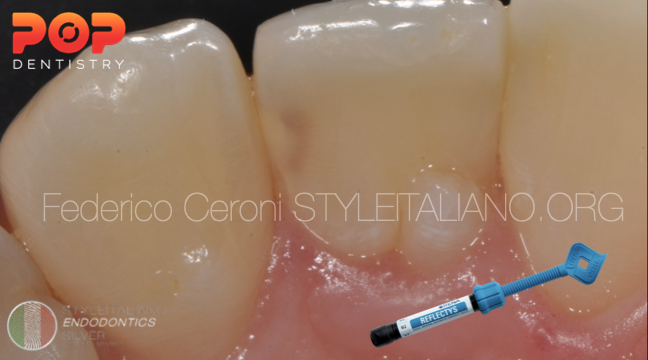
Fig. 5
Then I positioned the matrices to reconstruct a correct proximal contact. In this case I used transparent sectional matrices, because their shape allows me to create a correct emergence profile.
Then I start the layering steps. Since the vestibular portion of the tooth is still intact, it is not necessary to use a multi-mass layering technique. In this case it will be sufficient to choose the composite mass that is closest to the color of the middle third of the tooth. This mass will then be stratified trying to position it with additions of maximum 2mm in thickness, in order to polymerize correctly the composite and reduce shrinkage stresses. In this case I decided to use the the A2 Reflectys composite by Itena clinical.
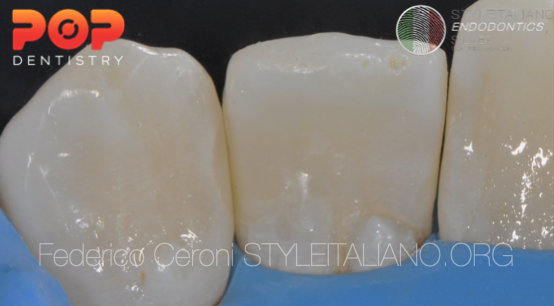
Fig. 6
This is the final result. In this case the choice of the matrix was fundamental for the reproduction of a correct profile and contact point, making it easier to finish and polish the restoration.
Conclusions
When we need to restore anterior teeth with direct composite restorations, the choice of the correct material makes the difference. A composite that is too translucent or too opaque, if not used in the right thicknesses, could lead to an aesthetic problem. For this reason we must try to simplify the stratification in the anterior sectors and, when possible, try to use single masses. Reflectys composite (Itena Clinical) is able to help us in the situations in which the vestibular enamel is still partially present and the use of a single mass is sufficient, because its translucency makes it able to perfectly mask the transition between tooth and restoration.
A minimally invasive approach is essential for a correct resolution of such problems, because the structure that will not be removed during the cavity preparation will help us in the layering phase, making our reconstruction perfectly camouflaged.
Bibliography
1 Devoto W. Clinical procedures for producing aesthetic stratified composite resin restorations. PPAD 2002;14(7):541-544
2 Perdigao J. Dentin bonding as a function of dentin structure . Dent Clin North Am 2002;46:277-301
3 Devoto W, Saracinelli M, Manauta J. Composite in every day practice: How to choose the right material and simplify techniques in the anterior teeth. Eur J Esthet Dent 2010;5(1):102-24
4 Vanini L. Light and color in anterior composite restorations. Pract Periodontics Aesthet Dent. 1996 Sep;8(7):673-82
5 Vanini L, Mangani F, Klimovskaia O. Conservative restoration of anterior teeth. Viterbo (Italy): Editing ACME; 2005.