Direct restoration of an endodontically treated tooth with Itena Reflectys composite and Quick bond adhesive system
30/03/2022
Federico Ceroni
Warning: Undefined variable $post in /home/styleendo/htdocs/styleitaliano-endodontics.org/wp-content/plugins/oxygen/component-framework/components/classes/code-block.class.php(133) : eval()'d code on line 2
Warning: Attempt to read property "ID" on null in /home/styleendo/htdocs/styleitaliano-endodontics.org/wp-content/plugins/oxygen/component-framework/components/classes/code-block.class.php(133) : eval()'d code on line 2
Adhesive dentistry changed the way we approach the rehabilitation of endodontically treated teeth. Adhesives and composites have permitted more conservative protocols for repairing severely damaged teeth by reducing the invasiveness that was historically involved with the ‘’classic’’ prosthetic approach.
In particular, direct restoration are the most conservative approach of the modern dentistry and in some cases can be successfully used to restore endodontically treated teeth.
From literature we know that a tooth subjected to an exclusive Endodontic treatment loses just the 5% of is resistance compare to an intact tooth, that is true if the cavity it not to large and the residual cusps and the marginal ridges have the right thickness.
If we are planning to restore an Endodontically treated tooth with a direct restoration, the first thing is to evaluate the thickness of the residual walls. Once checked that the thickness is sufficient, it is possible to start the reconstruction by following simple steps that will allow us to give the correct shape to our restoration. The goal is to restore the tooth to its original shape, taking great care to recreate the details that make the restoration perfectly integrated.
To do that, it is mandatory to know the morphology of the tooth that we have to restore: the number of the cusp, their size and shape, the drawing of the primary and secondary grooves and the shape of the marginal ridges.
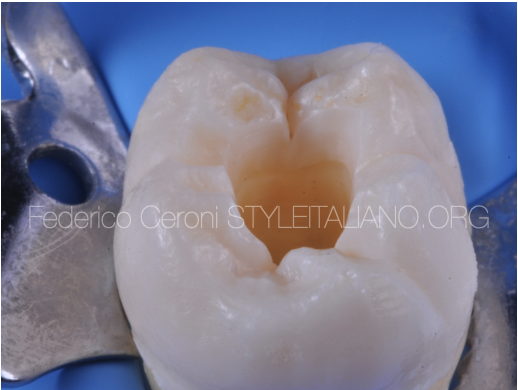
Fig. 1
In this case it was necessary to restore this third lower molar with a direct restoration. Third molars have particular anatomies that must be interpreted without a precise occlusal scheme.
When preparing the cavity, one has to remember that the residual tooth structure will help in the following layering step.
The most important thing to be kept are the ridges of the cusps, because their inclination can be kept as a reference for the layering procedure. The cavity should be prepared with a minimally invasive approach and refined with the same concept.
To refine the cavity is an important step for many reasons, because it allows to avoid the risk of leakage, the risk of a white line on the margin of the restoration and to prevent interface voids.
This step removes all the not-supported enamel that could detach with the contraction of the composite. To make a bevel means to prepare a healthy part of the tooth, the part we need to preserve the most because it provides key informations on the inclination of the cusps. To do this, a silicon bur can be used.
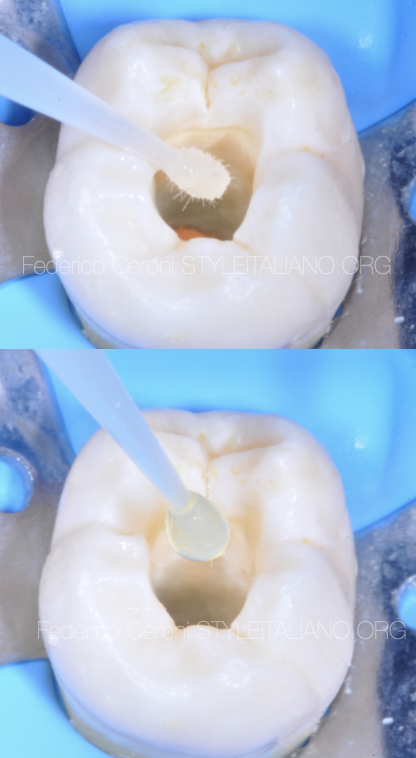
Fig. 2
The adhesive procedure was performed using the quick bond universal adhesive system, no orthophosporic acid was used.
The first step consisted in applying 3 layers of A prime, leave it undisturbed for 5 sec and then dry it with a blast of air. Then, 2 layers of B bond were applied, dried with a blast of air and cured for 20 sec with a light-curing unit.
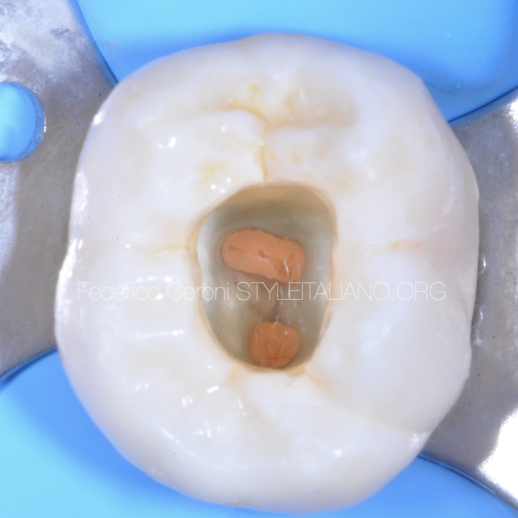
Fig. 3
The layering steps were then started.
Many clinicians are used to choose a single shade restoration in posterior teeth: with this approach it is impossible to make the filling invisible, since a single shade is not enough for a predictable result. A proper layering technique is needed to achieve high level results, because posterior teeth have many different color mixed together.
There is white on the top of the cusp and on the ridge of the cusp. There is the orange/yellow on the occlusal aspect, the brown inside the grooves, and the grey on the marginal ridges. What really matter in posterior is the contrast between something yellow and warm that goes below something that is cold and white.
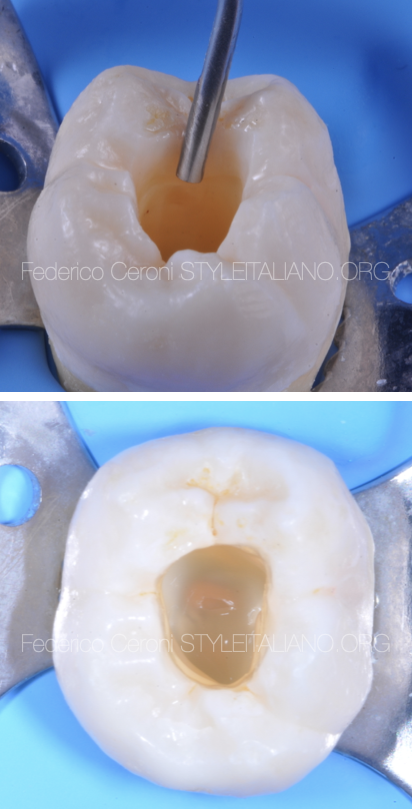
Fig. 4
The layering technique shown in this case is the 4 increment technique, described by Roberto Spreafico and Didier Dietschi, that is a variant of the classic technique of Bichacho.
The first step is the one that allows transforming a class II in a class I restoration. Then, the second step is to apply a thin layer of flowable composite (usually 0,5mm) on the bottom of the cavity. This is necessary for two reasons: first to create an elastic layer that absorbs the contraction of the next layers, allowing to avoid detachments of the adhesive interface. Second, to seal the adhesive and block any permeability phenomenon.
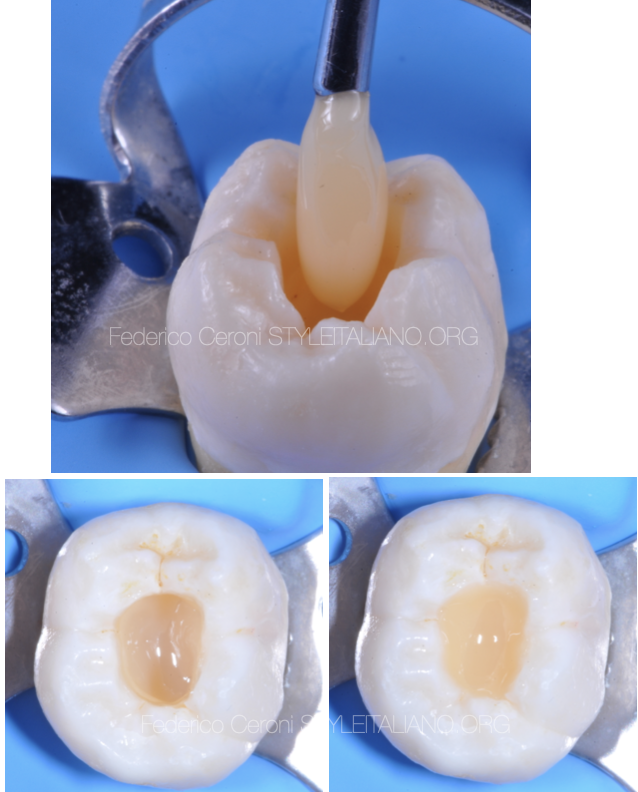
Fig. 5
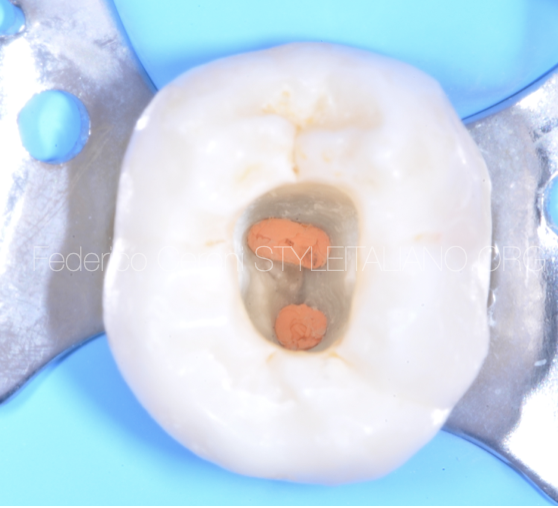
The third step is the dentin composite that has to fill most of the cavity leaving the space just for the enamel layer.
For the dentin layer the A3,5 reflectys composite by Itena was used because it is a chromatic composite that can reproduce the color of the natural dentin. More than one increment was necessary due to the depth of the cavity
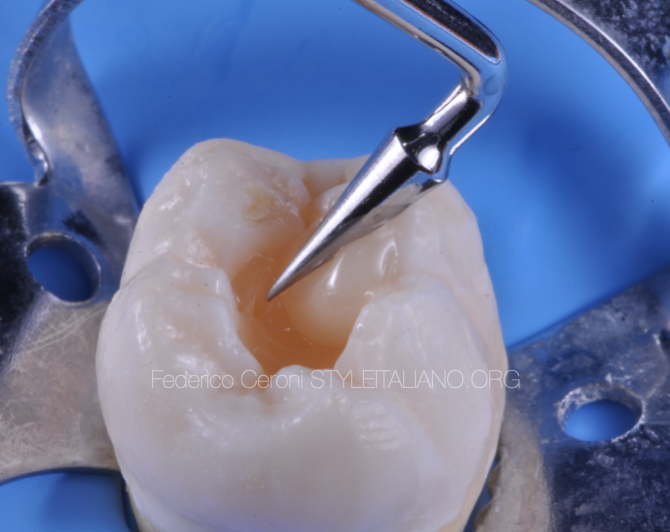
Fig. 6
The fourth step is the enamel layer. The 4 increment technique recommends to model the enamel in one shot, all the cusps are shaped simultaneously. The author prefers to shape and cure one cusp at the time, because this approach can give some advantages: the first cusp that is cured can be used as a reference to shape the following.
The second is that drawing the grooves is easier if it is possible to have a hard material that stabilizes our shaping tools.
The third is that decreasing the amount of composite to be cured, the contraction of the material decreases and, as a consequence, the possibility to have a detachment of the adhesive interface and a white line decreases.
This technique is called sectional technique, it is described by style Italiano shade guide.
The occlusal surface of the tooth should be considered as a pizza and the cusps are the slices.
For the enamel the B2 reflectys composite by Itena was chosen thanks to its an high value that can reproduce the effect of the enamel
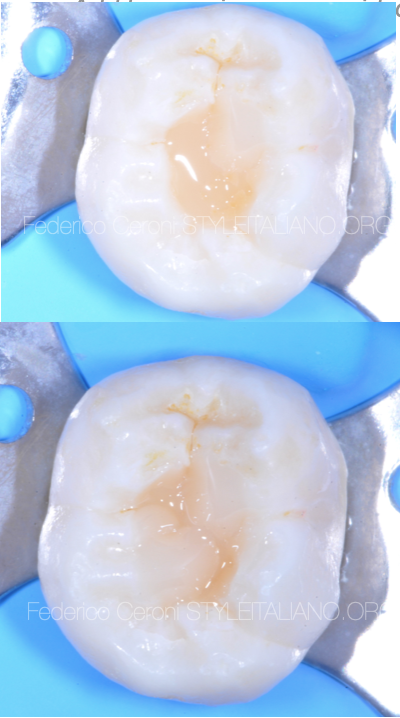
Fig. 7
The most important moment of this procedure is when shaping the first cusp. Once cured, it is already decided where the grooves are going to be, both in horizontal and vertical direction. Thats why it is so important to select which cusp to start shaping.
Starting from the easier one allows to position the grooves in the right place without too much effort. Then it is possible to go on, leaving the most difficult as last. I usually leave at the end the biggest one. Adding one slice at time we compose our tooth.
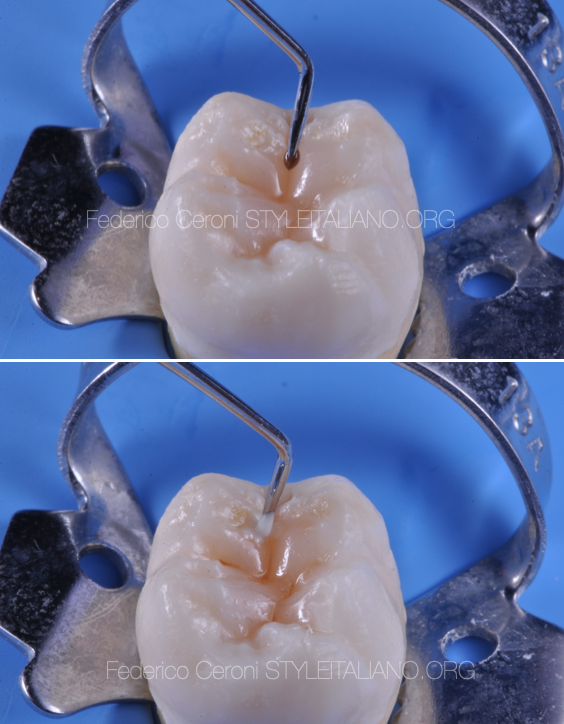
Fig. 8
Once the tooth is shaped it is possible to improve the aesthetics of the restoration adding the stains, in order to give to the restoration a 3d effect. Pay attention to the intensity of the brown, should be chosen very carefully regarding to the natural stained adjacent teeth.
I usually use 2 stains, brown and white. I need the brown to paint the grooves and to give a warm effect to the occlusal surface, and then I put the white on the top of the ridge of the cusps. This create a contrast between what is below and what is above, giving you a 3d perception.
Stains are also a verifier of your work, based on how they fit into the grooves you can see if you shaped the grooves in the right way.
Cusp that are separate with a thin and deep space are the best, here the stain can enter with the right quantity and gives you the right effect.
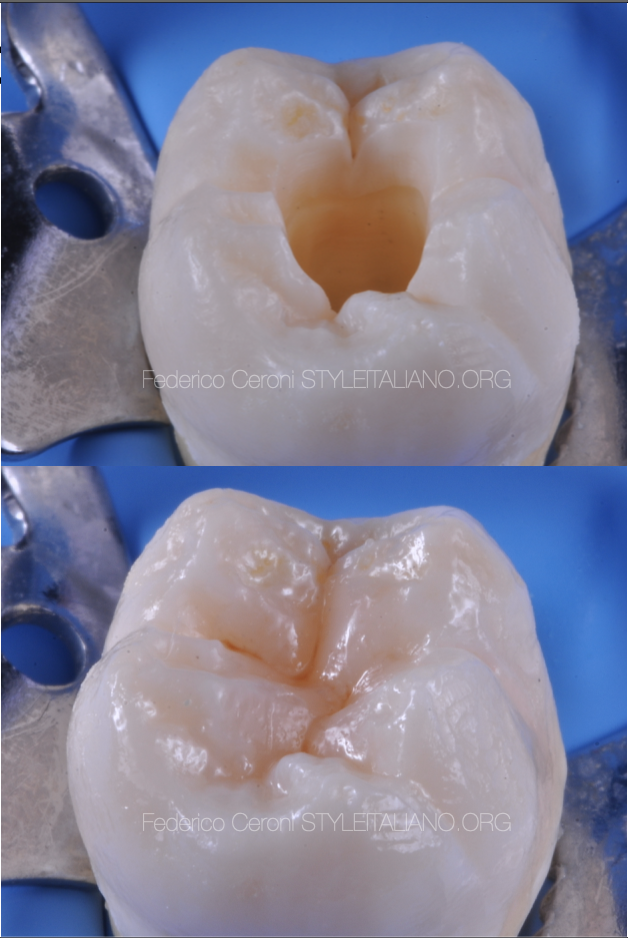
Fig. 9
Having a good control of the details it is possible to recreate a tooth that looks natural.
Conclusions
Our goal must be to restore correct aesthetics and function while preserving the dental structure as much as possible. A minimally invasive approach is essential for a correct resolution of problems involving damage teeth, especially in young patients. To use a direct composite to restore endodontically treated teeth is a great and predictable solutions when the conditions of the residual structure of the tooth allow it.
Bibliography
1 Dietschi D. Spreafico R. Current clinical concepts for adhesive cementation of tooth-colored posteriors restorations. Pract Periodontics aesthet Dent 1998;10:47-54
2 Perdigao J. Dentin bonding as a function of dentin structure . Dent Clin North Am 2002;46:277-301
3 Dietschi D, Duc O, Krejci I, Sadan A. Biomechanical considerations for the restoration of endodontically treated teeth: a systematic review of the literature. Part II: evaluation of fatigue behavior, interfaces, and in vivo studies. Quintessence Int 2008;39:117—29.
4 Vanini L. Light and color in anterior composite restorations. Pract Periodontics Aesthet Dent. 1996 Sep;8(7):673-82
5 S.Chersoni,P.Suppa,S.Grandini,G.Goracci,F.Monticelli,C.Yiu,C.Huang,C.Prati,L.Breschi,M.Ferrari,D.H. Pashley,and F.R. Tay Dent Res 83(6);459.2004