Corono-radicular fractures: a new conservative approach
31/12/2020
Fabio Gorni
Warning: Undefined variable $post in /var/www/vhosts/styleitaliano-endodontics.org/endodontics.styleitaliano.org/wp-content/plugins/oxygen/component-framework/components/classes/code-block.class.php(133) : eval()'d code on line 2
Warning: Attempt to read property "ID" on null in /var/www/vhosts/styleitaliano-endodontics.org/endodontics.styleitaliano.org/wp-content/plugins/oxygen/component-framework/components/classes/code-block.class.php(133) : eval()'d code on line 2
Traumatic lesions of permanent dentition have a percentage of incidence which ranges from 26-76%: the most frequent causes are falls, accidents occurred during sports or as a consequence of violent episodes.
Upper incisors are the most frequently affected teeth, even if, when there are traumatic lesions of the chin, as a rebound effect, it is possible to have fractures of the premolars region.
Treatment of root fractures depends on the location of the fracture itself and can also vary, according to the guidelines, from splinting to the extraction of the root followed by implant placement.
In this case report we will discuss a new conservative approach of reattachment associated to root canal therapy followed by fixing with a post.
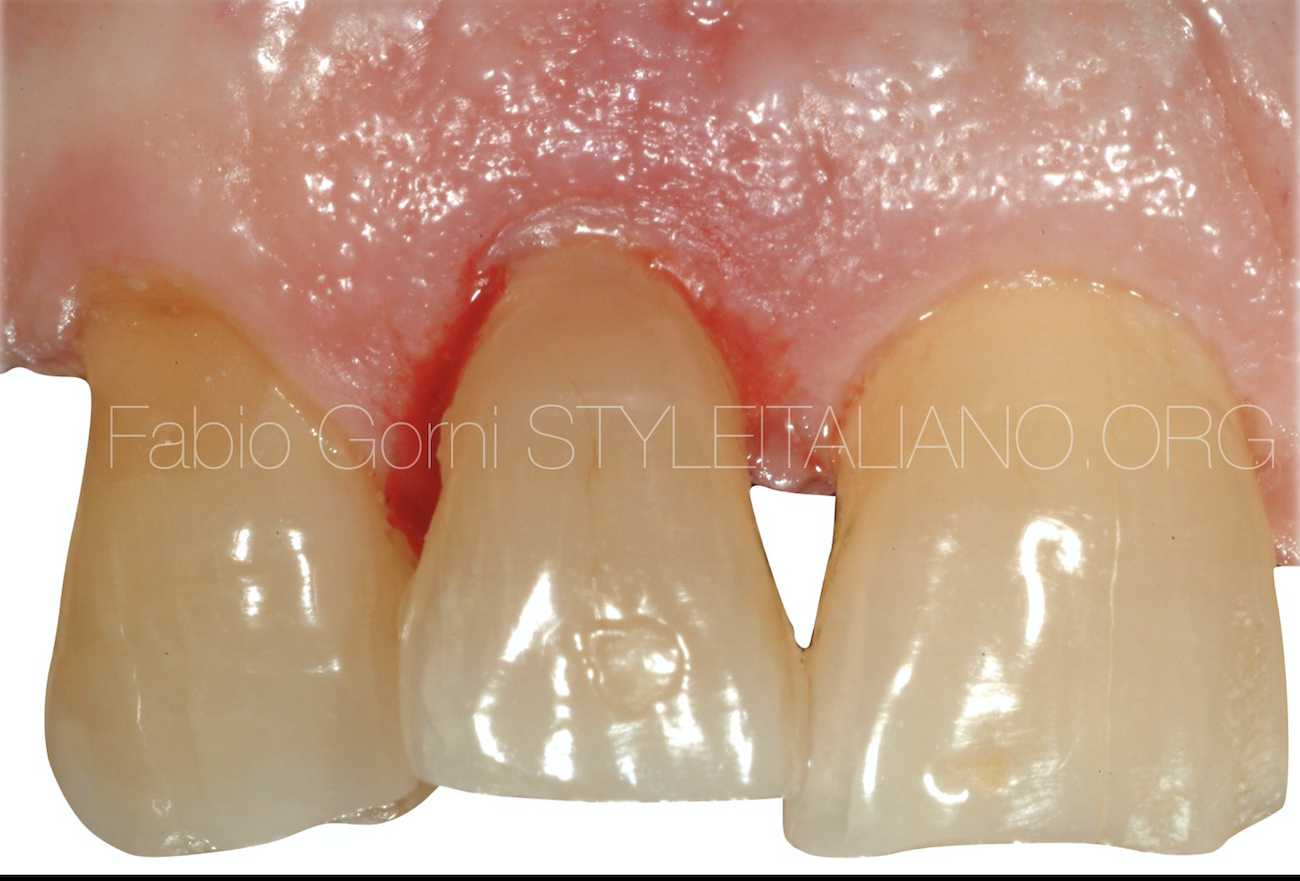
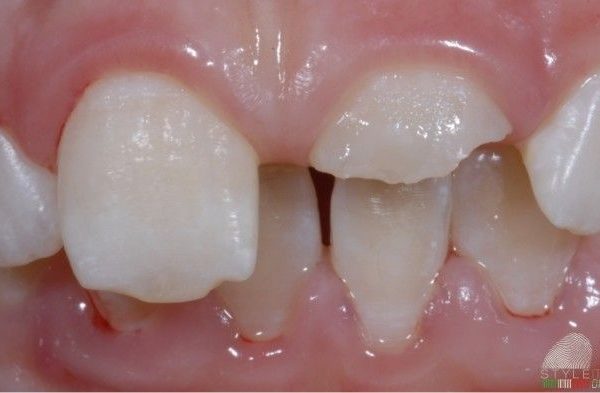
Fig. 1
Pre-op picture: after the trauma
Even if dental injuries (TDIs) of permanent teeth frequently occur in children and young adults; this case report deals with a 70 years old patient with a fractured lateral incisor. A proper diagnosis, treatment planning and follow up are important for achieving a favorable outcome.
In this case we noticed bleeding of the gingival sulcus, sensibility testing was negative and there was tenderness during the percussion test.

Fig. 2
Pre-op xray
The preoperative radiograph clearly shows a root fracture which is higher than the mesial and distal bone peaks. It also shows how the fracture enters the pulp chamber of the lateral incisor.
Only after a correct diagnosis and local anesthesia it is possible to start to remove the fractured portion of the tooth.
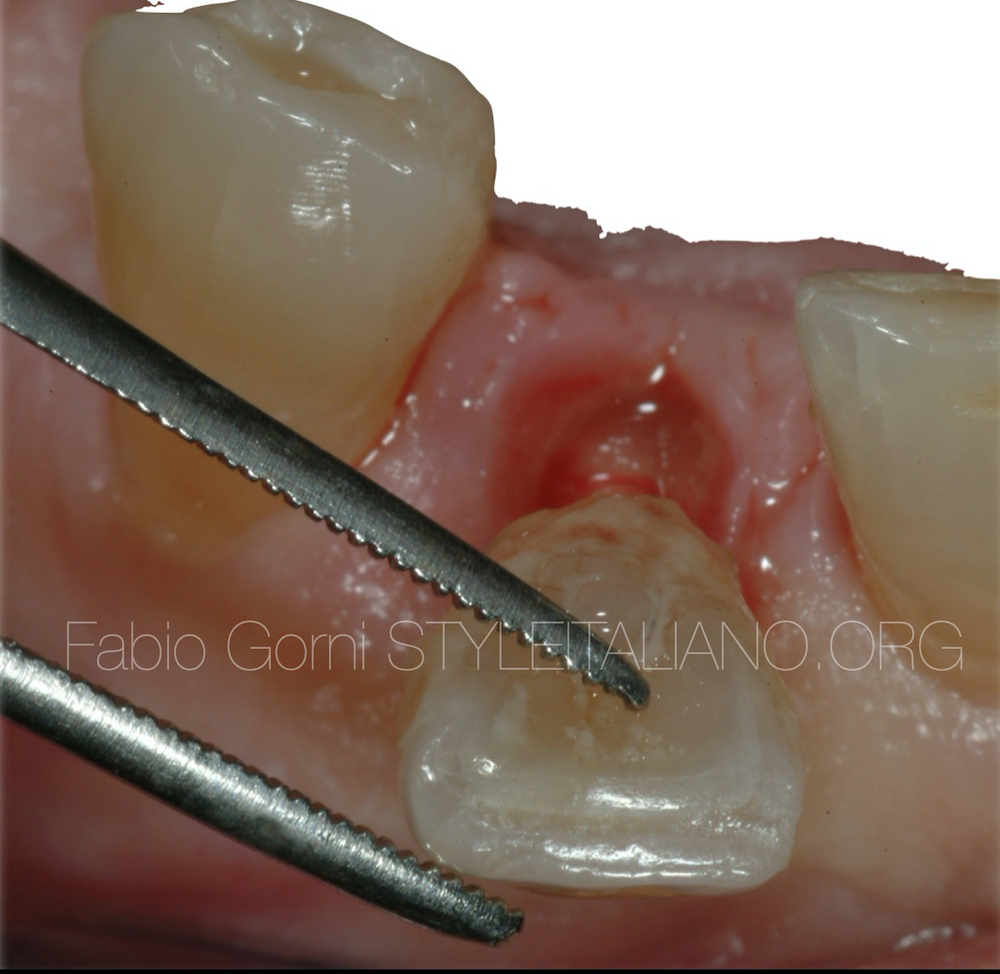
Fig. 3
Fragment removal
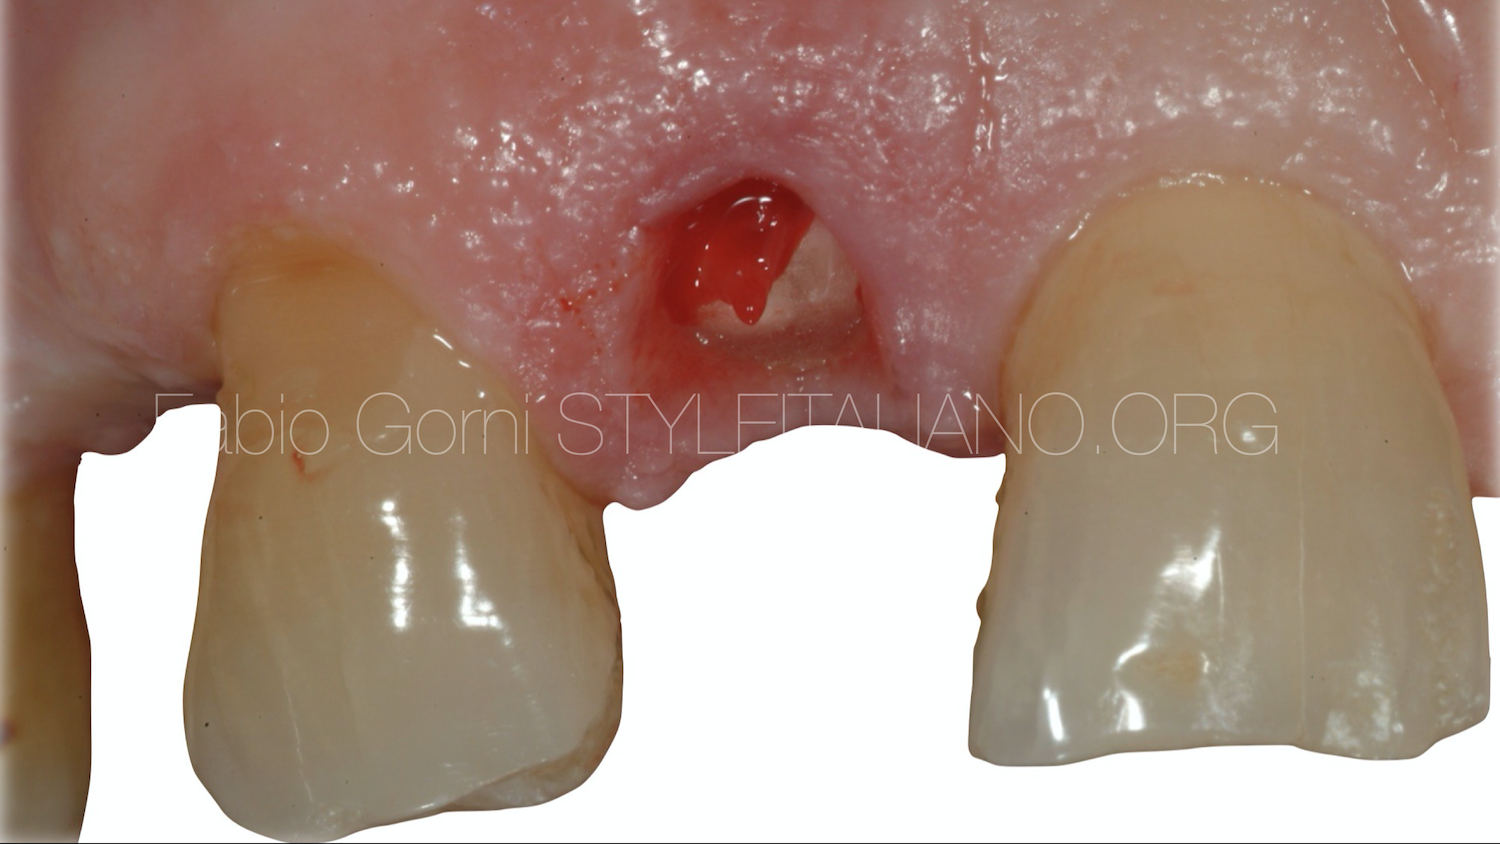
Fig. 4
Once the fracture line is exposed we can see that, according to the most recent classifications, we have a root fracture.
In the occlusal view of the root it is possible to notice a more significant bleeding on the buccal aspect. This is due to the bigger extension of the lesion from the apex to the crown.
The exposure of the pulp is also noticeable.

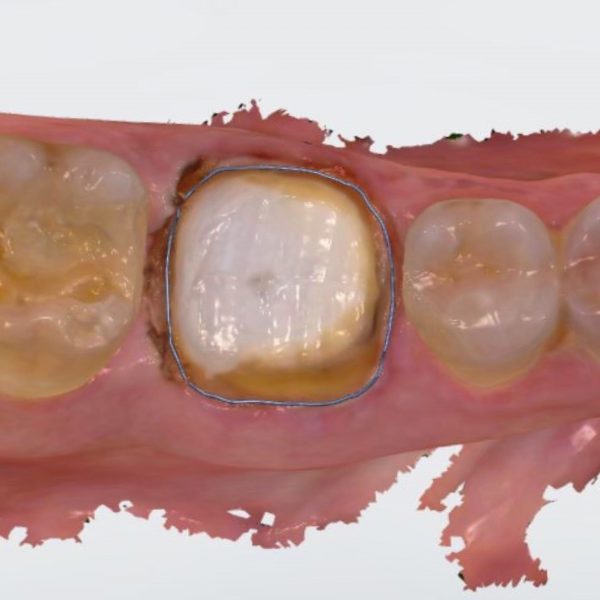
Fig. 5
The portion of fractured tooth was placed in purified water (0.9% NaCl). In order to achieve the best adaptation of the crown to the root, one must not touch the fracture lines.
In this detailed view, the shape of the fracture can be seen: on the buccal aspect the is a bevel which is at least 3mm more apical than the palatal aspect. This shape makes isolation of the operative field very complex for both the root canal therapy and the luting phase.
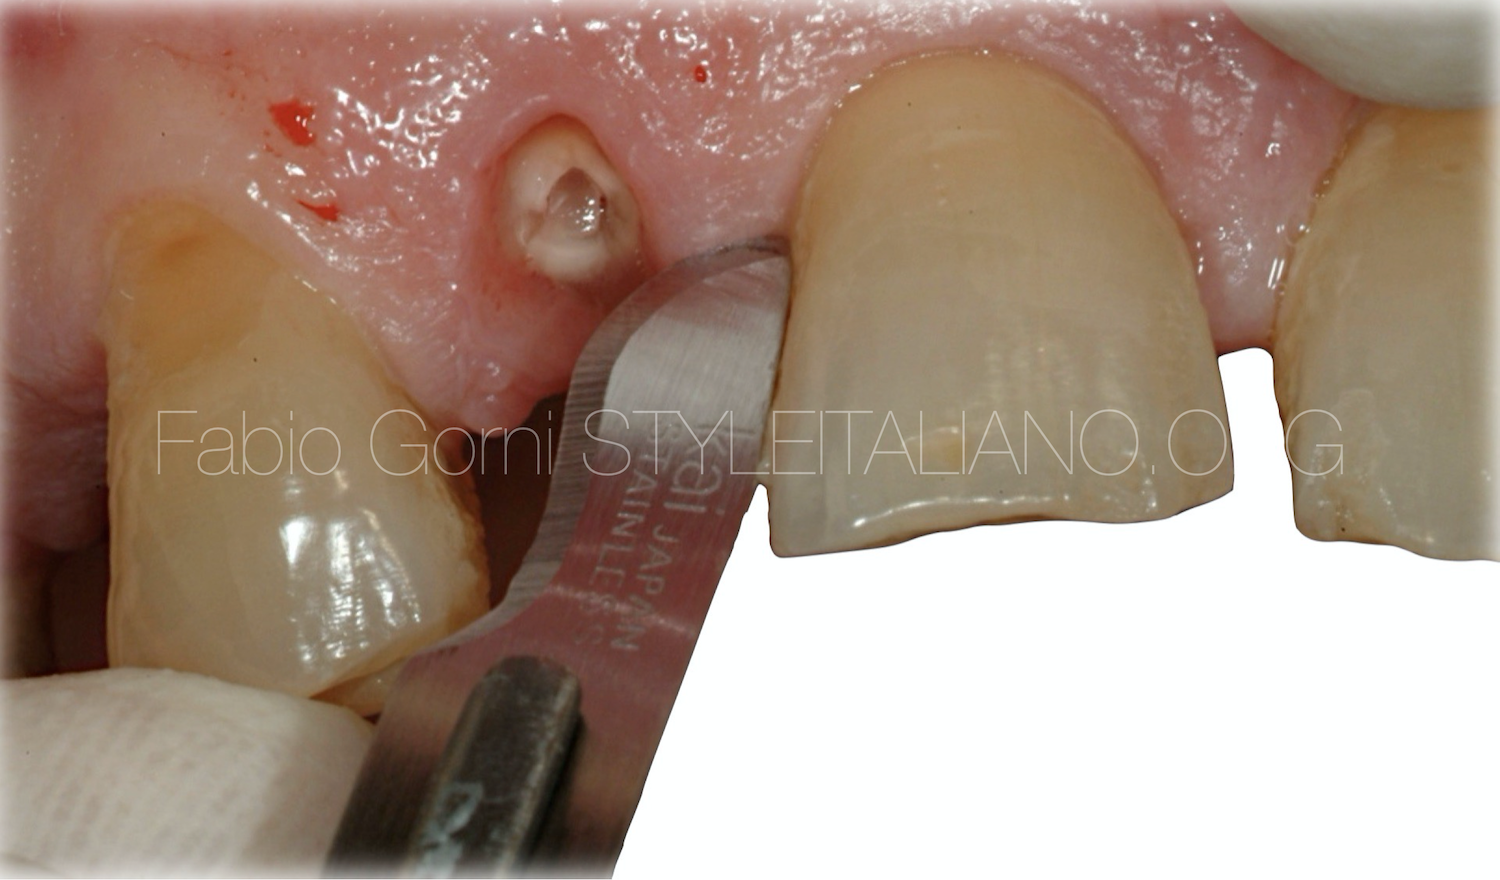
Fig. 6
For this reason an intra-sulcular incision using a 5c surgical blade (K- Medical Surgical blade) was designed.
The papillae were been apico-coronally in order to preserve the vascular plexus.
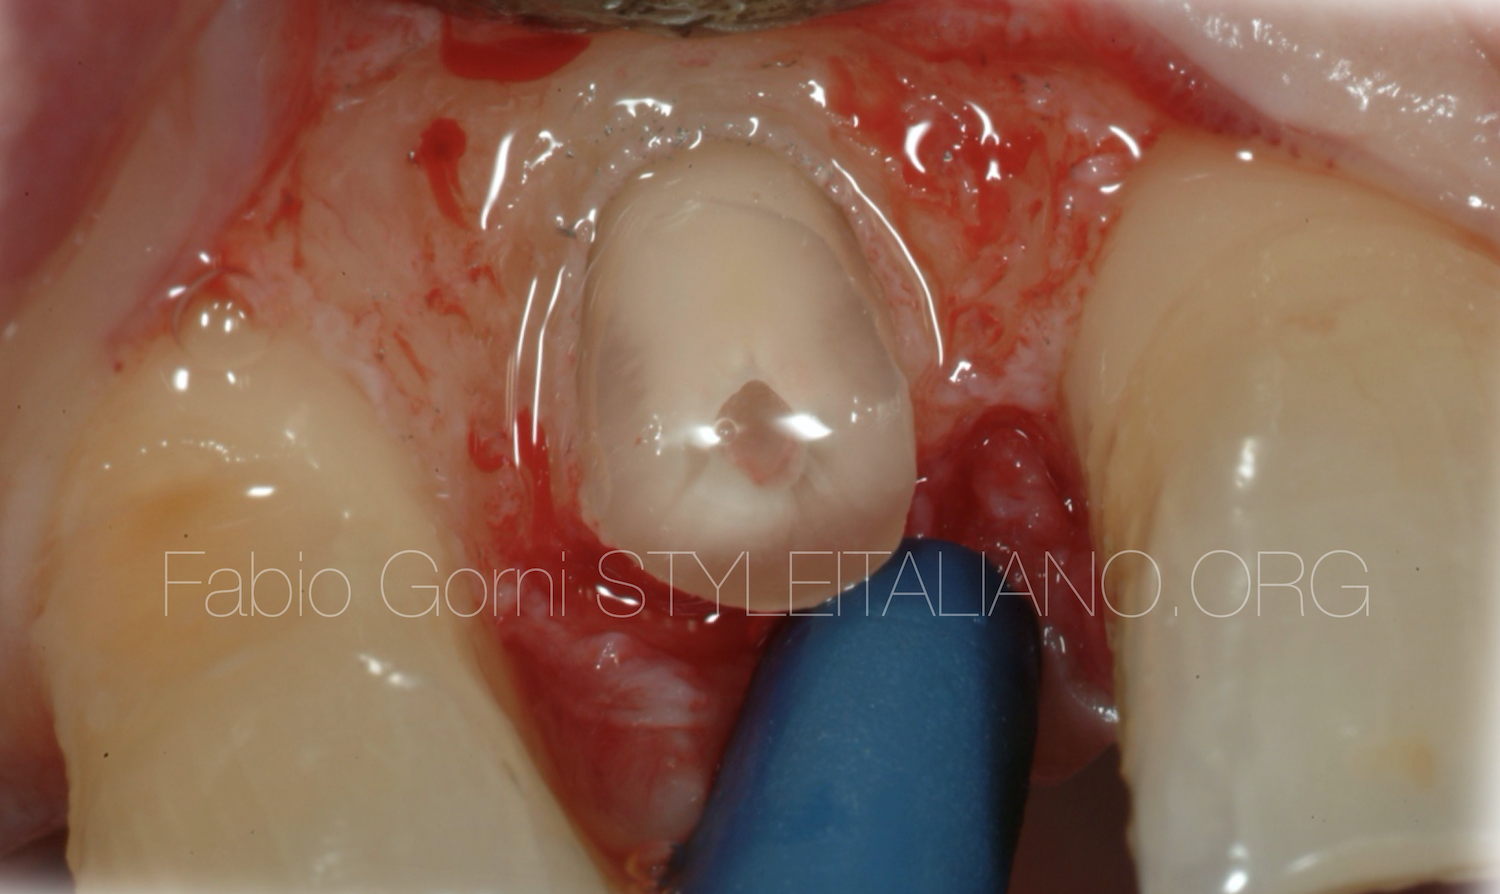
Fig. 7
Once the surgical flap was raised, a buccal osseus resective surgery (ORS) was performed, in order to have at least 2 mm circumferentially of exposed root coronally to the alveolar crest. These 2 mm will be very important for the correct formation of the biological width
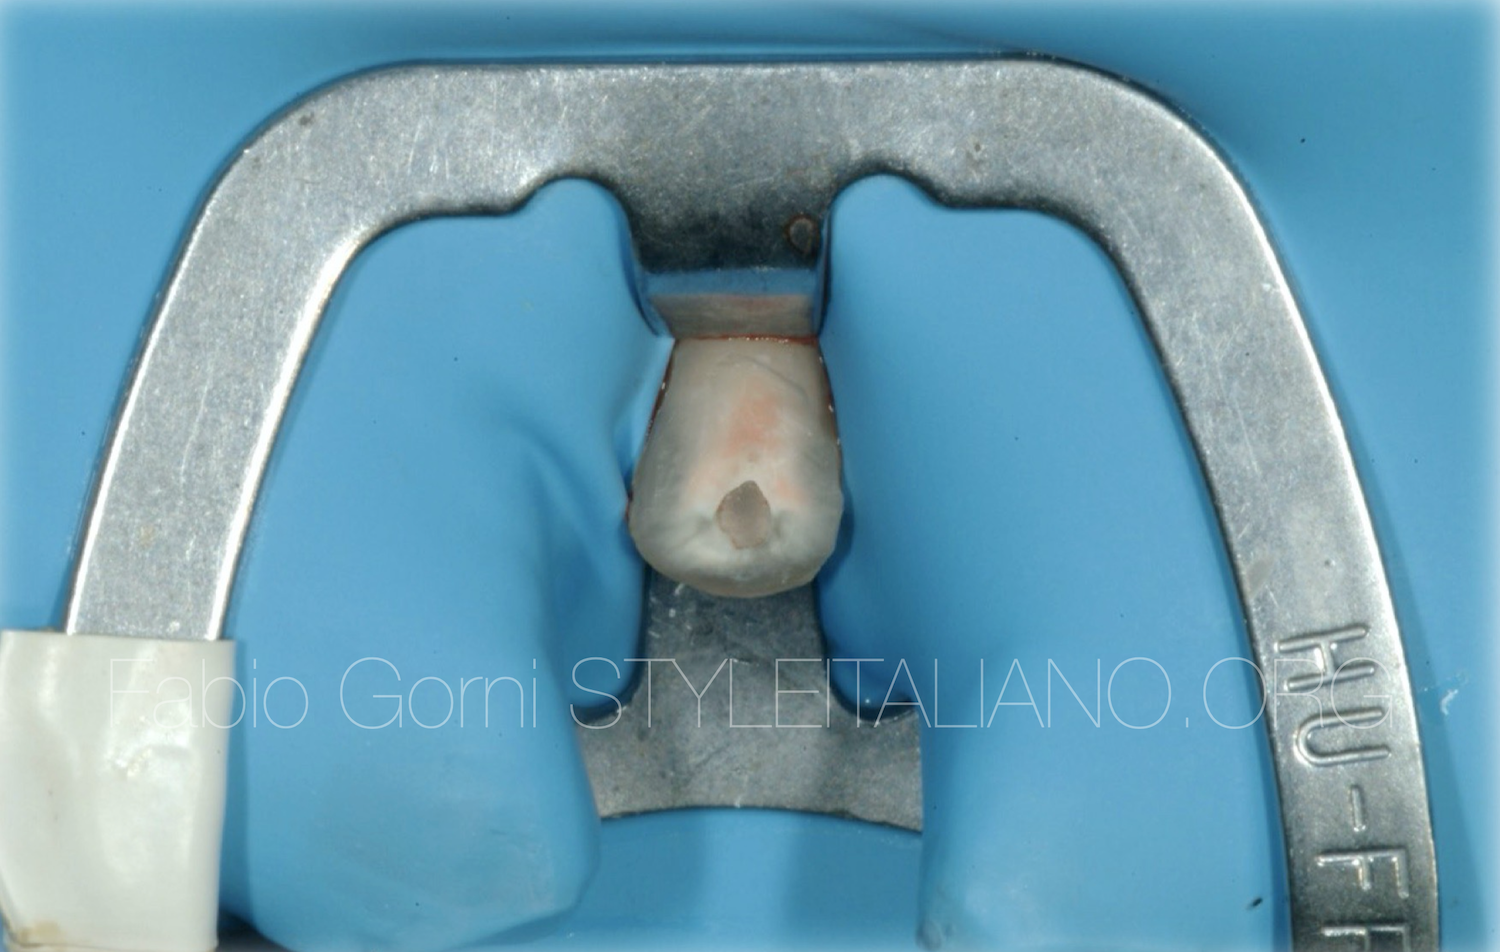
Fig. 8
At this point we were ready to position the rubber dam (MDC Dental-Nic Tone Medium). In order to reduce the bacterial count, especially considering the fact that we were working with a raised flap, the rubber dam sheet and the clamp were cleansed with a mouthwash containing 0,2% chlorexidine.
Then, rubber dam and the clamp were placed over the tooth, achieving a correct isolation.
The root canal treatment was performed using Ni-TI instruments following this sequence:
- Preflaring with 10.04 and 15.05 NiTi rotary instruments.
- WL check with a #10 K-file
- The complete sequence of the selected rotary file system was brought to the working length (10.04, 15.05, 20.06, 25.06.
- The finishing was done with a 25.08 and a 30.09 NiTi rotary instrument.
The tooth was irrigated with a 5% sodium hypochlorite solution and activated with Irri-safe US tips (Acteon-Satelec 20-25).
After the root canal treatment the post-space was prepared and cleaned with an ultrasonic tip and a specific brush.
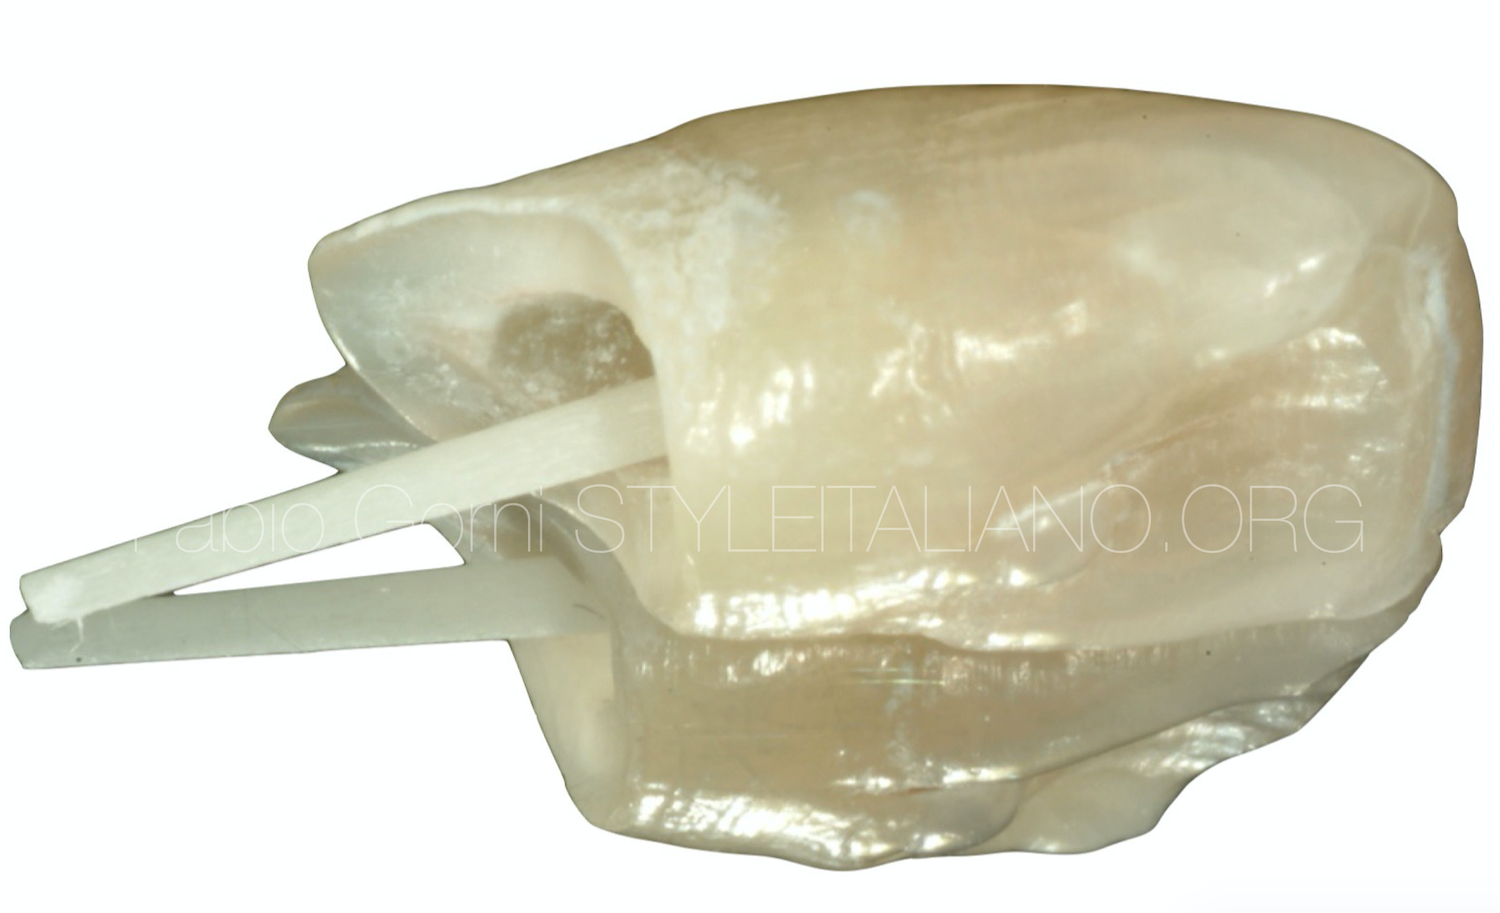
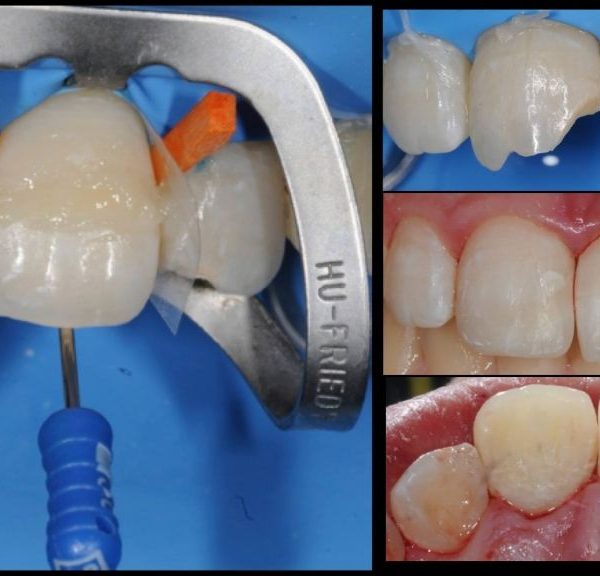
Fig. 9
It is extremely important to evaluate the size of the post by taking into account the depth of the empty canal and the intra-coronal space. In this case a 085.06 post (Sweden and Martina-Mtwo post) was selected and then reduced with a diamond disk outside the mouth.
Then, the crown of the tooth was cleaned both mechanically( Intensive - Bur FG D18 CB) and chemically (5% Sodium hypochlorite) in order to remove the remnants of pulp from the chamber. In this way, the coronal part of the post could fit into the crown and the risk of future discolorations was prevented.
When one wants to execute this procedure, it is necessary to check that the post fits perfectly into the crown before starting the luting sequence: the post does not have to create any sort of obstacle neither in height nor in width.
In this picture it is possible to see that the post fit perfectly the crown fragment in term of length and size
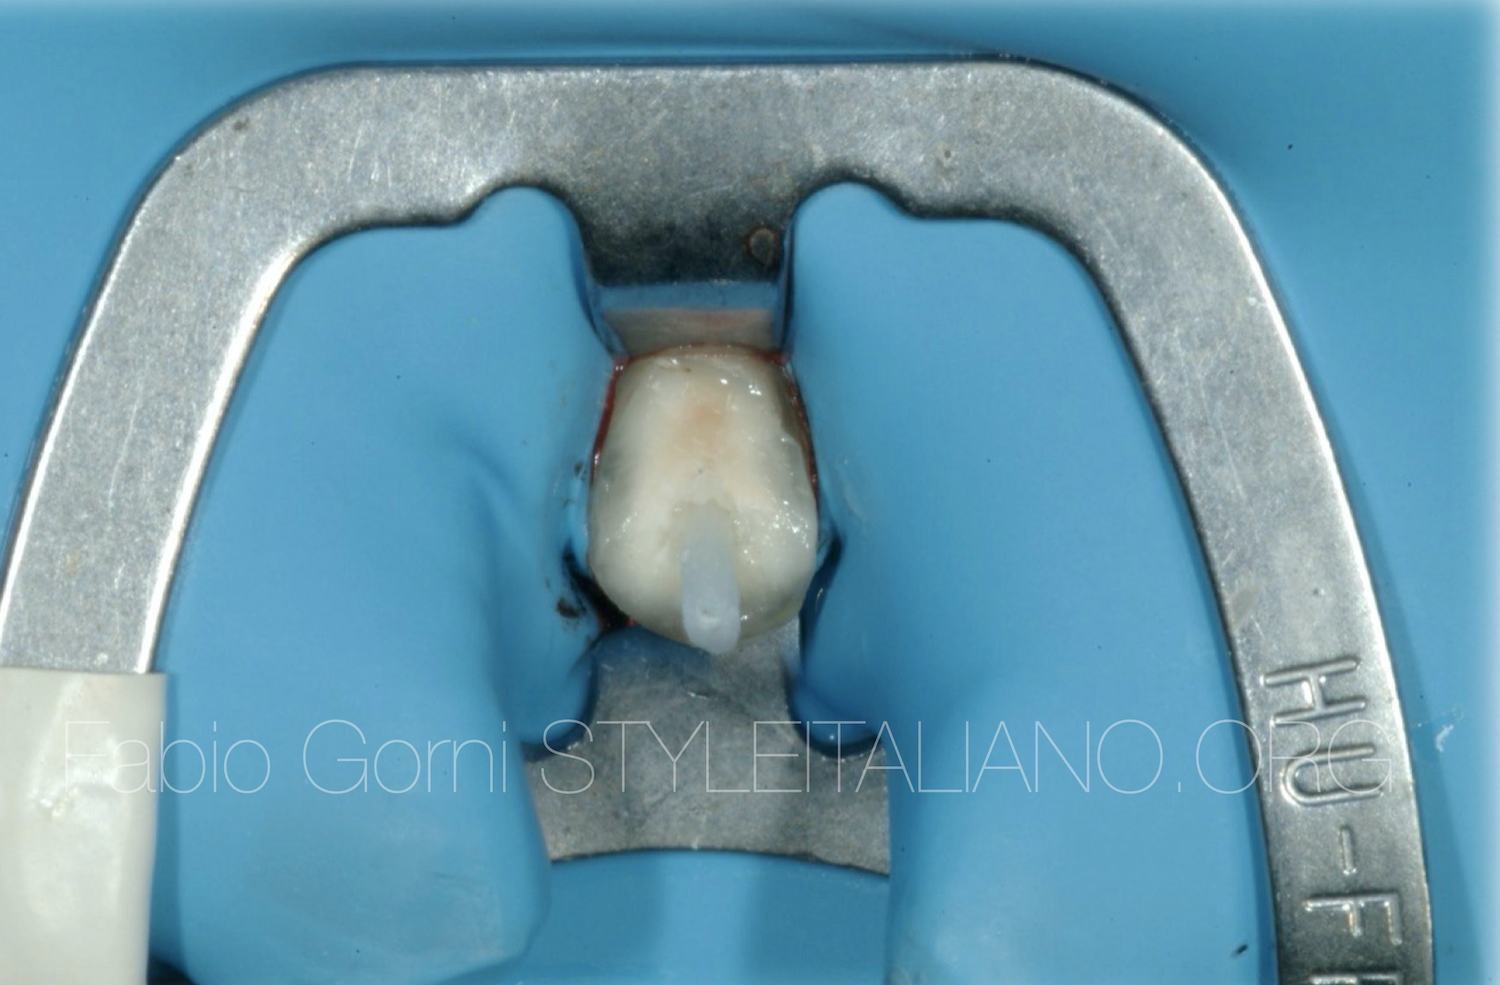
Fig. 10
The post was cleaned with alcohol, then the primer and bonding was applied on the entire post for 5 seconds. Then, the solvent was removed by blowing gently with air being careful to protect the post from light.
Both the root canal and the crown were been etched with 37% orthophosphoric acid for 15 seconds, rinsed and dried with air and paper point, being careful not to desiccate the dentine.
Primer and boding were then applied into the canal and inside the crown cavity and were let stay undisturbed for 20 seconds. The excesses were removed with a paper point and the solvent was evaporated by blowing gently with air.
At this point, Core-x flow (DentSply) was applied directly into the canal and then the post was placed into its final position and stabilized.
The post must was fully seated in maximum 40 seconds, then the core-x flow was positioned at once in the coronal cavity and the crown was placed in its natural position.
Once removed the material in excess, the sealer was light-cured.
Light curing was carried out for 20 seconds for each side of the crown.
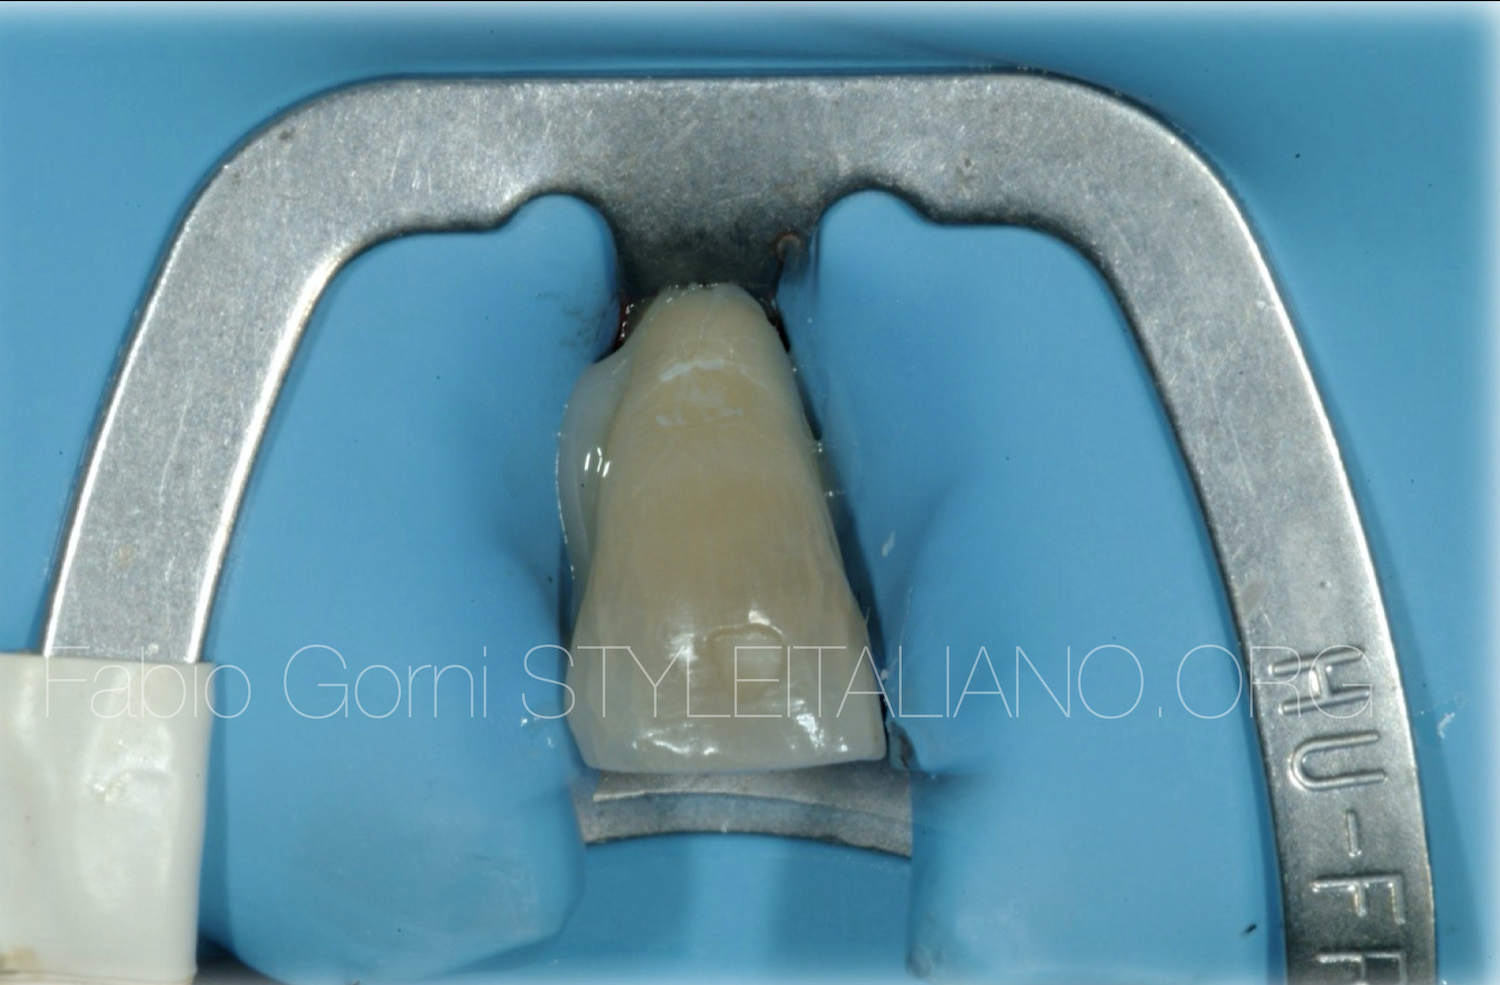
Fig. 11
The rubber dam was removed and the tooth was finished and polished
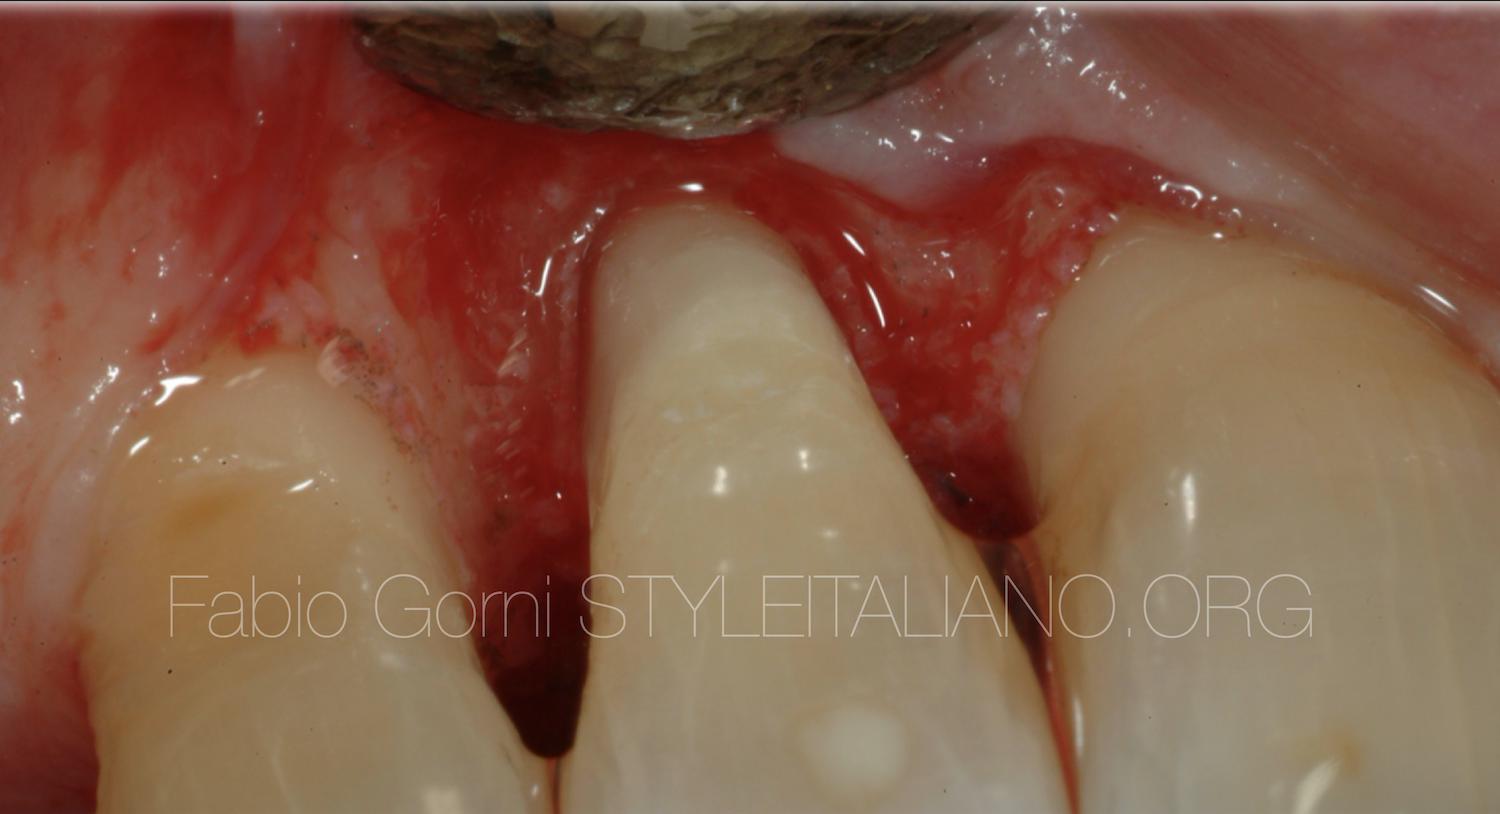
Fig. 12
It is important not to leave excesses of composite on the junction line of the fracture.
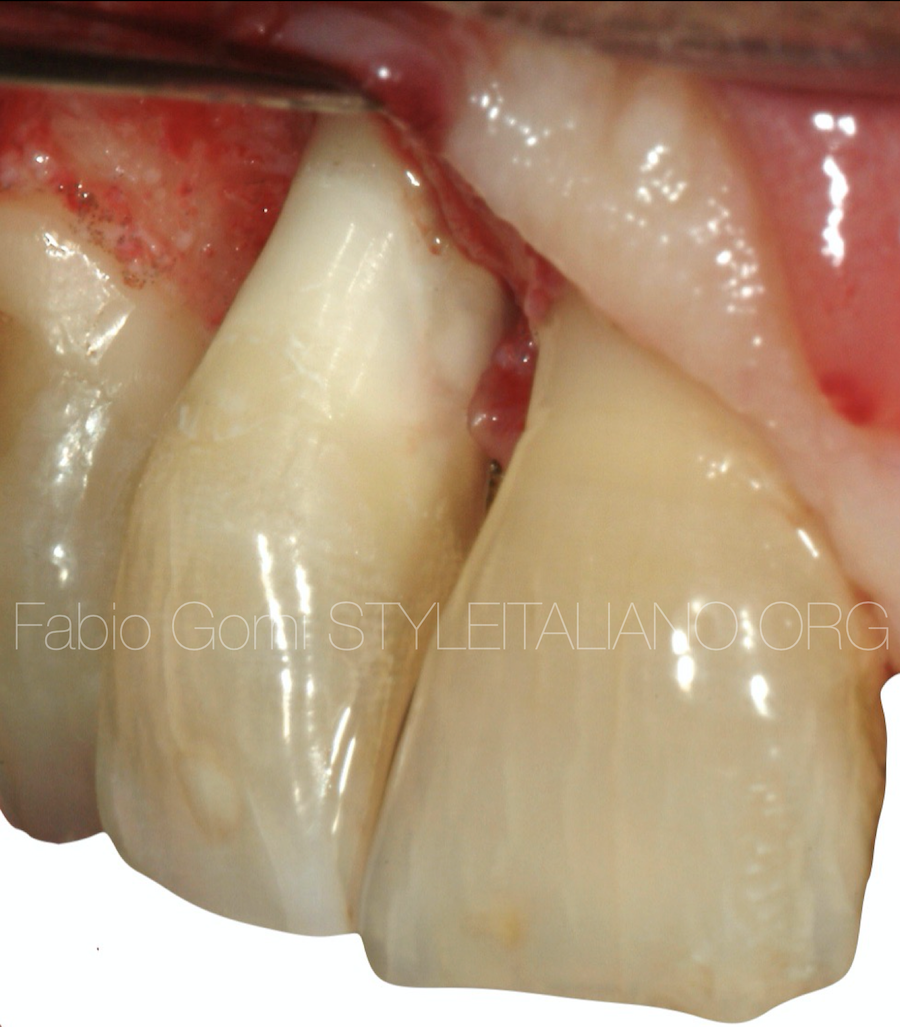
Fig. 13
With a lateral vision of the tooth it is possible to see the perfect juxtaposition of the fracture.
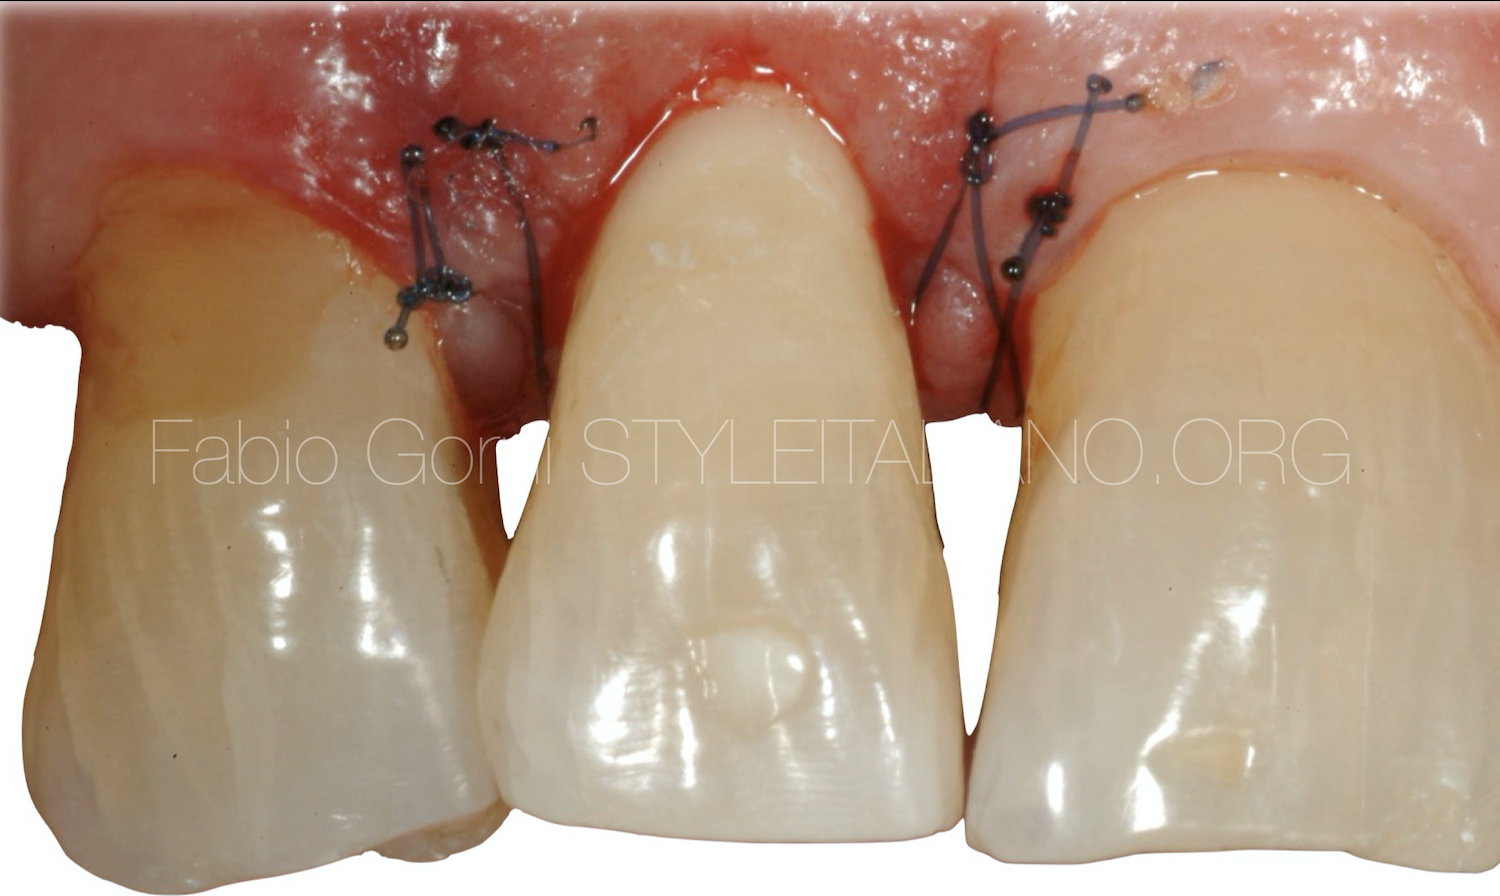
Fig. 14
A non absorbable surgical suture, 5/00 polyamide monofilament was been used in order to avoid plaque accumulation in the days following the procedure. Two single stitches were placed on the mesial papilla and two on the distal papilla.
The stitches were removed two weeks later.
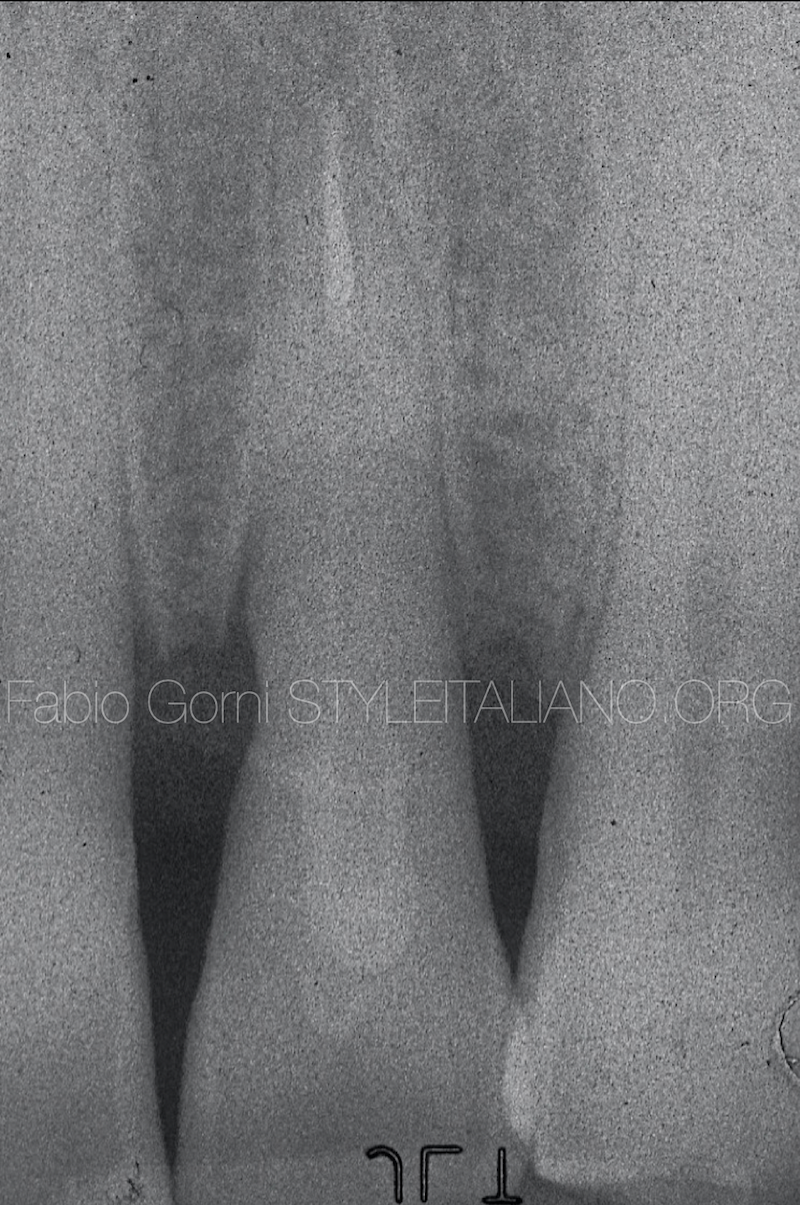
Fig. 15
In the post-operative radiograph we can appreciate the gutta percha filling of the canal, the fiber post and the perfect juxtaposition of the fracture lines.
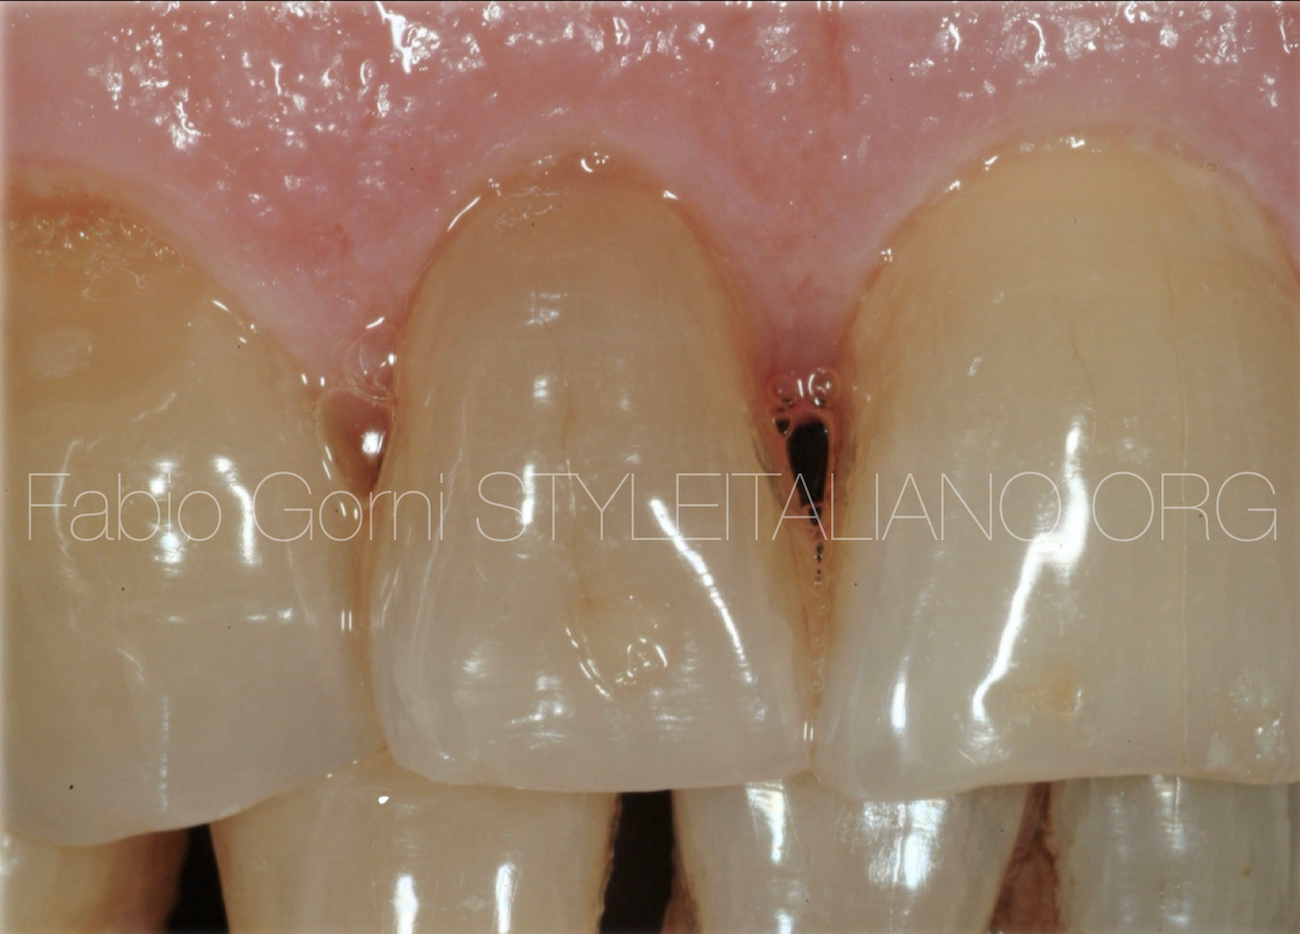
Fig. 16
Clinical follow-up Esthetically the tooth seems perfectly integrated in the dental arch.
Conclusions
This procedure helped the patient keeping his tooth in a single visit and with a low cost.
Bibliography
- Andreasen JO, Andreasen FM, Andersson L. Textbook and color atlas of traumatic injuries to the teeth, 4th edn. Oxford, UK: Wiley-Blackwell; 2007.
- Glendor U. Epidemiology of traumatic dental injuries: a 12 year review of the literature. Dent Traumatol 2008; 24: 603–11.
- Anthony J. DiAngelis & Coll. International Association of Dental Traumatology guidelines for the management of traumatic dental injuries: 1. Fractures and luxations of permanent teeth. Dental Traumatology 2012; 28: 2–12.
- Anna Salat - http://www.styleitaliano.org/articles/partial-reattachment.
- De Sanctis, M., & Clementini, M. (2014). Flap approaches in plastic periodontal and implant surgery: critical elements in design and execution. Journal of Clinical Periodontology, 41(s15), S108–S122.
- Schmidt JC, Sahrmann P, Weiger R, Schmidlin PR, Walter C. Biologic width dimensions--a systematic review. J Clin Periodontol. 2013 May; 40 (5):493-504.)
- Mangani F., Putignano A., Cerutti R. Guidelines for Adhesive Dentistry: The key to success. Quintessence Pub. 2009).
- Burkhardt, R., Preiss, A., Joss, A. & Lang, N. P. (2008) Influence of suture tension to the tearing characteristics of the soft tissues: an in vitro experiment. Clinical Oral Implants Research 19, 314–319.
- Flores MT., Andreasen JO & Coll. Guidelines for the evaluation and managment of traumatic dental injuries. Sent Traumat 2001; 17:193-196.