A Screw Post & Widened Apex Story
27/02/2025
Garima Poddar
Warning: Undefined variable $post in /home/styleendo/htdocs/styleitaliano-endodontics.org/wp-content/plugins/oxygen/component-framework/components/classes/code-block.class.php(133) : eval()'d code on line 2
Warning: Attempt to read property "ID" on null in /home/styleendo/htdocs/styleitaliano-endodontics.org/wp-content/plugins/oxygen/component-framework/components/classes/code-block.class.php(133) : eval()'d code on line 2
This is the story of retreatment and management of tooth number 21 where a screw post was placed in the canal without performing root canal treatment. Over a decade, the tooth also developed wide apex and periapical pathology and turned symptomatic.Post removal-
During the management of this case, removal of screw post in the most conservative manner was our prime concern. The post appeared to be tightly screwed inside the canal. Hence, ultrasonics was the tool of choice for nonaggressive approach for post removal without sacrificing a lot of dentin.
At medium to low vibrations, the US tips were used around the post to loosen the post and unscrew it. The process took some time, but it could be visualized under magnification that the dentin loss was minimal with ultrasonics.Shaping protocol followed –
The canal was shaped conservatively, using a combination of K files and rotary files.
It was observed that from the beginning itself the apex was wide with 55 number K file passing beyond the apex without any resistance.
Shaping of all the canals was done with hero gold files and then with K files also (Micro-mega).
Irrigation protocol-
While performing irrigation, care was taken, not to extrude the solution beyond apex. Side vented; 30-gauge needles was used which were kept 2mm short of the working length.
Throughout shaping, 5.25% sodium hypochlorite was used after each file.
After shaping, the following protocol in each canal, was used for irrigation and activation of irrigants-
1). 17% EDTA – 1ml per canal – ultrasonic activation using D600 and activating tip from (Woodpecker, China).
2). Distilled water used to flush the canals.
3). 5.25 % sodium hypochlorite – ultrasonic activation. (4 such cycles repeated per canal)
4). Distilled water.
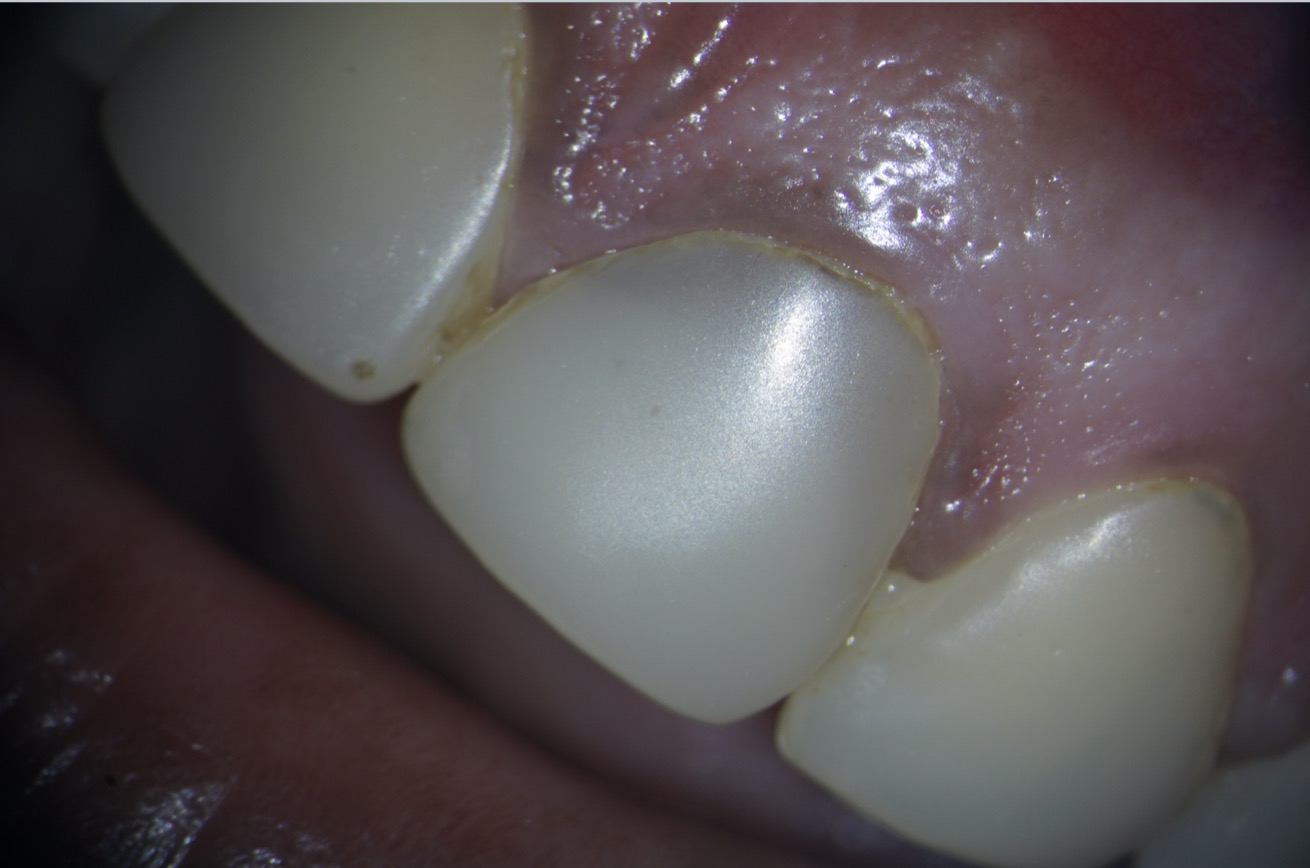
Fig. 1
A 35-year-old female patient was referred to our hospital with dull, aching pain in tooth number 21 with a history of some treatment in the maxillary anterior teeth 10 years back.
The tooth showed slight tenderness on percussion and had composite restoration on the buccal as well as palatal surface of tooth number 21. Composite restorations were seen on teeth number 12, 11,21 and 22.
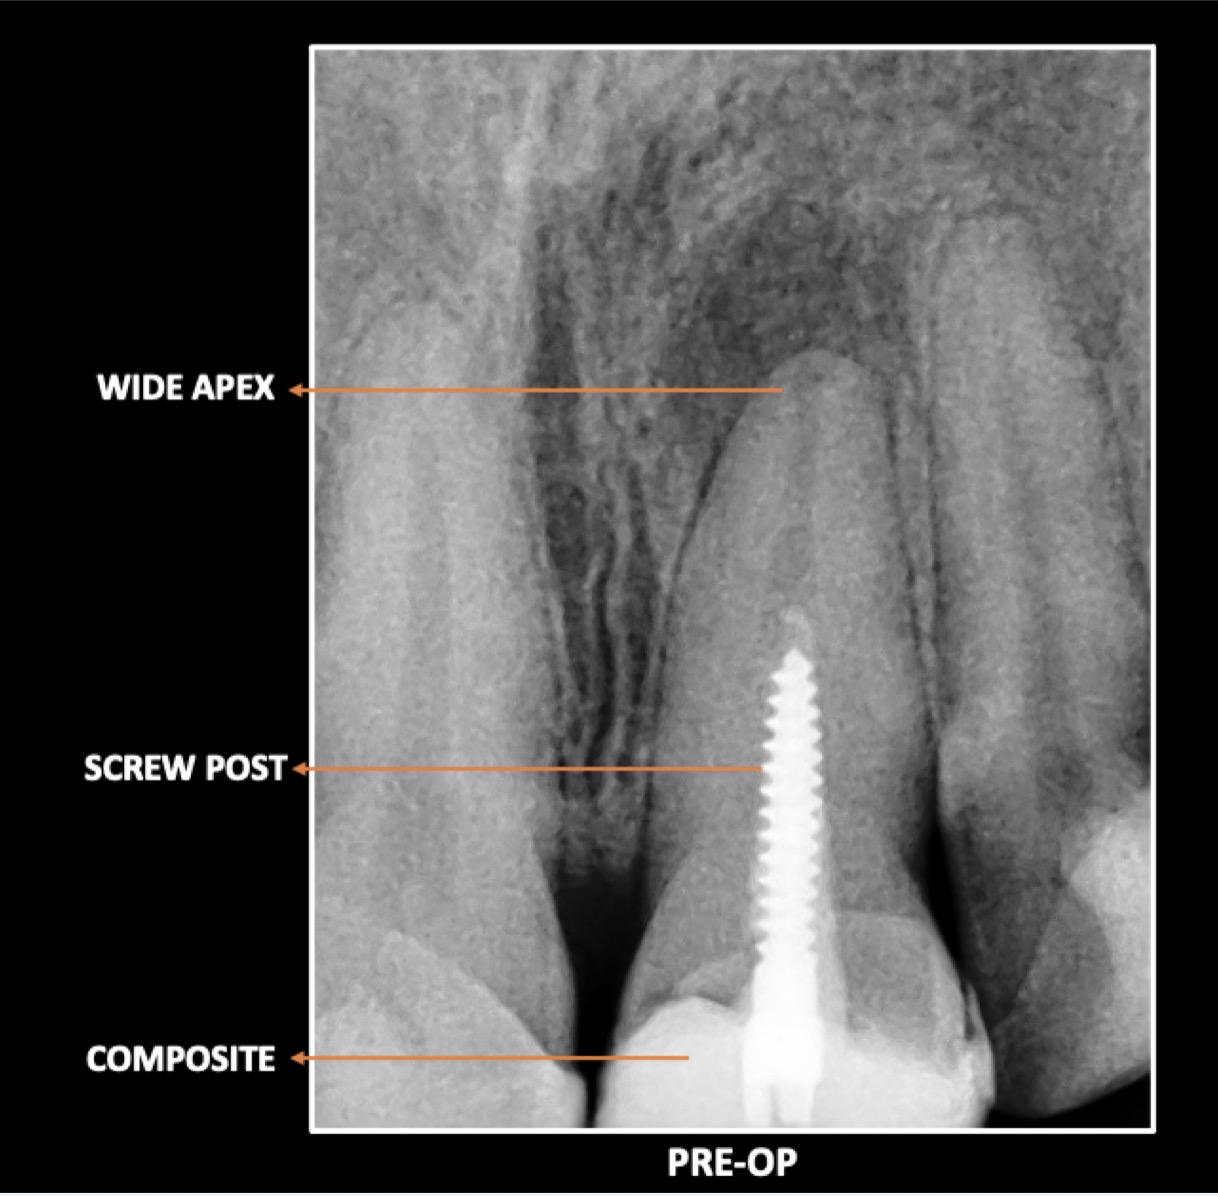
Fig. 2
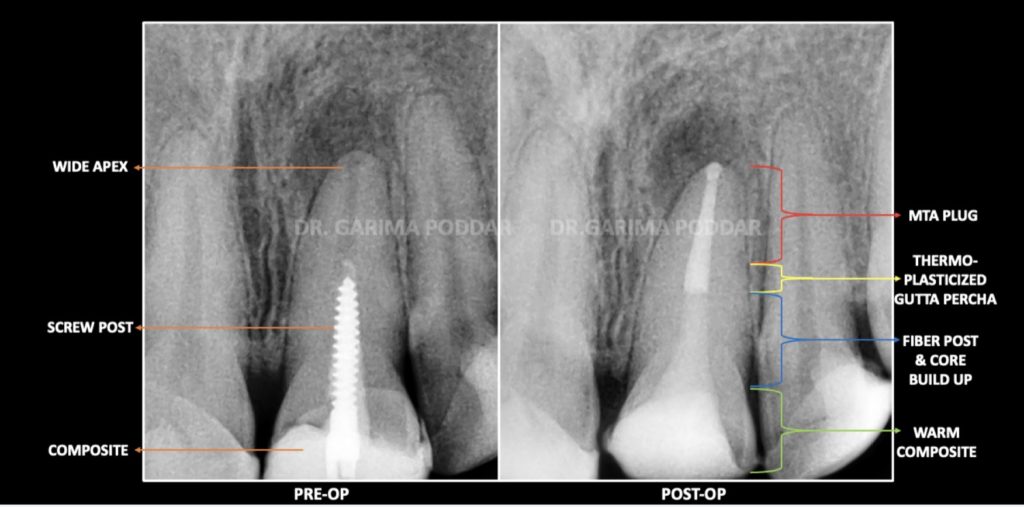
Radiographic evaluation revealed the following about tooth number 21-
- No obturating material could be observed in the canal of tooth number 21.
- A screw post was screwed into the canal till the middle third of the canal length.
- The apex appeared considerably widened on the radiograph.
- A peri-apical radiolucency was associated with the tooth.
- A radio-opaque restorative material was observed in the coronal part of the tooth.

Fig. 3
There was no mobility seen for the tooth, and after discussing with the patient, a conservative treatment plan was decided.
Since, it was a maxillary anterior tooth, so the old composites on the buccal surface were not removed for the time being for esthetic purpose.
Local anesthesia was administered as patient had pain and rubber dam isolation was done.
Old restorative material was removed carefully from palatal aspect, taking care not to cut the head of the metallic screw post during this process. The procedure was performed under magnification, using a dental operating microscope.
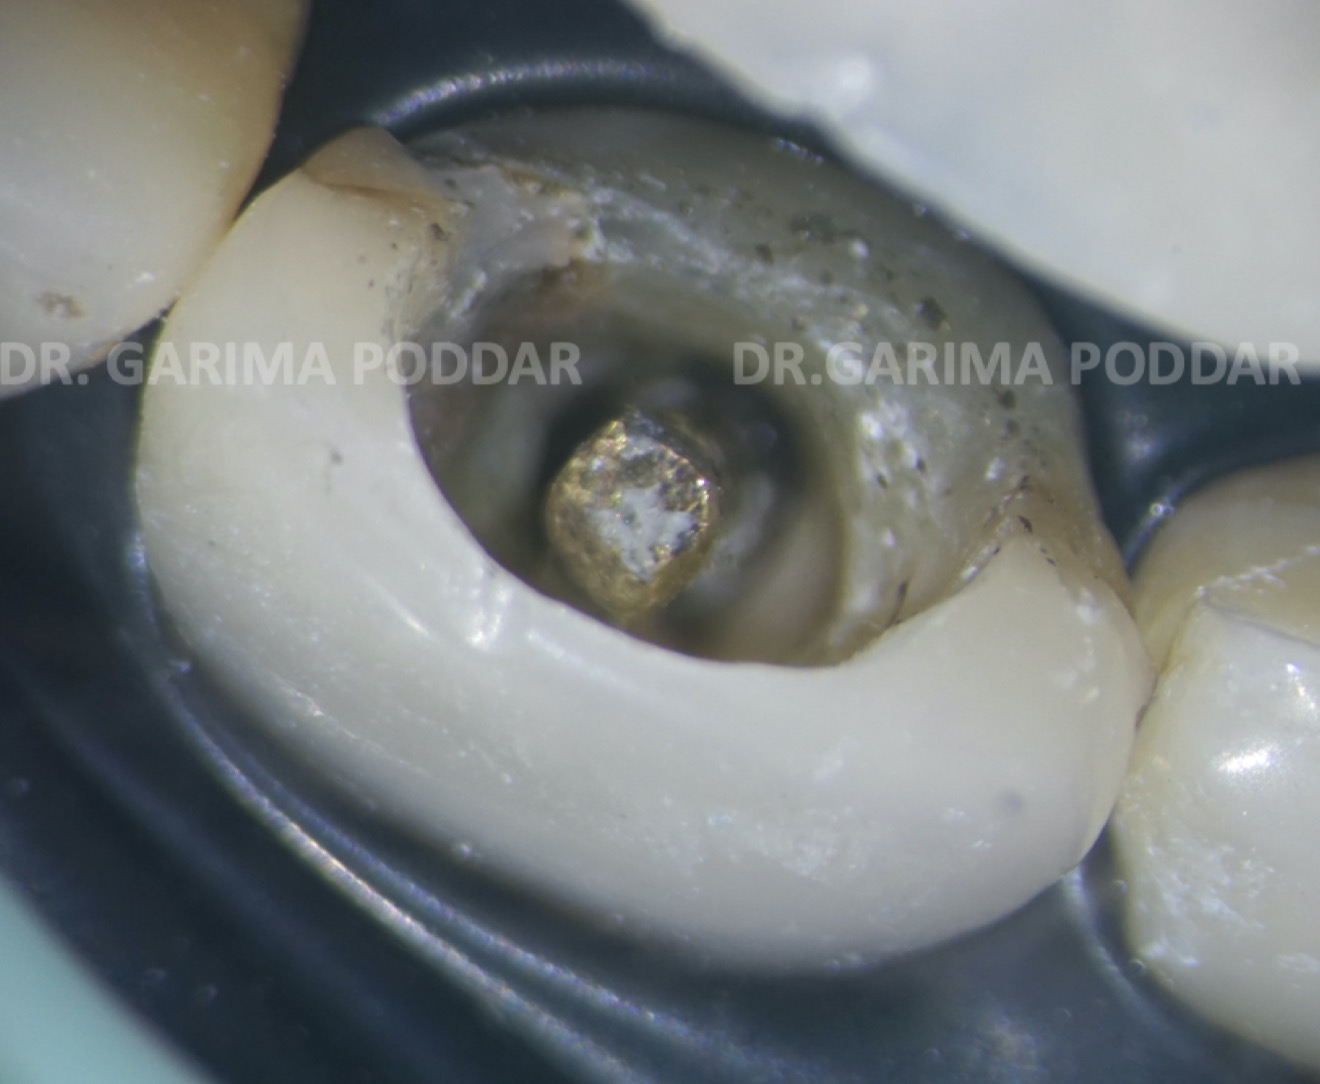
Fig. 4
Post removal-
During the management of this case, removal of screw post in the most conservative manner was our prime concern. The post appeared to be tightly screwed inside the canal. Hence, ultrasonics was the tool of choice for nonaggressive approach for post removal without sacrificing a lot of dentin.
At medium to low vibrations, the US tips were used around the post to loosen the post and unscrew it. The process took some time, but it could be visualized under magnification that the dentin loss was minimal with ultrasonics.
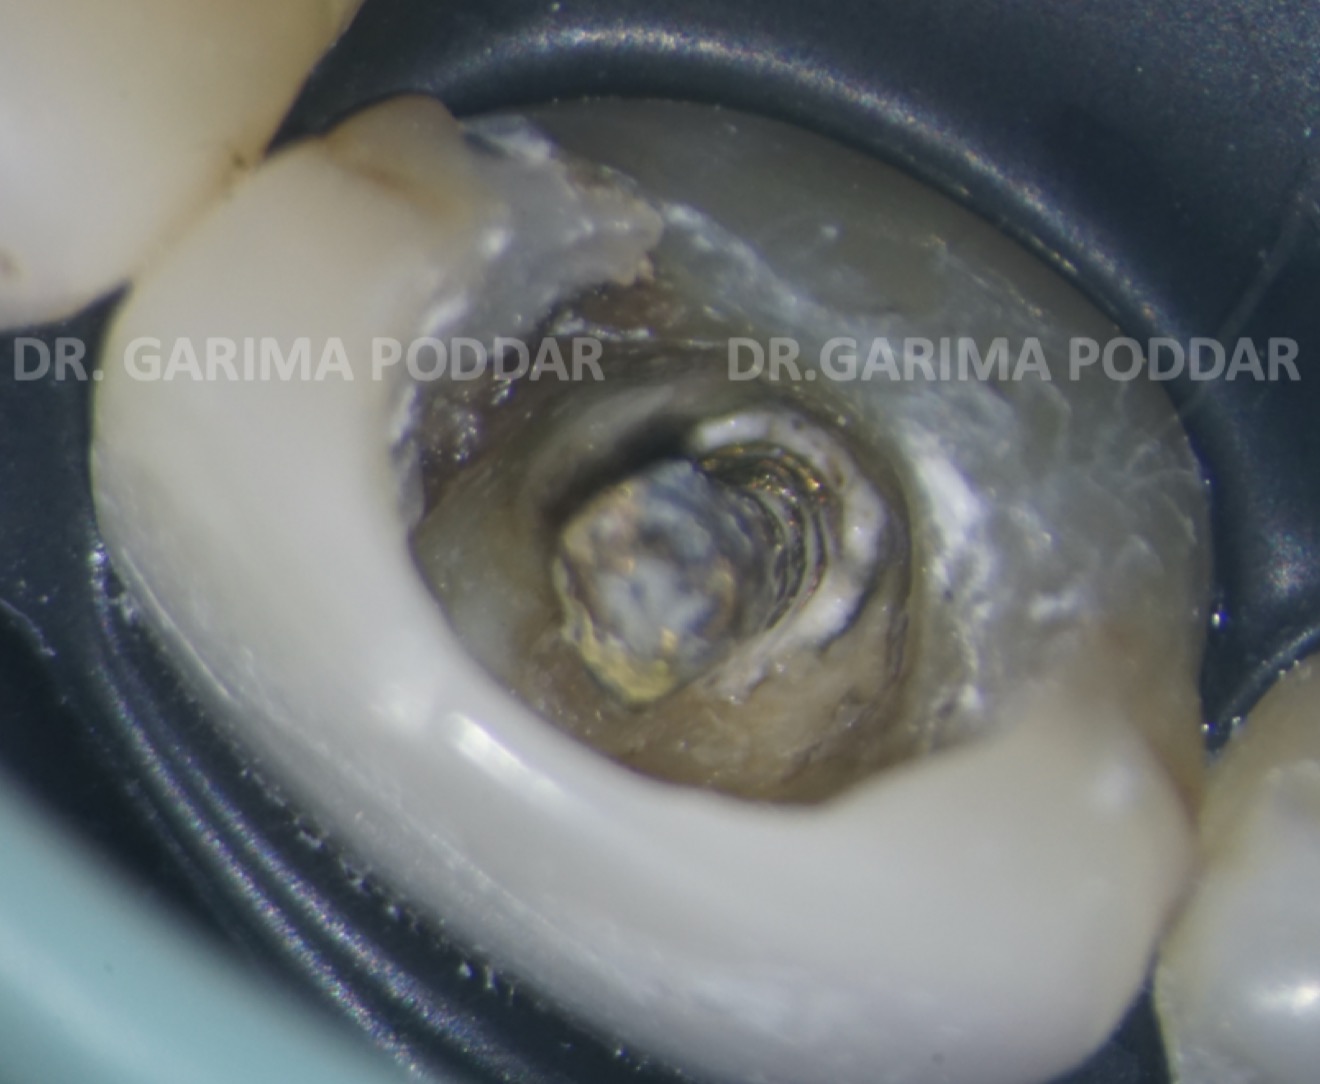
Fig. 5
The procedure was performed under a dental operating microscope. Ultrasonic tips were used around the metal post, and slowly but steadily the post removal was carried out.
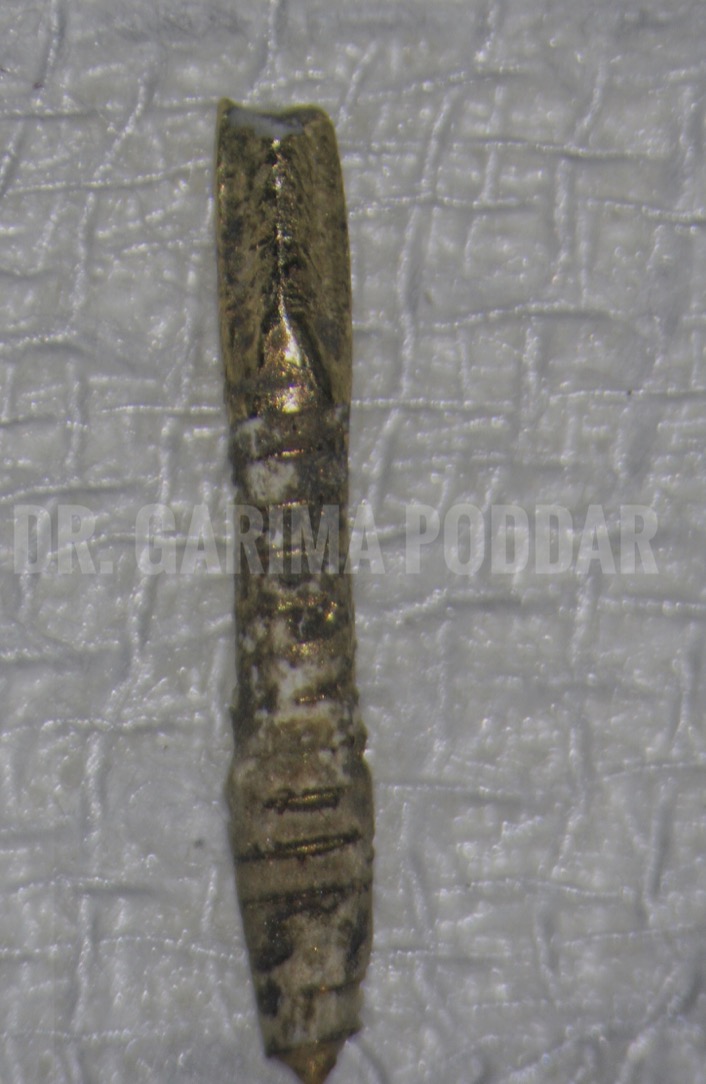
Fig. 6
The screw post was retrieved from the canal and care was taken throughout this process, to be as conservative as possible.
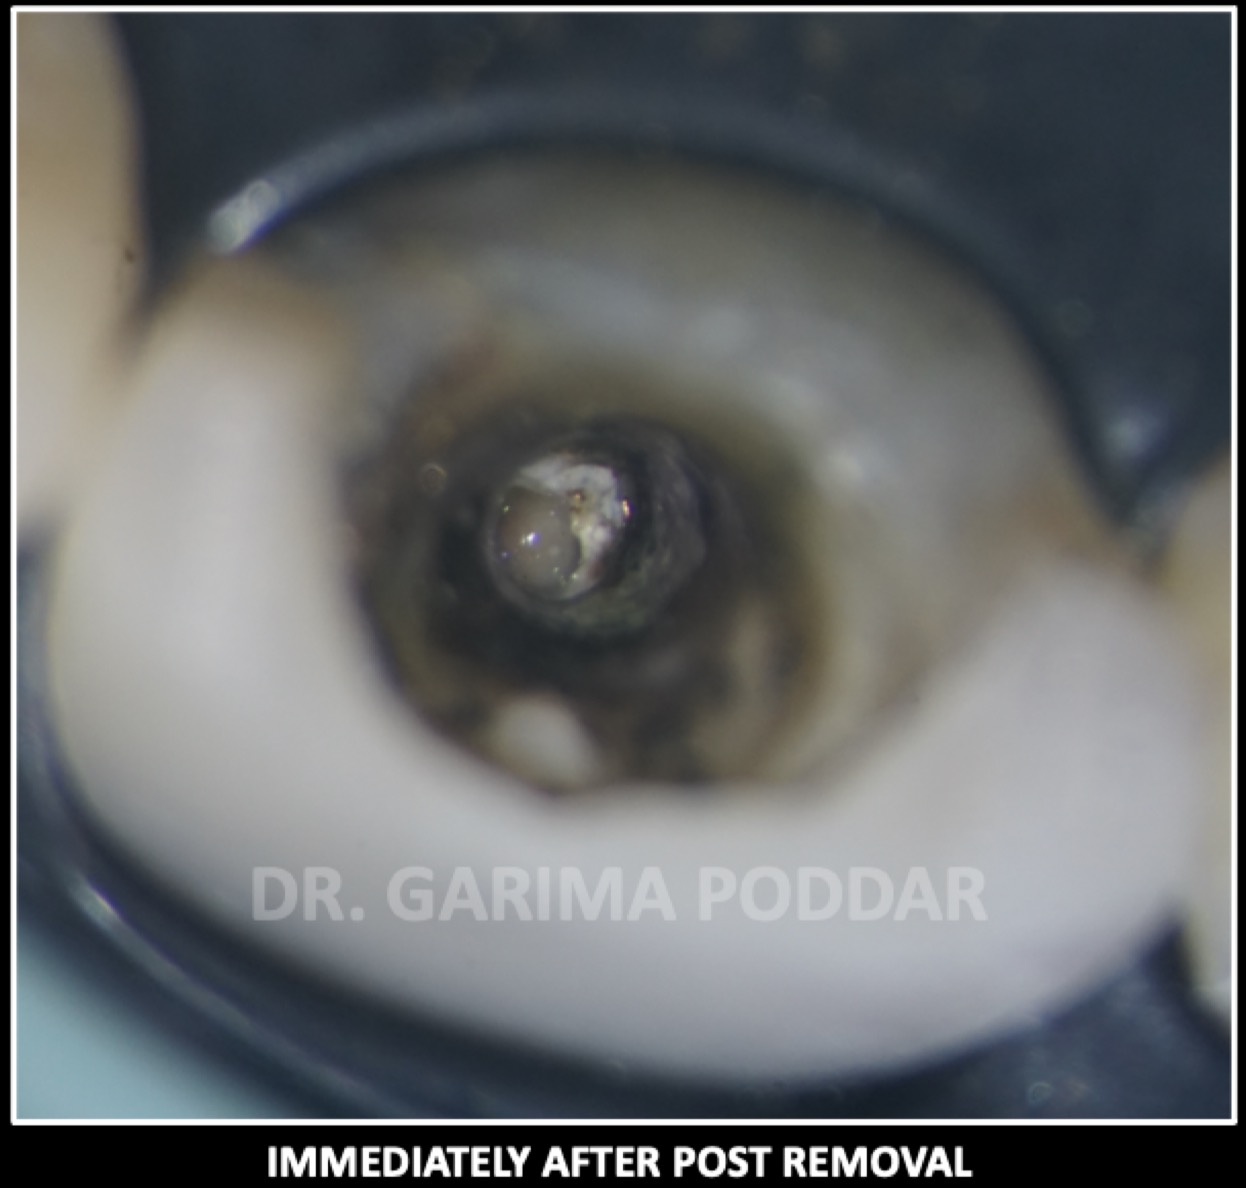
Fig. 7
Once the post was retrieved safely from the canal, the remaining cement and debris were flushed out of the canal using sodium hypochlorite and distilled water.
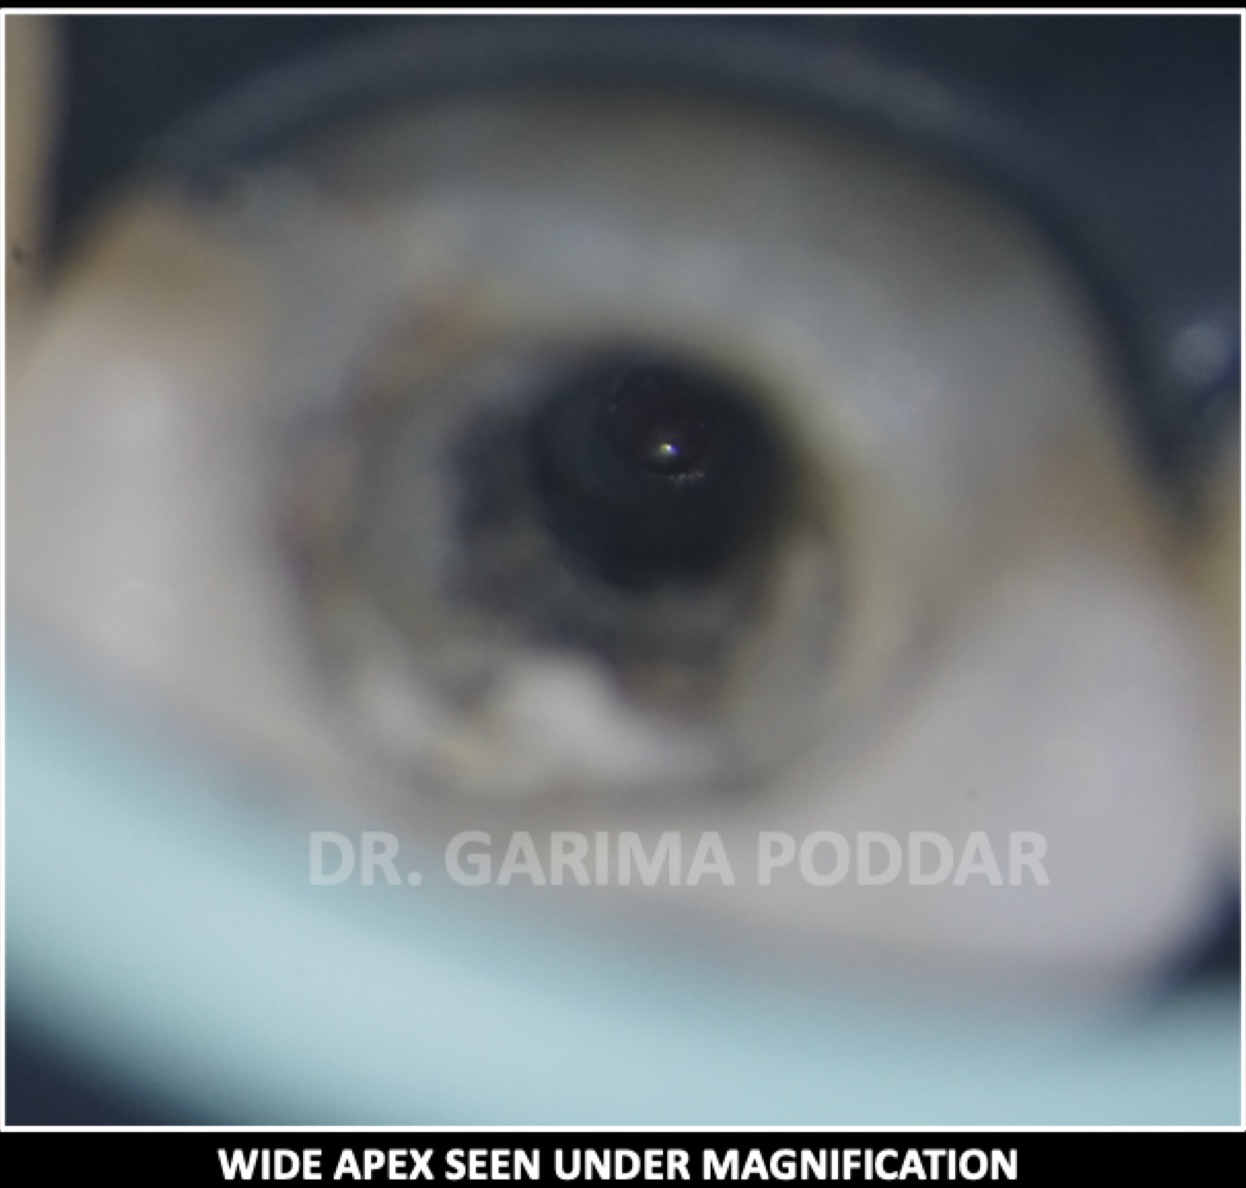
Fig. 8
The wide apex of the root canal could be appreciated under magnification.
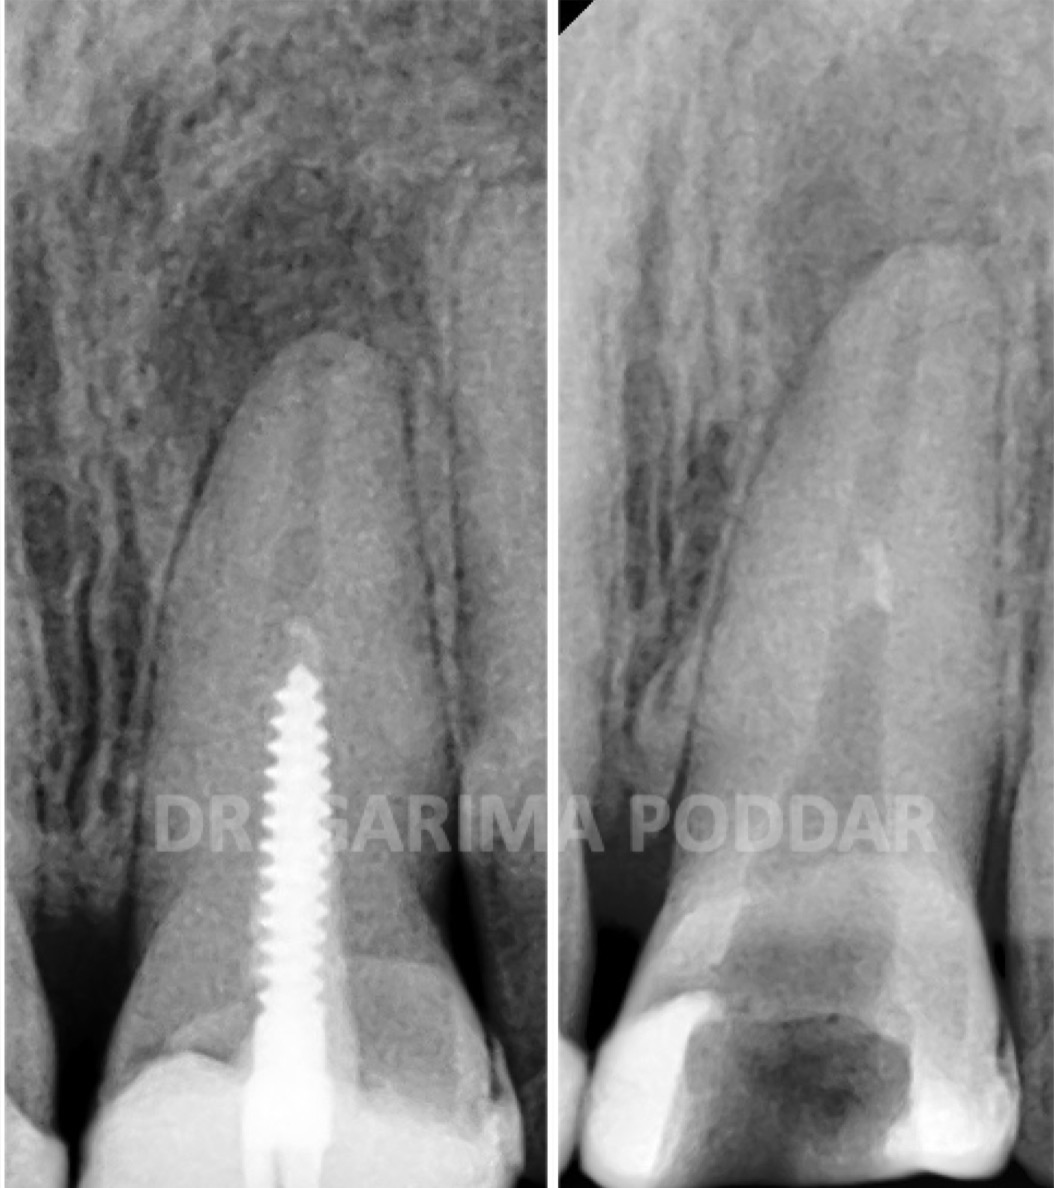
Fig. 9
Shaping protocol followed –
The canal was shaped conservatively, using a combination of K files and rotary files.
It was observed that from the beginning itself the apex was wide with 55 number K file passing beyond the apex without any resistance.
Shaping of all the canals was done with hero gold files and then with K files also (Micro-mega).
Irrigation protocol-
While performing irrigation, care was taken, not to extrude the solution beyond apex. Side vented; 30-gauge needles was used which were kept 2mm short of the working length.
Throughout shaping, 5.25% sodium hypochlorite was used after each file.
After shaping, the following protocol in each canal, was used for irrigation and activation of irrigants-
1). 17% EDTA – 1ml per canal – ultrasonic activation using D600 and activating tip from (Woodpecker, China).
2). Distilled water used to flush the canals.
3). 5.25 % sodium hypochlorite – ultrasonic activation. (4 such cycles repeated per canal)
4). Distilled water.
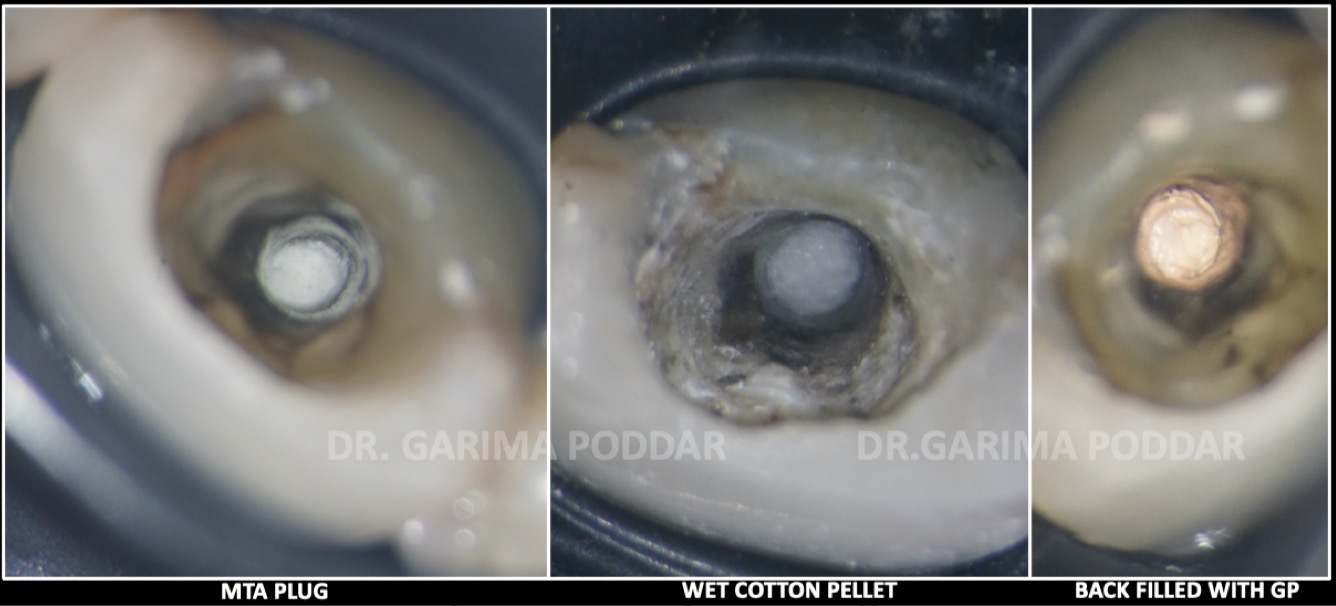
Fig. 10
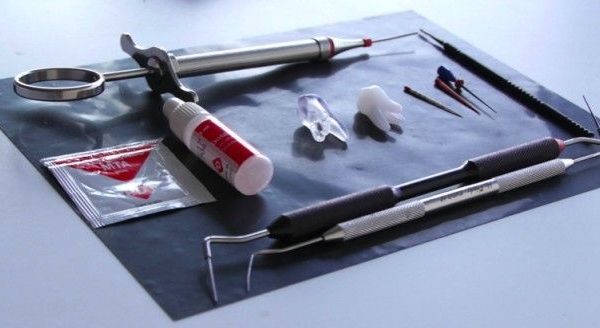
Obturation protocol-
Canals were dried with paper points. Armamentarium for MTA plug placement was arranged in order, which included an MTA delivery system – Map One (Produits Dentaires), Hand pluggers and a micro applicator tip for removing excess mta from the walls later on. MTA was mixed to a wet sand consistency and apical plug was created in increments in the canal. An apical plug of about 5 mm was placed which filled the apical third of the root canal. A moist cotton was placed over it and temporary dressing was given in order to achieve a proper setting of MTA. The patient was recalled after 72 hours for further procedure.
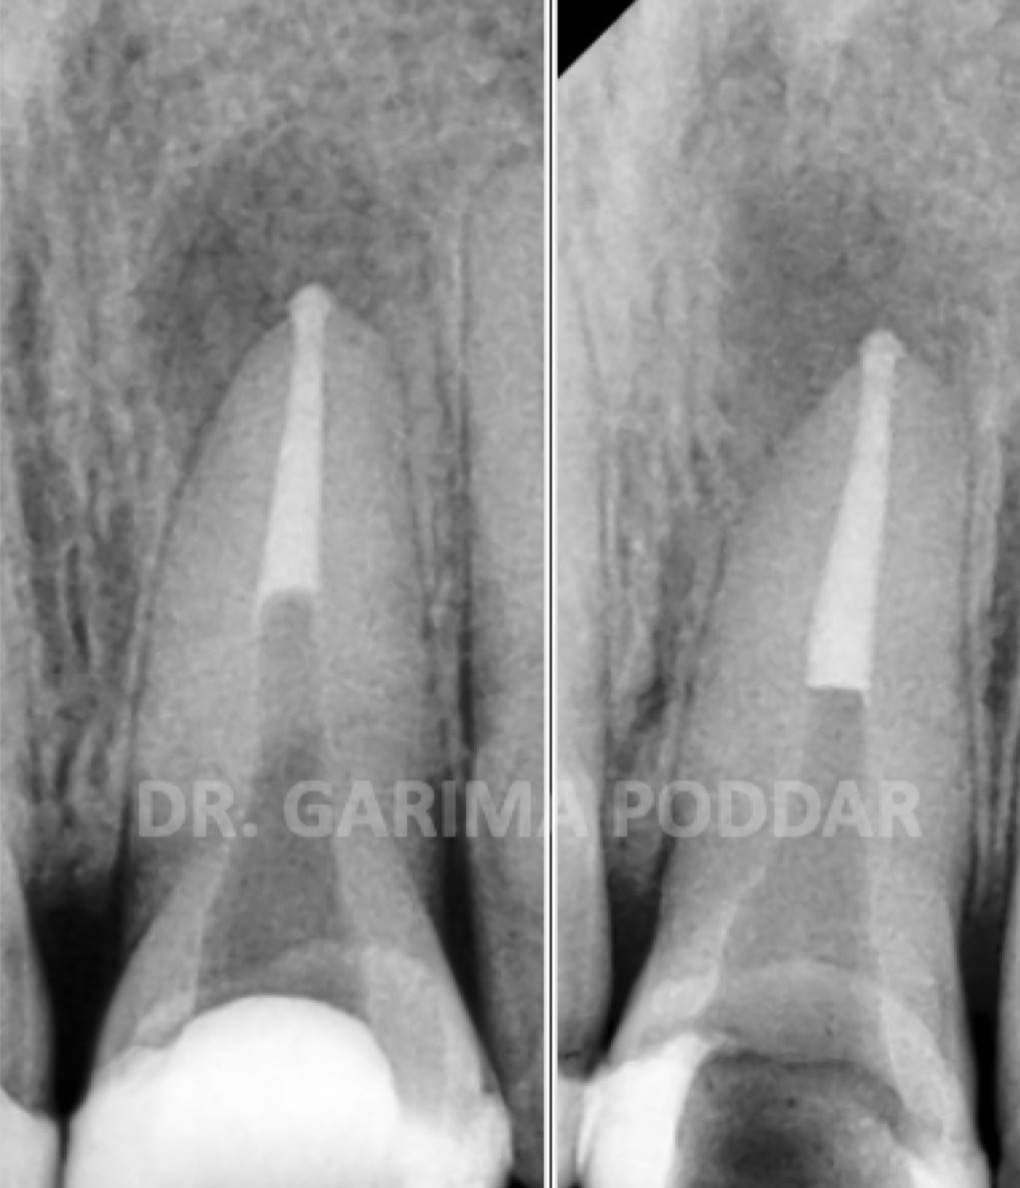
Fig. 11
In the next appointment it was observed that the mta had set completely.
The size of the fiber post was evaluated. Already the root had been subjected to a lot of stressful forces, so we didn’t not opt for post space preparation. A small layer of around 1.5mm of Thermoplastic gutta percha was placed using backfill unit of EQ-V (Meta biomed, Korea) to obturate the length of canal which would not be occupied with the post.
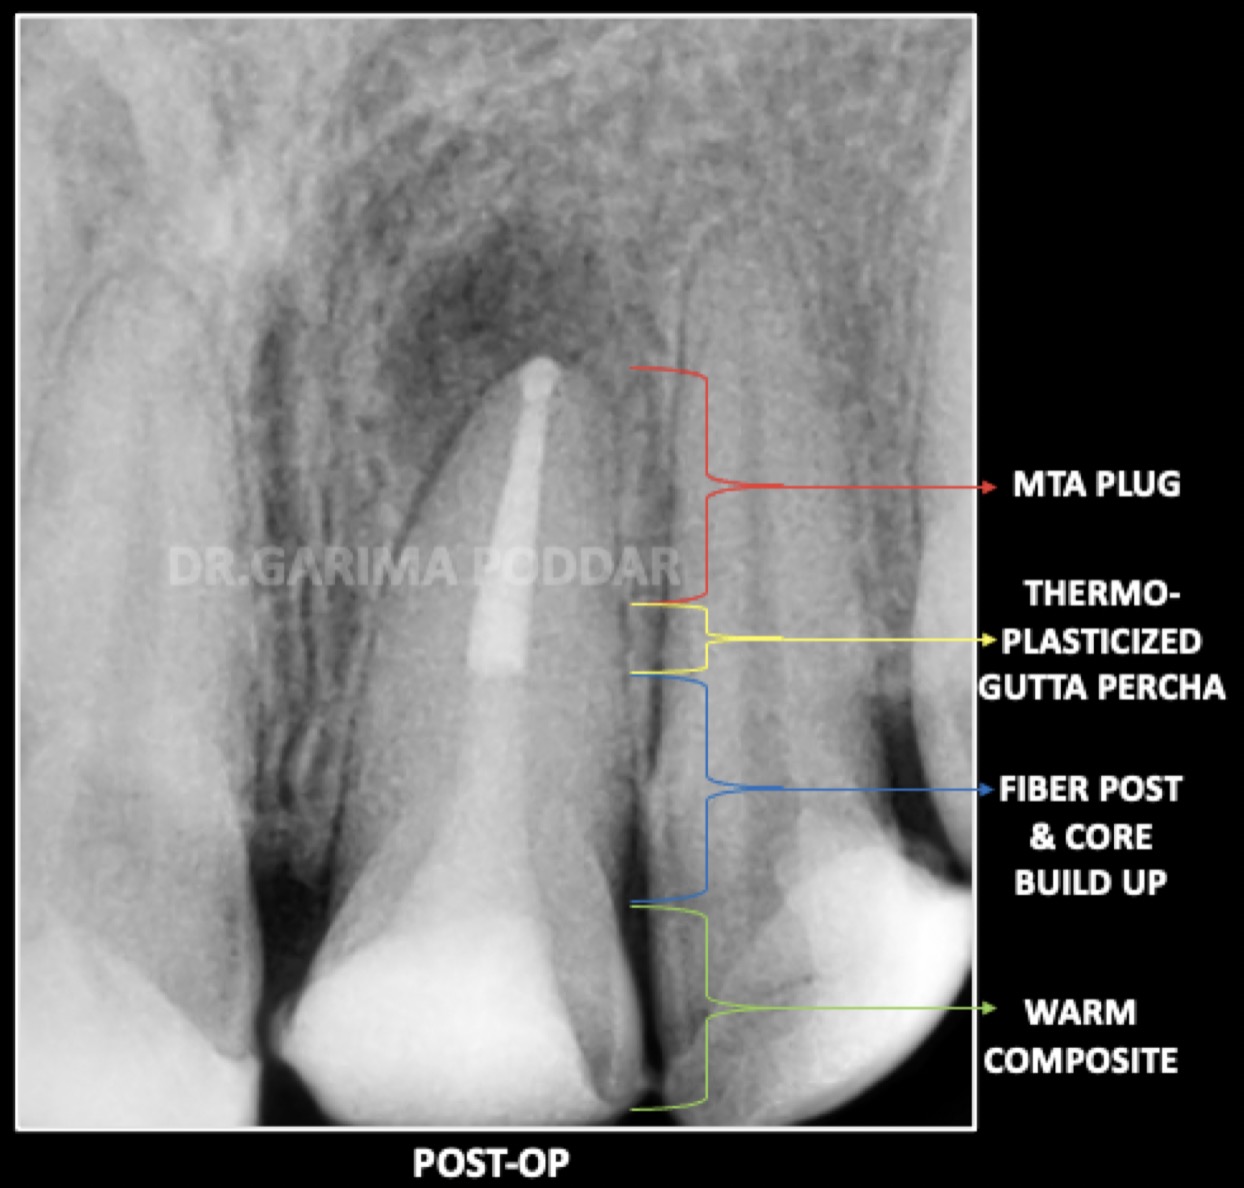
Fig. 12
The old restorative material from buccal aspect was also completely removed.
A passively fitting fiber post (Coltene) was selected and post and core were done using warm composites.
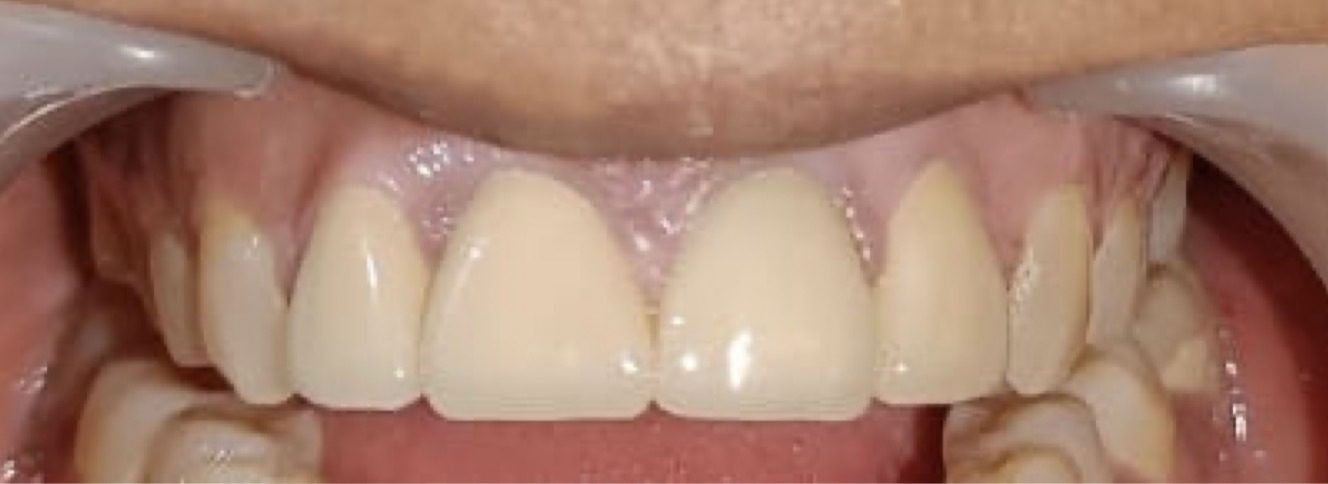
Fig. 13
Prosthetic phase-
The patient was referred back to the referring dentist for the prosthetic phase.
Since 21 had a lot of tooth structure loss, for 21, a full coverage crown was preferred by the referring dentist. Lithium disilicate crowns were fabricated for 12,11, 21 and 22 on patient’s request as she was not satisfied with the old restorations on 12, 11 and 22 as well and wanted the teeth to match with each other.
The crowns were bonded under isolation for proper results. A good coronal seal plays a very vital role in good prognosis of an endodontically treated tooth.
Conclusions
DISCUSSION-
A screw post exerts undue and excessive stress on the roots of a tooth and chances of introducing micro cracks in the root is quite a possibility with screw posts. A passively cemented post is a much better alternative as compared to a screw retained post. While removing an old post, use of ultrasonics has proved to be a boon where minimal tooth structure loss happens and chances of incorporating crack in the tooth structure is minimized. Magnification and a source of good illumination always helps in having a clear vision of the work field and thus the operator is able to perform treatment more precisely and conservatively. In case of widened apex, MTA is a good material of choice which provides a hermetic and stable seal apically and provides reinforcement of the weakened tooth structure as well. For an endodontic treatment to be successful, both apical as well as coronal seal should be proper. A leakage from any of the two parts, could lead to secondary infection and hence a failure could happen. Following root canal treatment, when there is considerable loss of tooth structure and the remaining dentinal walls of the root are extremely thin, the tooth is prone to fracture. Thus, in such cases, a suitable post endodontic rehabilitation is required.
CONCLUSION-
A good knowledge of endodontic treatment protocol and use of advanced techniques and tools like ultrasonics and magnification, ensures correct and reproducible results in challenging cases also.
Bibliography
REFERENCES-
- Stock CJR. Current status of the use of ultrasound in endodontics. Int Dent J 1991;41:175;82.
- Hulsmann M, Schinkel I. Influence of several factors on the success or failure of removal of fractured instruments from the root canal. Endod Dent Traumatol 1999;15:252-8.
- Ingle, JI.; Bakland, LK.; Baumgartner, JC. Endodontics. 6th ed. Hamilton, Ontario: BC Decker; 2008.
- Cohen, S.; Burns, PC. Pathways of the pulp. 6th ed. St. Louis: Mosby; 1994.
- Begotka BA, Hartwell GR. The importance of the coronal seal following root canal treatment. Va Dent J. 1996 Oct-Dec;73(4):8-10. PMID: 9540744.