Redefining the access in retreatments: Part II of V
31/07/2020
Enrico Cassai
Warning: Undefined variable $post in /var/www/vhosts/styleitaliano-endodontics.org/endodontics.styleitaliano.org/wp-content/plugins/oxygen/component-framework/components/classes/code-block.class.php(133) : eval()'d code on line 2
Warning: Attempt to read property "ID" on null in /var/www/vhosts/styleitaliano-endodontics.org/endodontics.styleitaliano.org/wp-content/plugins/oxygen/component-framework/components/classes/code-block.class.php(133) : eval()'d code on line 2
One of the most important steps of the endodontic therapy is the execution of the access cavity. Very often the failure of the therapy arises from an incorrect realization of this initial step, with consequences that can lead to the missing of canals, improper detersion and shaping of the root canal system or the fracture of instruments.
In this second out of five articles the correct approach that must be taken during the access in a retreatment through an existing composite restoration will be described.
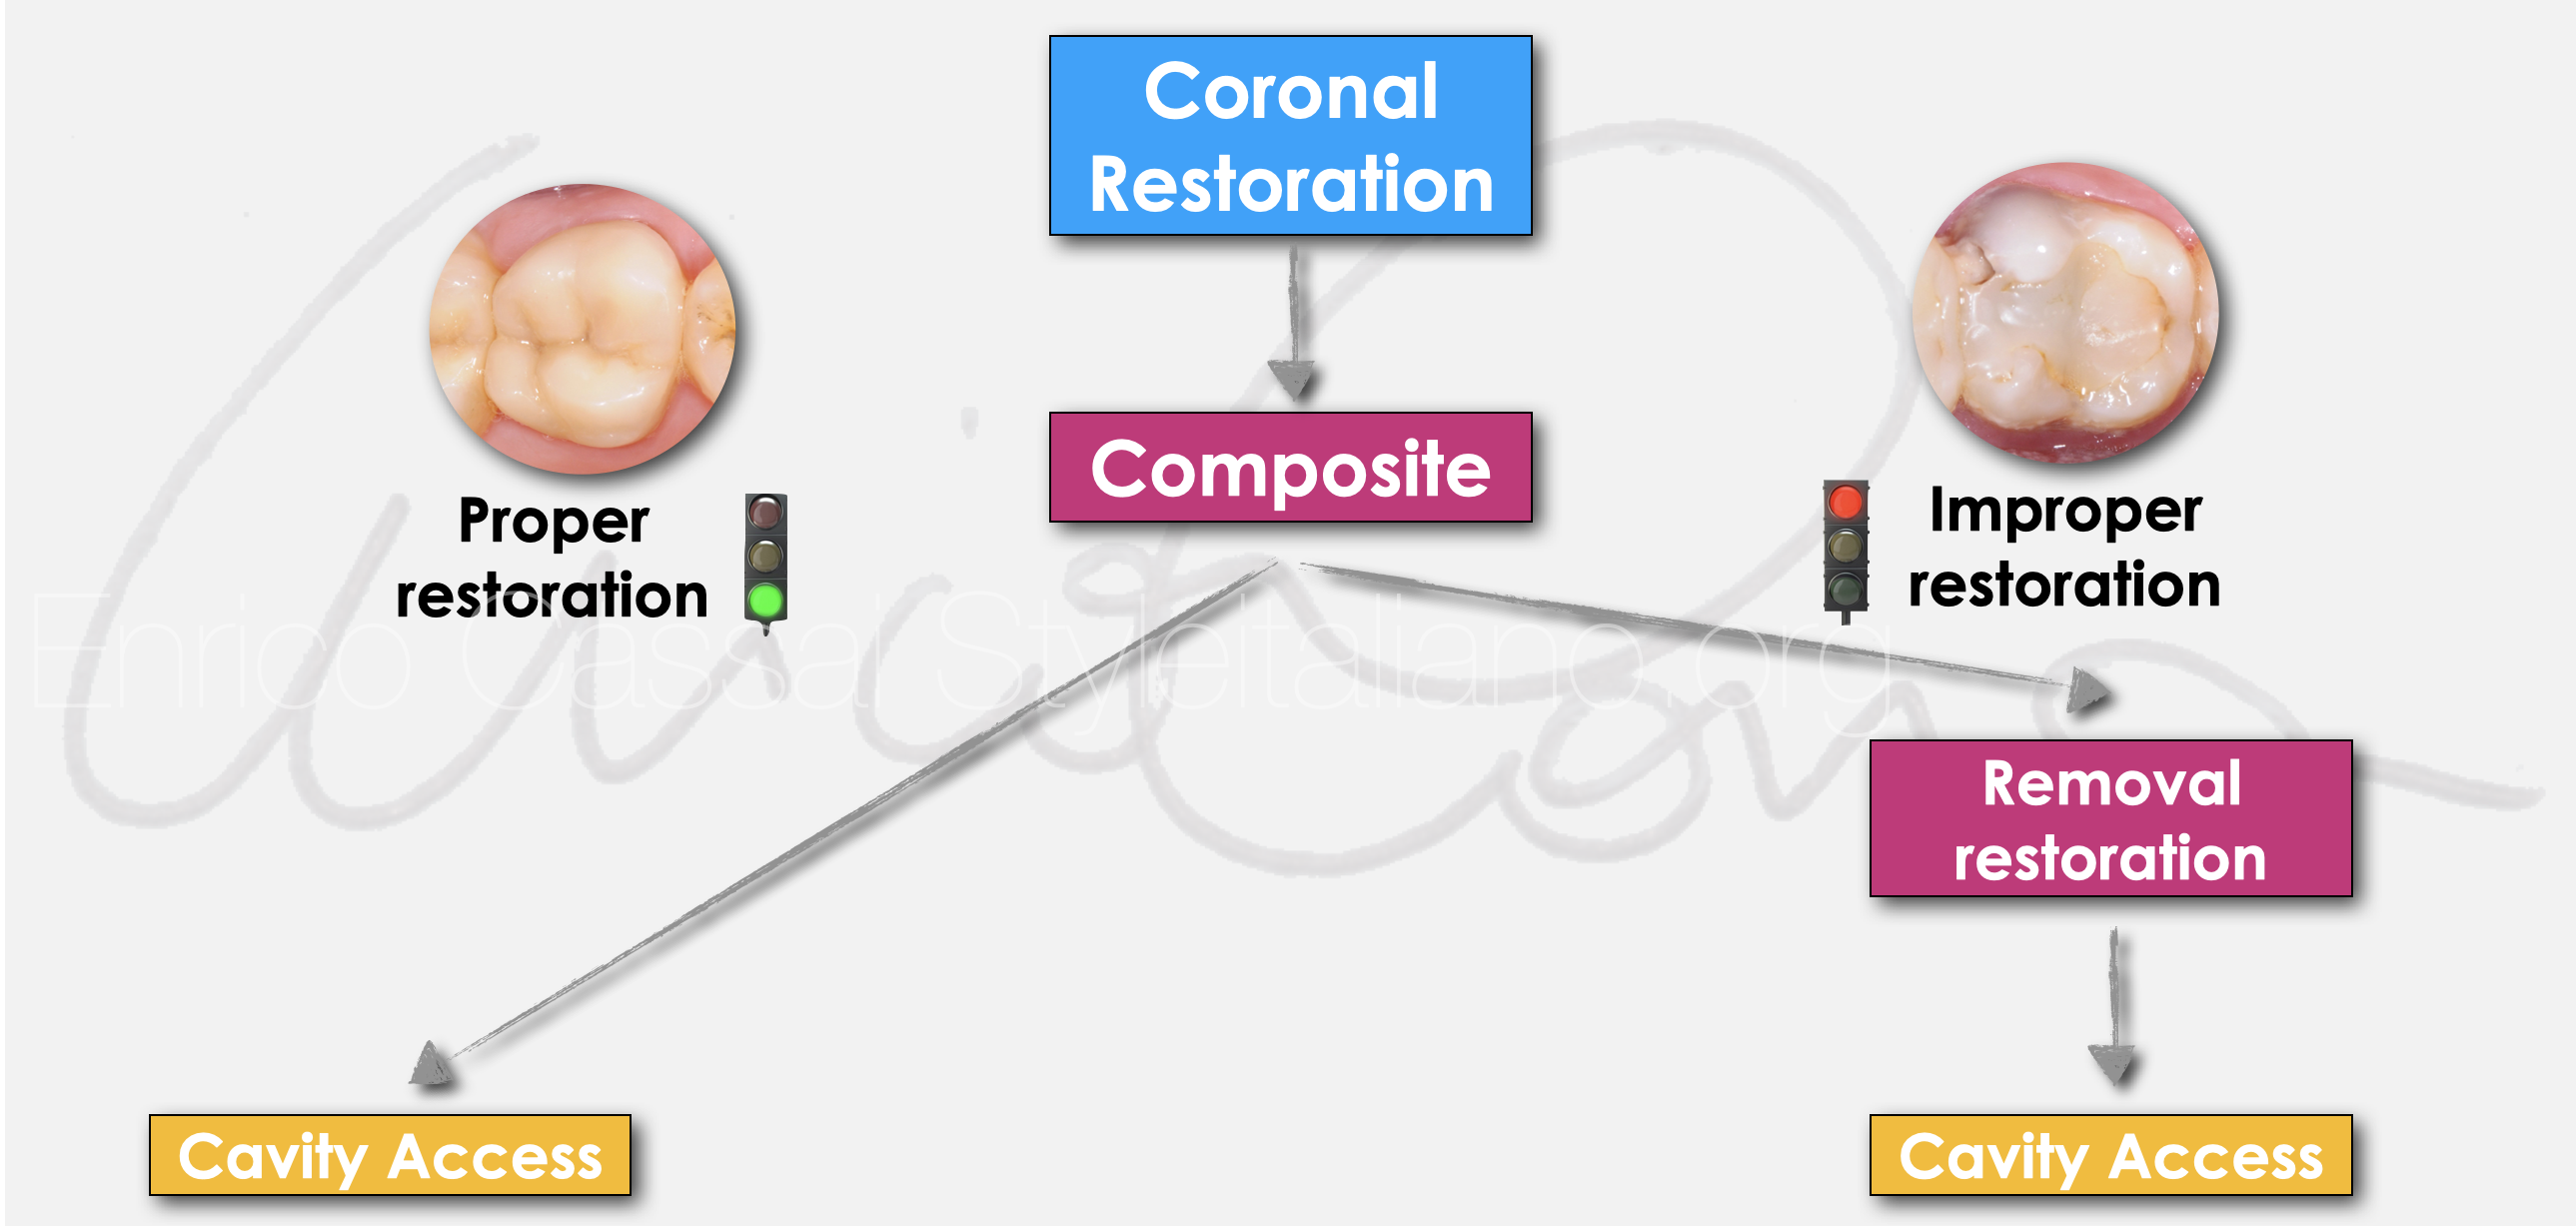
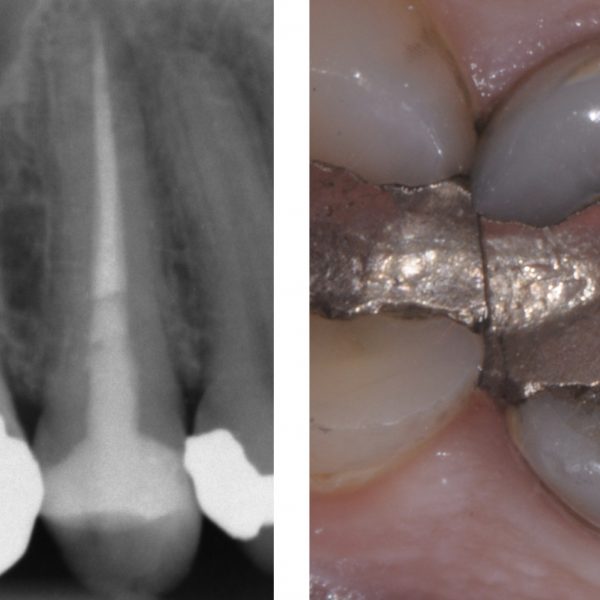
Fig. 1
If the re-access has to be performed through a pre-existing simple resin restoration or an indirect restoration, the first consideration that must be made is if the restoration can be entirely removed and subsequently replaced or if it can be maintained. (DIAGRAM 1)
If the re-access has to be performed through a pre-existing simple resin restoration or an indirect restoration, the first consideration that must be made is if the restoration can be entirely removed and subsequently replaced or if it can be maintained.
In the first case, the operator's behavior is very similar to that already described in the previous article in which the access through a pre-existing amalgam is analyzed. (1)
In the second case, the difficulty lies in the fact that composite materials blend very well with the hard dental tissues, therefore the identification of the anatomical landmarks is more difficoult. The risk is the elimination of healthy dental tissue or creating iatrogenic damages such as perforations. (2)
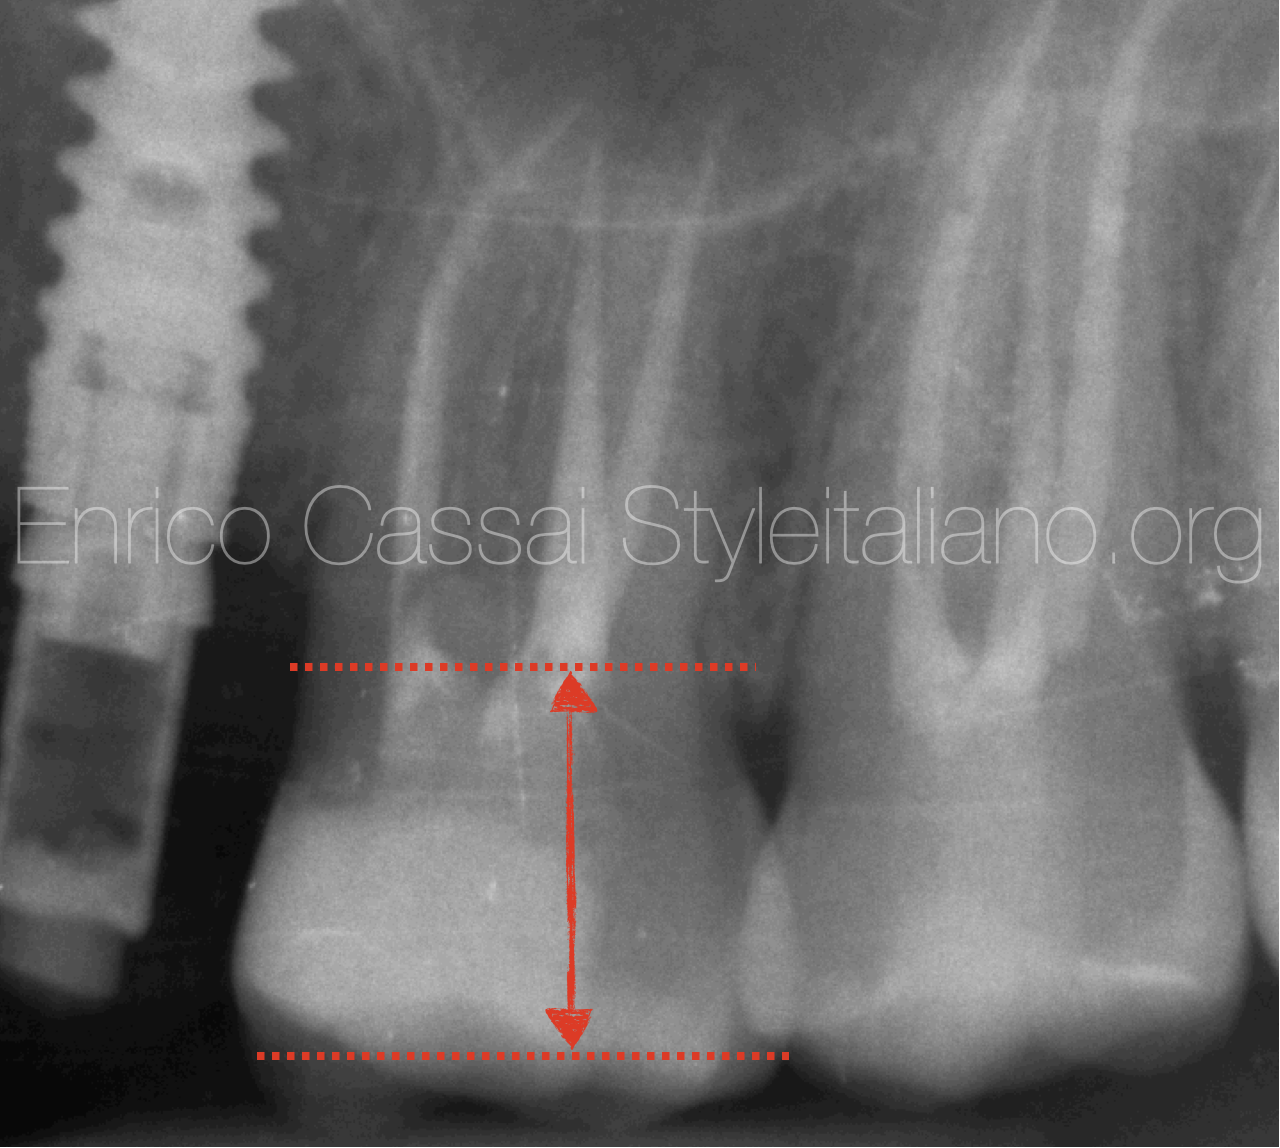
Fig. 2
STEP BY STEP
PREOPERATIVE EVALUATIONS (X-RAY)
Therefore, if an access cavity has to be made through a pre-existing composite restoration, a careful preoperative evaluation through the initial x-ray is recommended to understand properly the distance between the occlusal surface and the floor of the pulp chamber.
With this measure it will be easier for the clinician to understand how long the diamond-coated burs to be used should be. It is advised to stop using burs within 2 m to the pulp chamber floor and to use ultrasonic tips from that point, in order to have a better visual control of the area and to avoid iatrogenic damages (FIG.2)
PREOPERATIVE EVALUATIONS (CBCT)
If necessary, a CBCT can be taken in order to have perfect measurements and to assess the 3d anatomy of the tooth that should be treated.
In this case, the exam shows the presence of a lesion on the messy-buccal root that is connected to the pain that the patient referred during palpation on this area.
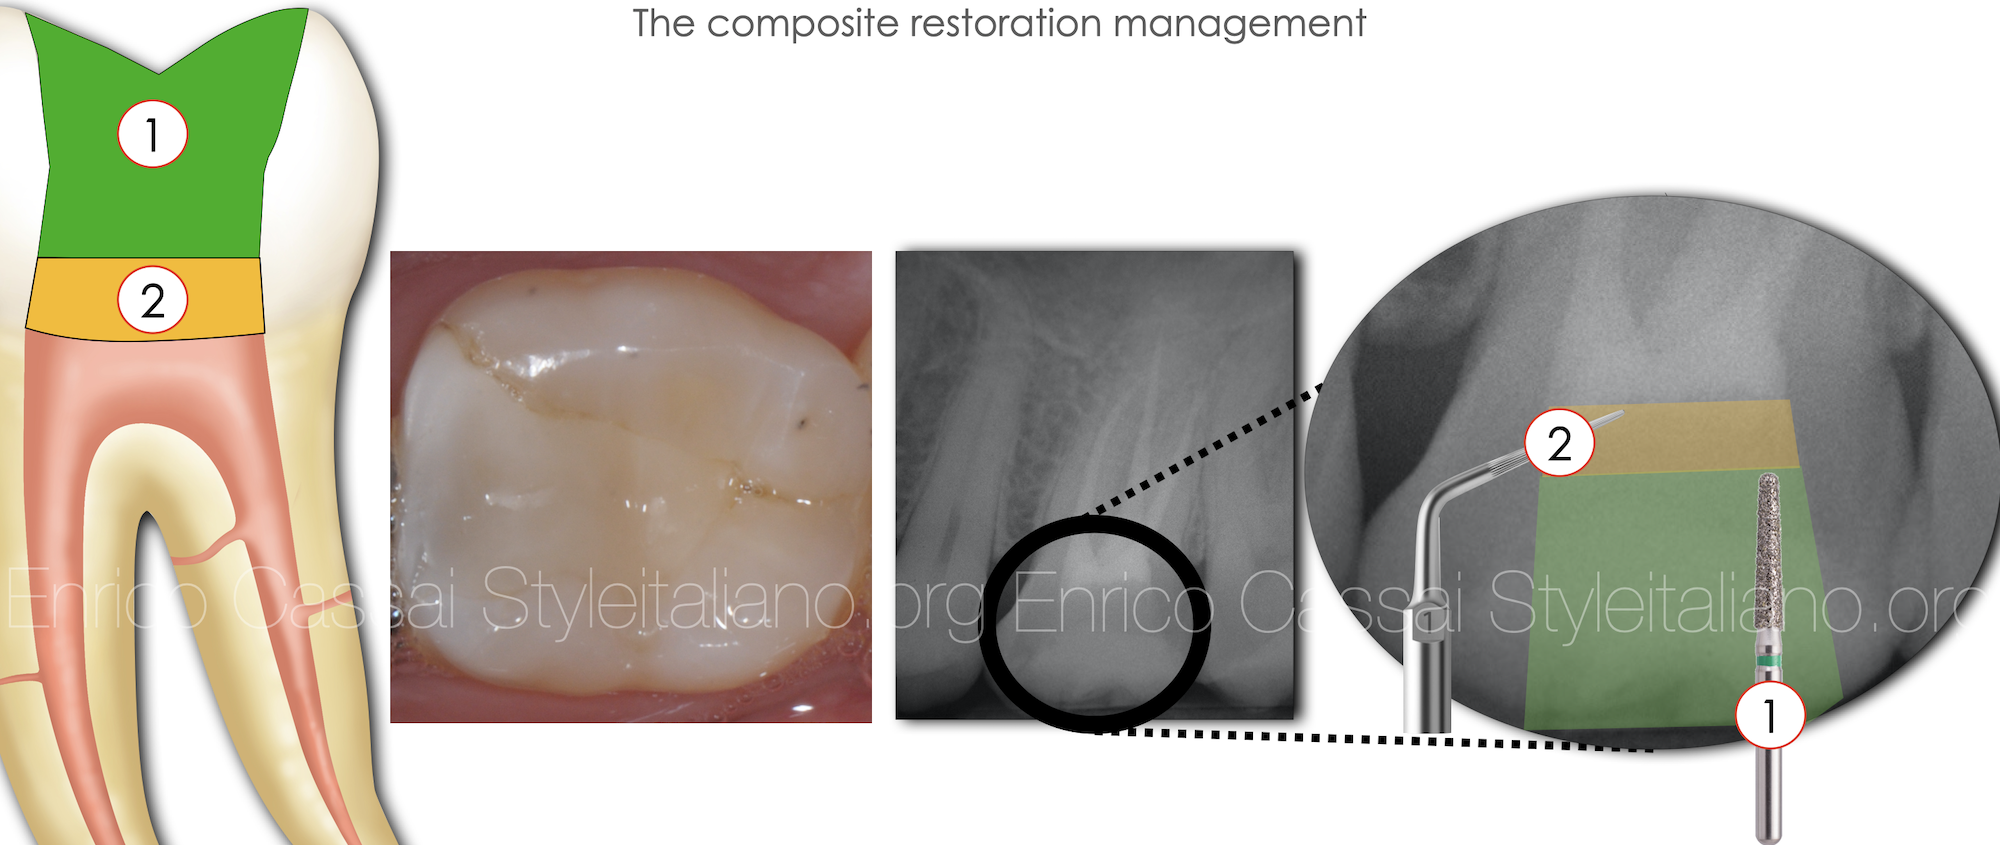
Fig. 3
STEP BY STEP
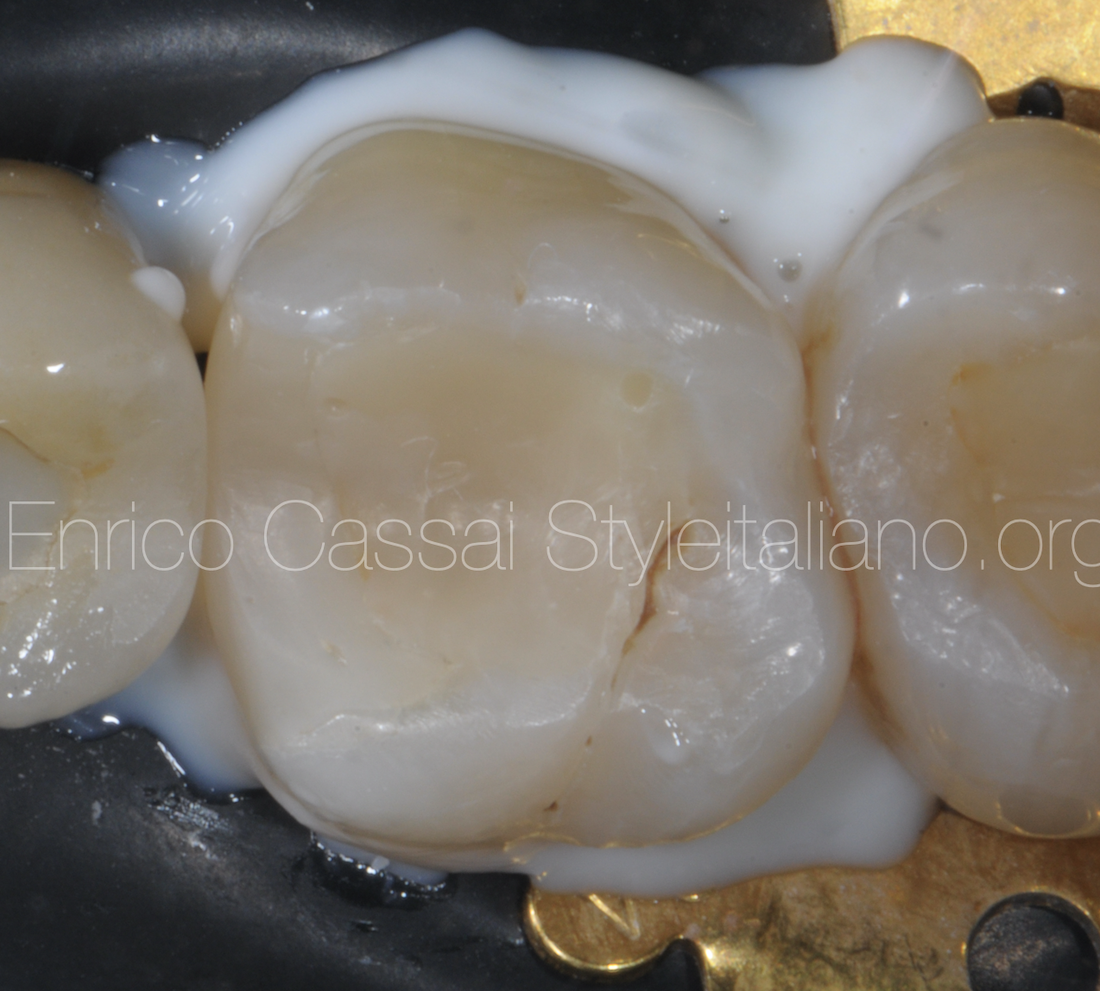
Fig. 4
PROPER RUBBER DAM ISOLATION
The isolation of the operating field with rubber dam is advisable. As in this case, if it is decided to carry out the postendodontic restoration in the same session, it is preferrable to isolate several teeth (multiple isolation)so that at the end of the endodontic therapy there is the opportunity to restore the tooth with the proper coronal anatomical references.
Alternatevely, in the case of single isolation, the use of a liquid dam is recommended to validate the correct peripheral isolation of the tooth on which the hook has been mounted.
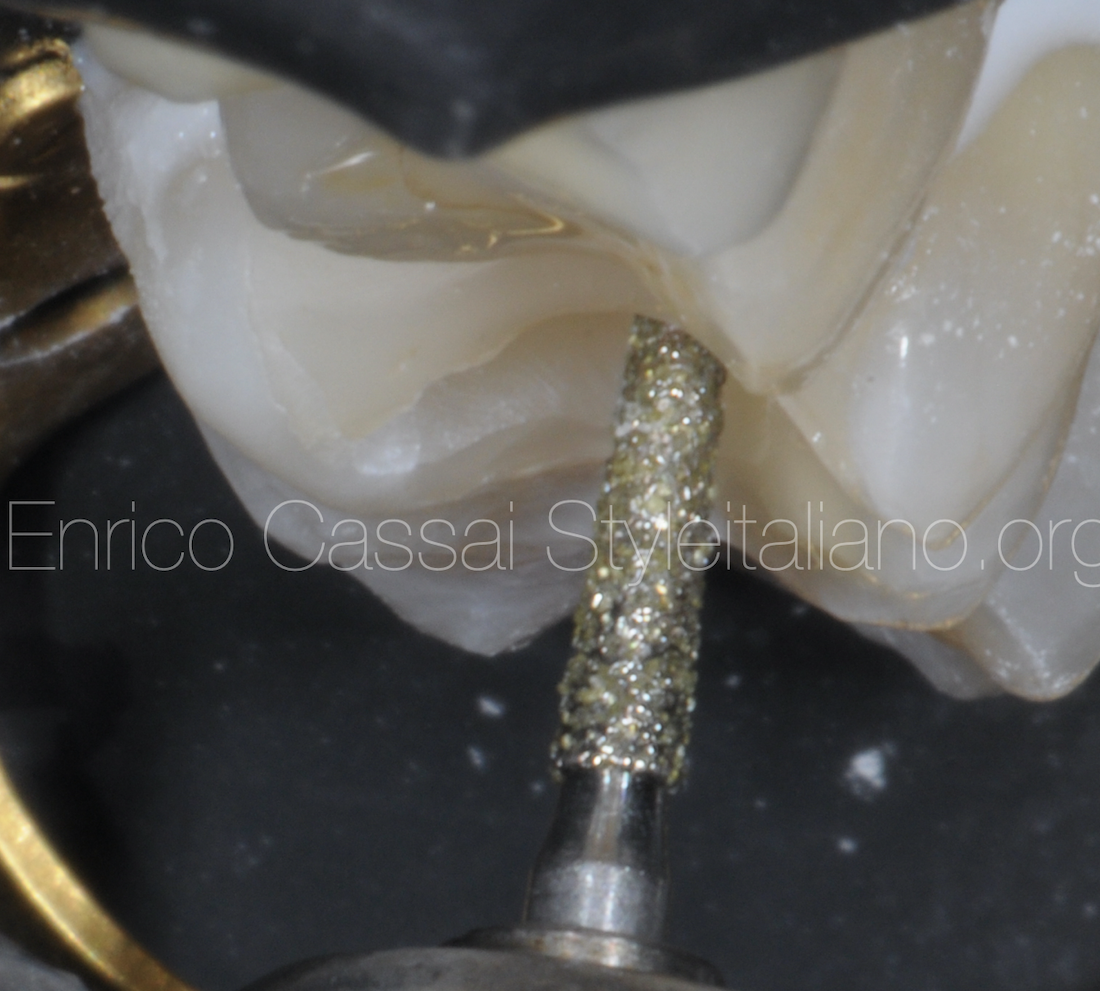
Fig. 5
PRELIMINARY ENDODONTIC ACCESS CAVITY
Use a long, diamond coated, truncated-conical bur mounted on a turbine or, better, on a red handpiece to create the design of the access cavity, reaching 2 mm from the floor of the pulp chamber.
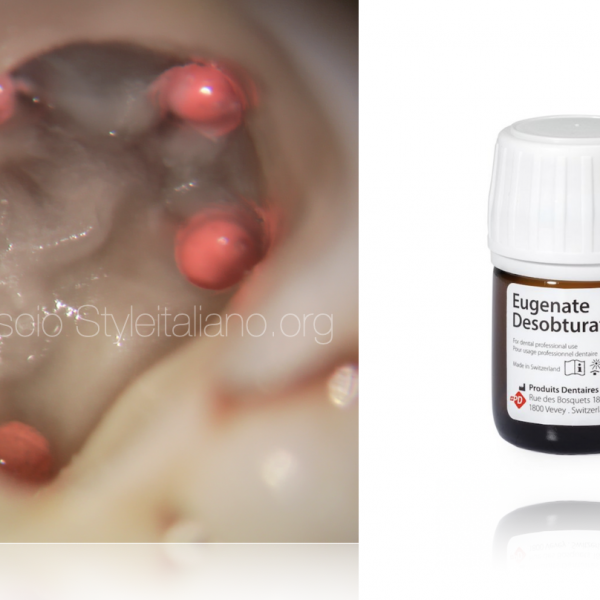
Then, use an ultrasonic tip to remove the remaining 2 mm of composite material and access the root canal entrances.
The tip that acts on the material must be scrupulously checked under optical magnification.
Furthermore, washing the cavity with water will help to enhance the chromatic differences between resin (which will appear blackened) and moistened dentine.
Refinement with US tip
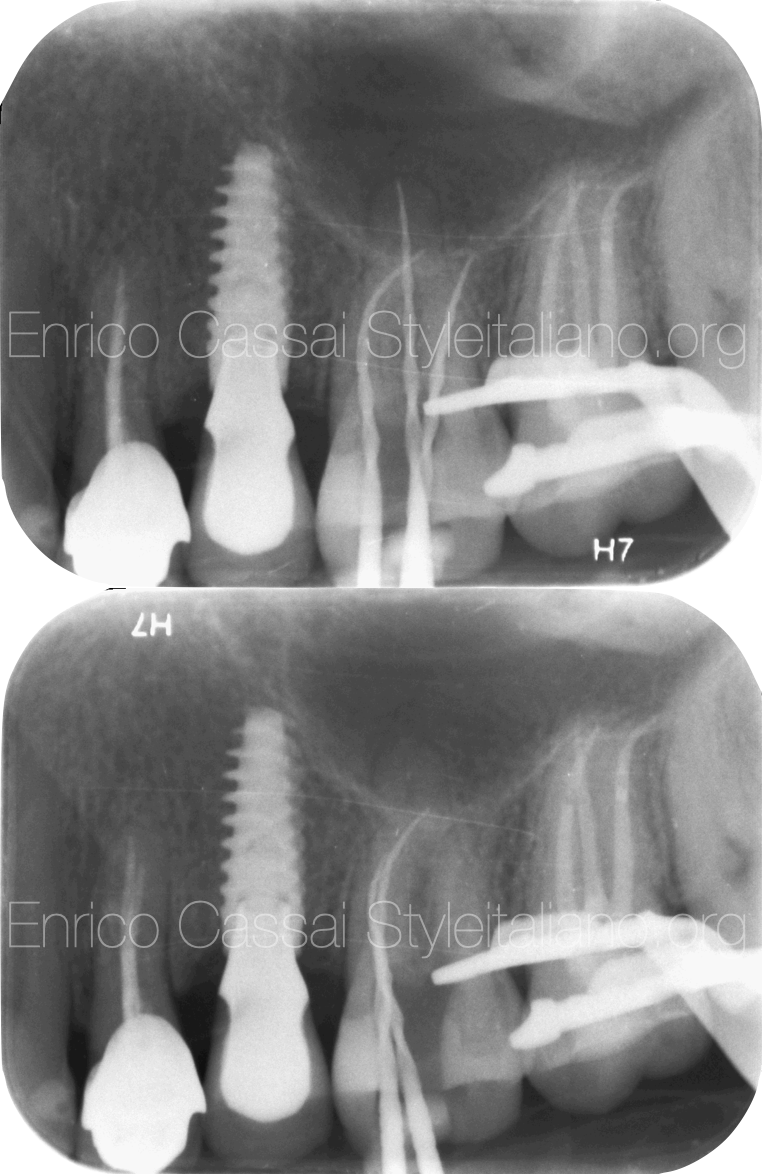
Fig. 6
After removing the restoration, one proceeds to the identification of the main canals (MB, DB, P), the removal of coronal interferences (preflaring) if present, the scouting with K-file up to the correct working length and the cleaning and shaping. The correct working length of the main canals was estimated with the last mechanical file brought to the working length. It was only after this step that the accessory canal (MB2) was identified, scouted, cleaned and shaped.
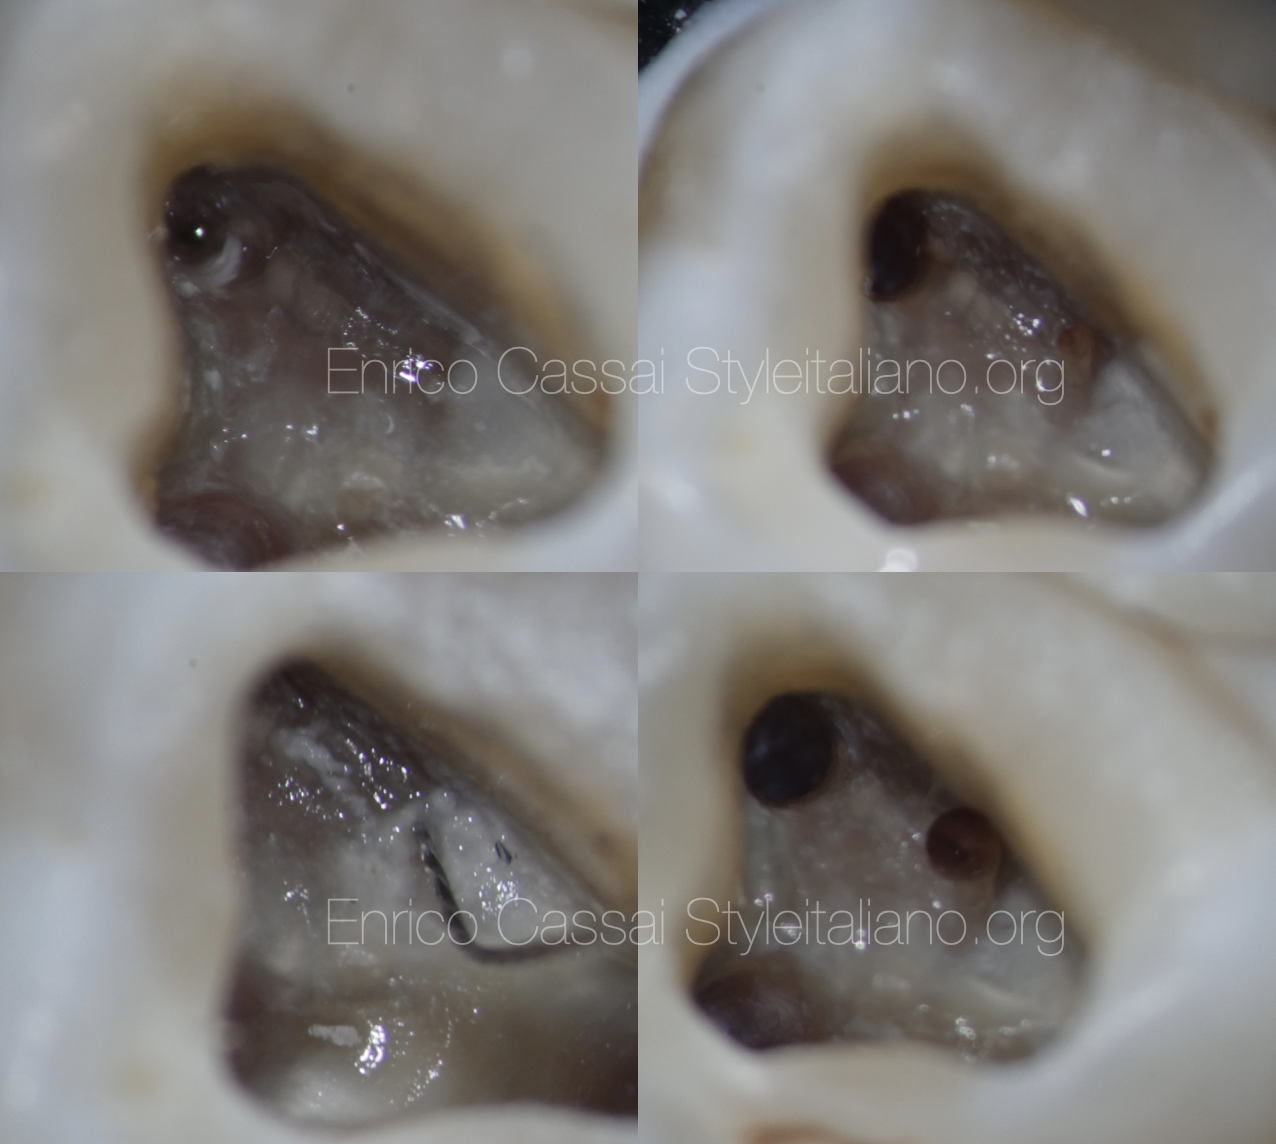
Fig. 7
TIPS & TRICKS
Once reached the canal orifices, identify the material present in the canals to adopt the correct canal emptying technique.
If it is guttapercha, try to remove most of the material with mechanical instruments, keeping only the most apical portion for the use of solvents.
Always treat the main canals first, until they are ready to be filled, and only then look for the accessory canals, clean and shape them.
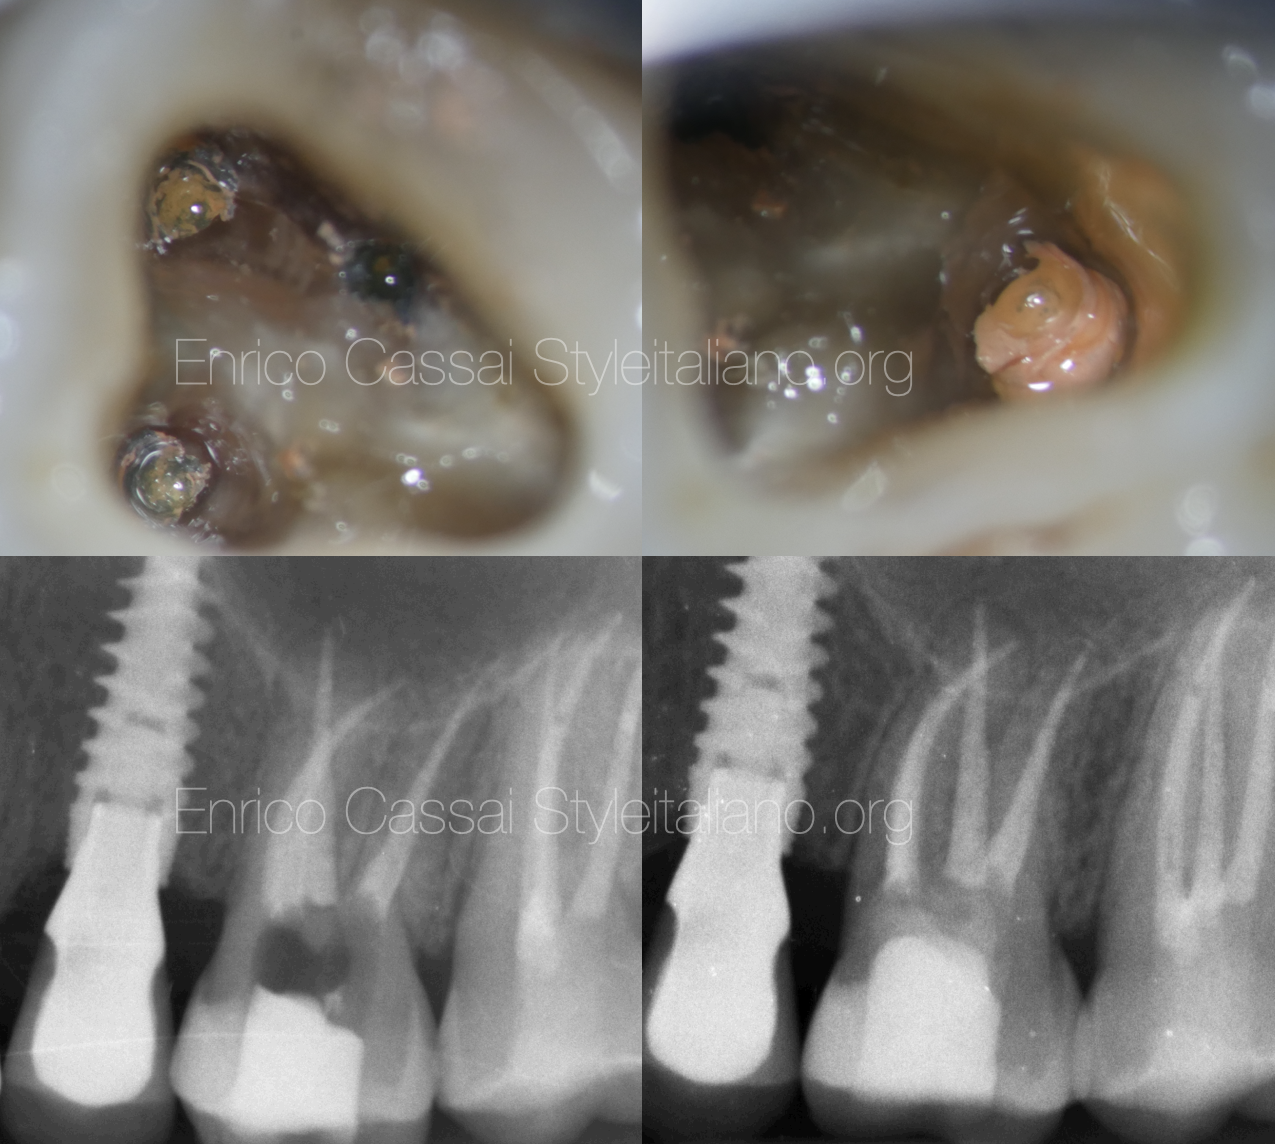
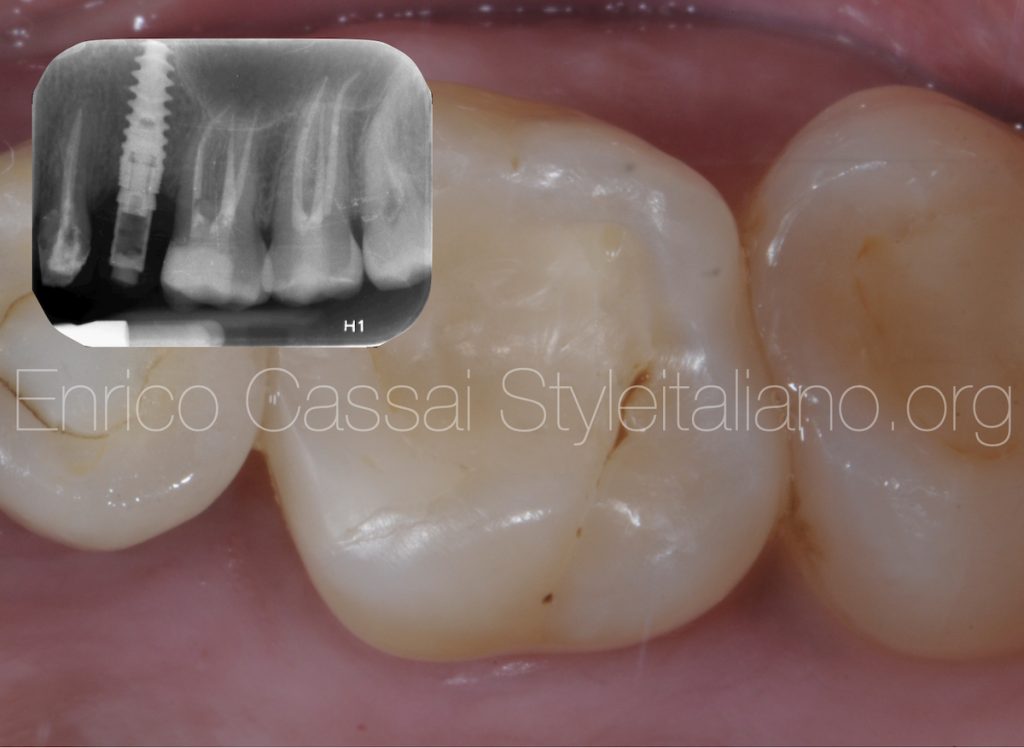
Fig. 8
The canals were all filled with the continuous wave of condensation technique. After performing a control x-ray to evaluate its correct execution, a composite build-up was made and the patient was sent to the referring dentist with the recommendation of restoring it with a full cusps coverage.
Conclusions
In this article it was shown the correct protcol to use in the case of re-access in an orthograde retreatment of a direct-indirect composite restored tooth.
The recommendations are the following:
- consider if the access should be done by eliminating the existing restoration or through it
- careful preliminary evaluation of the initial case with a preoperative x-ray and CBCT if necessary
- proper isolation of the operating field
- use a magnification and a light source in the penetration step of the access cavity
- wash with water or alcohol during the access cavity and evaluate the different colors between the dentine and the resin on contact with ultrasonic tips
Bibliography
Scianamblo MJ: Endodontic failures: the retreatment of previuosly endodontically retreated teeth, Revue Odontostomatol (Paris), 1988
Parreira FR et al: Cast prosthesis removal using ultrasonic and thermoplastic resin adhesive, J Endod, 1994
Carr GB: Retreatment. In Cohen S, Burns Rc, editors: Pathways of pulp, 1998
Bertani, P., Gagliani, M., Gorni, F. (editors). Retreatments. Solutions for periapical diseases of endodontic origin. EDRA, 2020.