The management of a buccal perforation in a lower incisor
08/06/2021
Fabio Gorni
Warning: Undefined variable $post in /home/styleendo/htdocs/styleitaliano-endodontics.org/wp-content/plugins/oxygen/component-framework/components/classes/code-block.class.php(133) : eval()'d code on line 2
Warning: Attempt to read property "ID" on null in /home/styleendo/htdocs/styleitaliano-endodontics.org/wp-content/plugins/oxygen/component-framework/components/classes/code-block.class.php(133) : eval()'d code on line 2
Root perforations are characterized by a communication between the root canal system and the external tooth surface. They are caused by a pathological process or an operative procedural accident. When iatrogenic, they can occur during access cavity opening, root canal preparation or during post preparation.
Root perforation needs to be diagnosed early and treated appropriately as soon as possible, since they may cause an inflammatory response associated with periodontal tissue and alveolar bone destruction. In fact, depending on the severity of the injury and possible chronic inflammatory reaction, perforations may cause the development of granulomatous tissue, proliferation of the epithelium, and, eventually, the development of a periodontal pocket.
Lack of understanding of root perforations and their consequences, to the extent that could delay diagnosis and treatment, may cause future problems leading to tooth loss.
MTA has proven a reliable material to repair root perforations, even if each clinical case must be analyzed carefully and individually, in order to determine the presence or absence of infection, the extent of perforation, the time elapsed before sealing, and the periodontal risk to the patient, to see whether or not the disease could interfere directly in the prognosis.
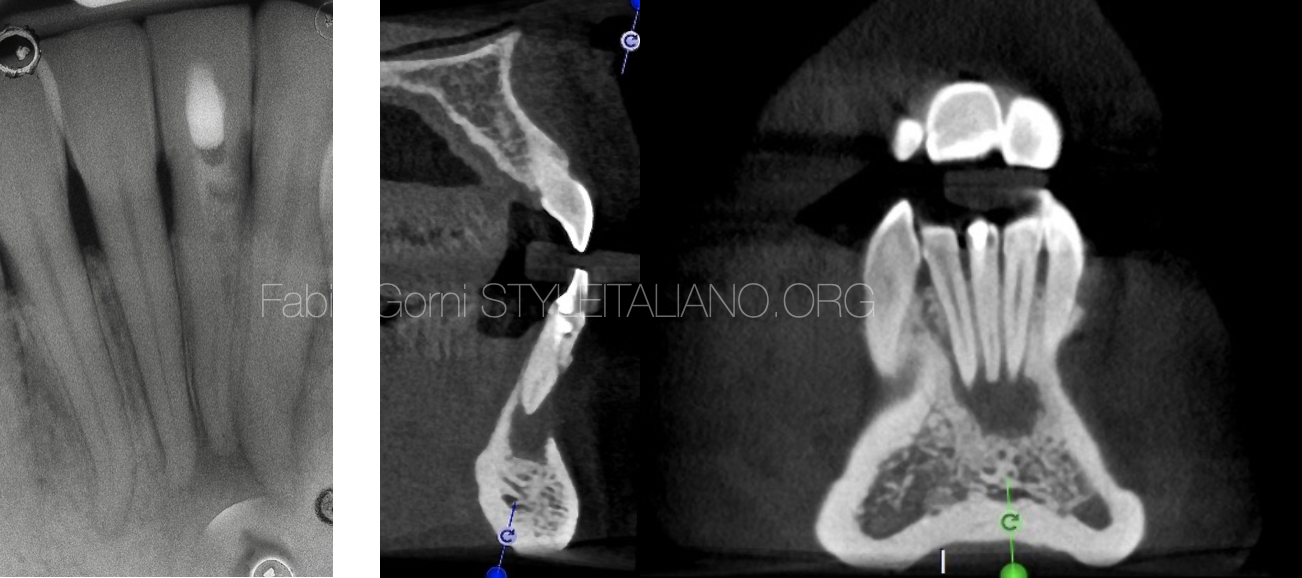
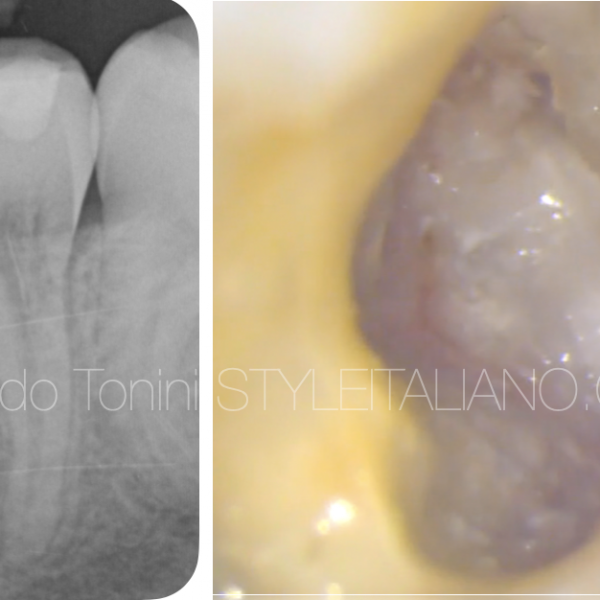
Fig. 1
A patient was referred to my practice by a colleague who could not find the root canal in a lower left central incisor. While trying to find the root canal, the colleague did a buccal perforation.
After taking an x-ray, I asked for a CBCT in order to view the different planes of all the surfaces and to evaluate the possibilities of treatment.
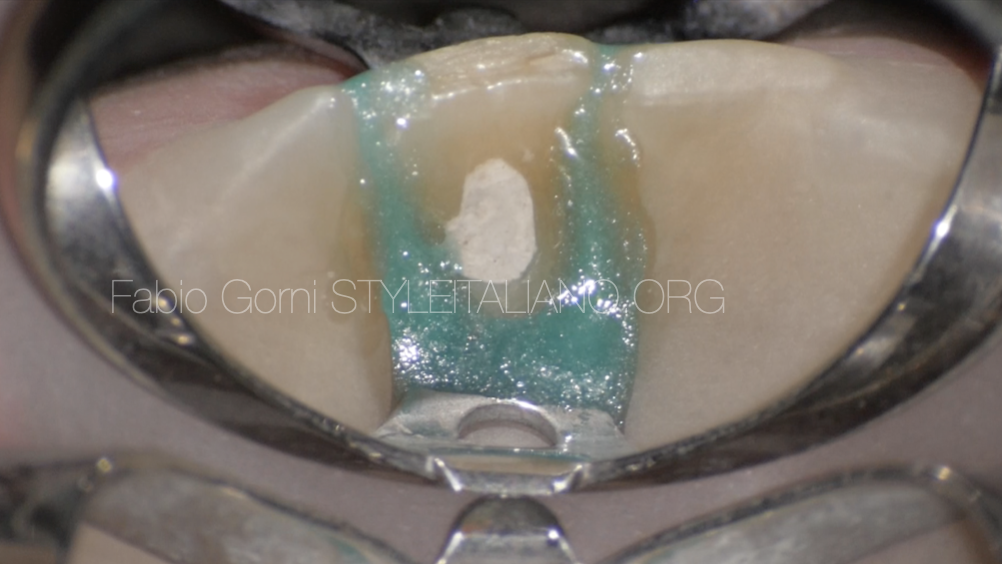
Fig. 2
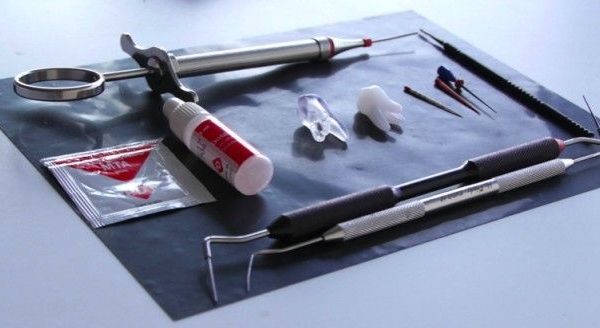
I isolated the tooth with the rubber dam and prepared to start the procedure.
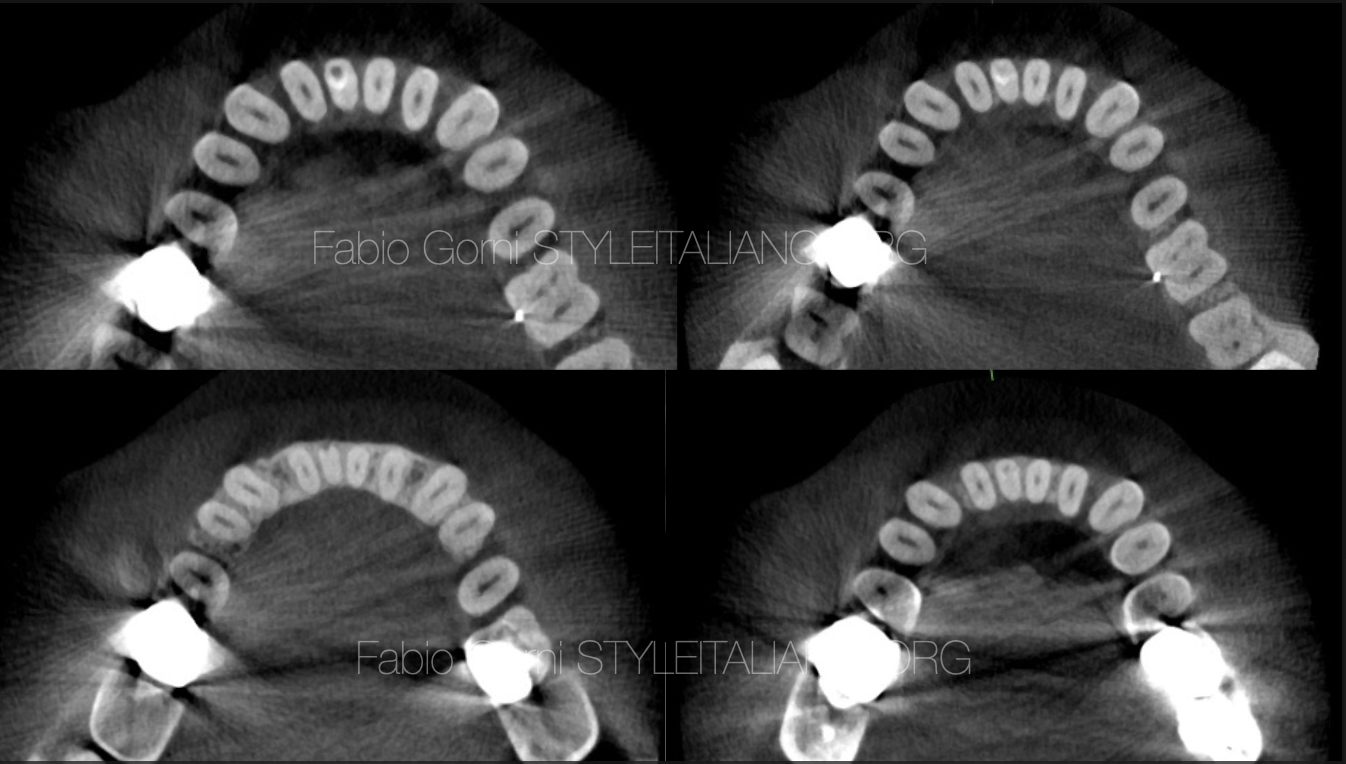
Fig. 3
I knew from the CBCT the position and the extent of the perforation.
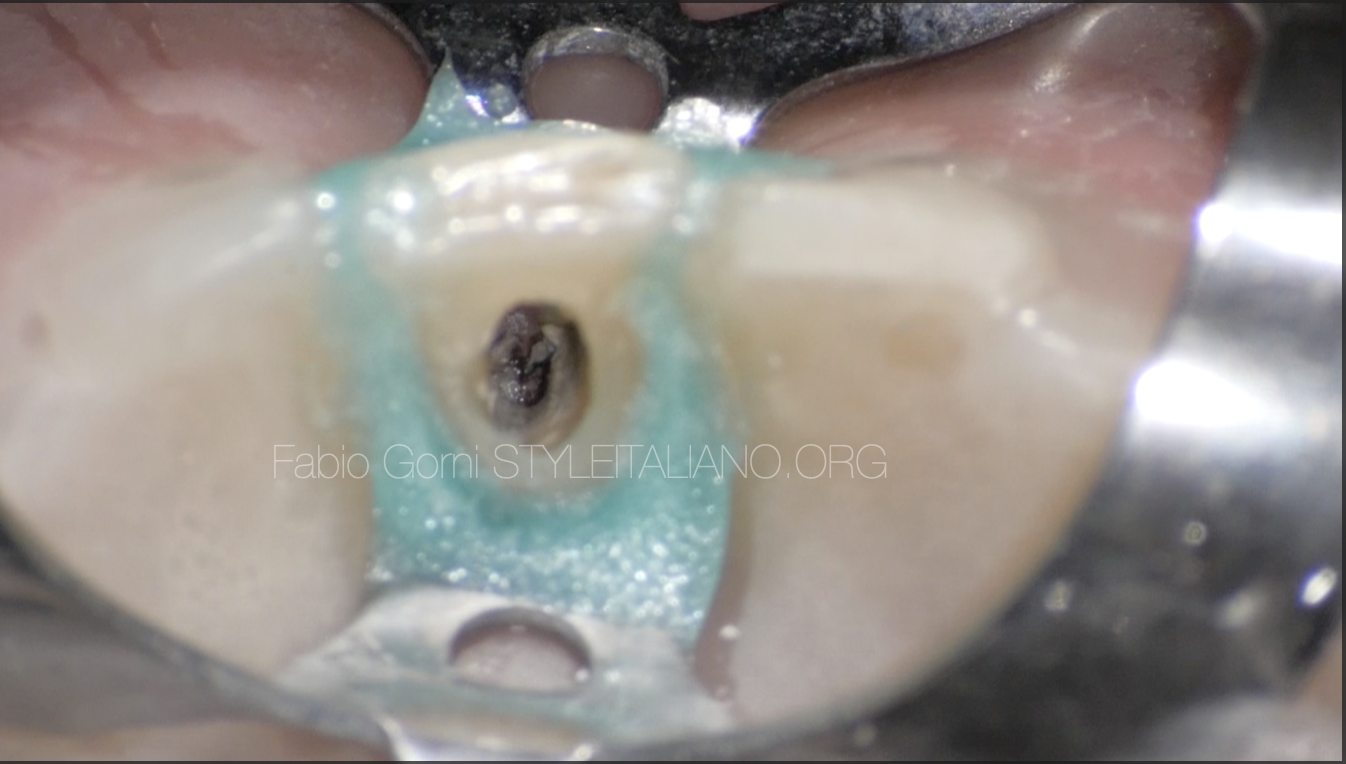
Fig. 4
This is the aspect of the tooth once removed the temporary restoration
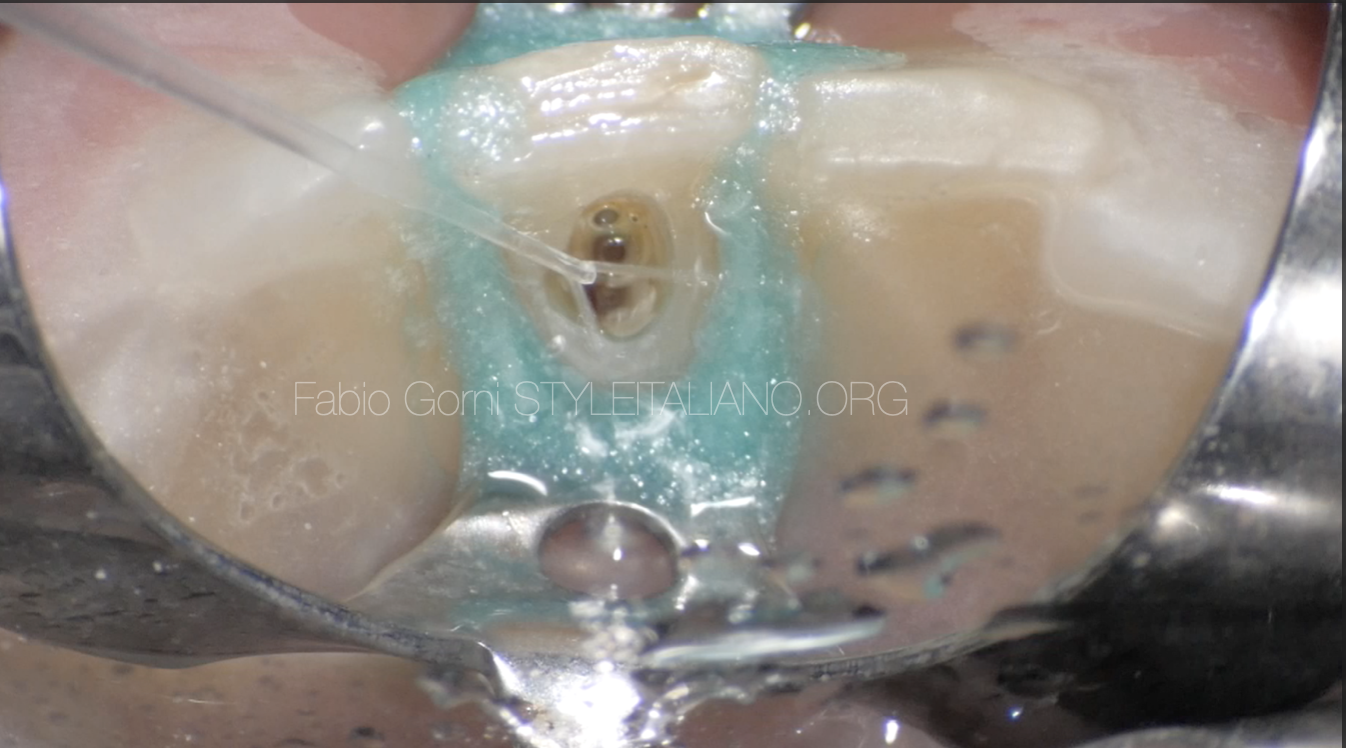
Fig. 5
With the help of the operating microscope I found the opening of the root canal and shaped it, then I rinsed with the help of a 2-side vent polypropylene cannula (IrriFlex, Produits Dentaires SA) in order to maximize the efficiency of the irrigating solution.
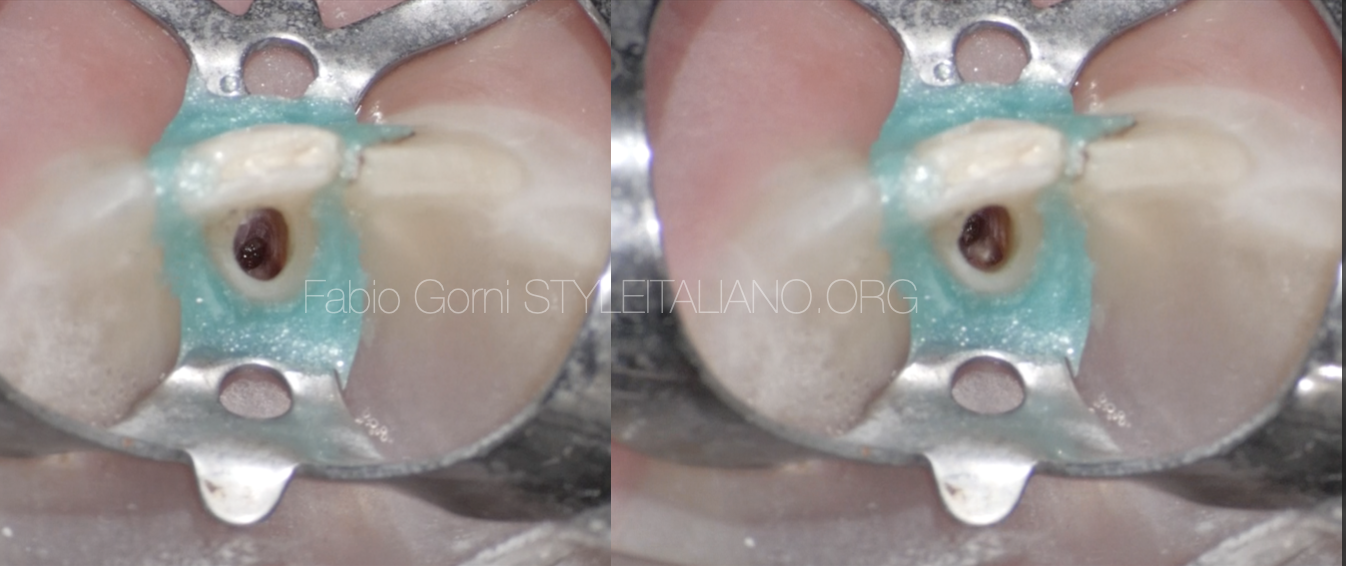
Fig. 6
I cleaned the perforation site and regularized the margins with the help of an ultrasonic tip.

Fig. 7
After shaping and cleaning, the root canal and the perforation were ready to be filled.
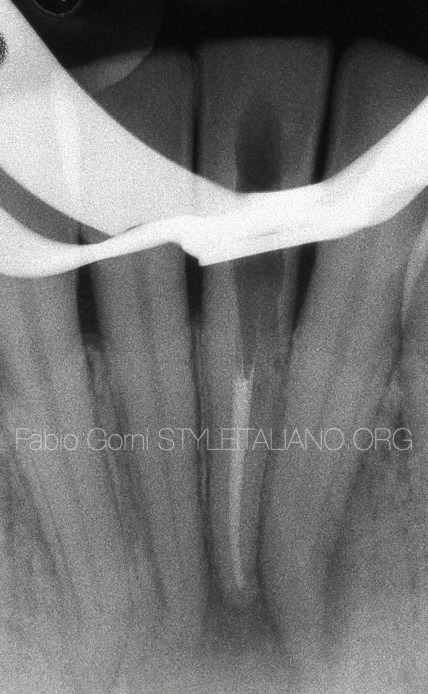
Fig. 8
I filled the root canal with warm gutta percha, using the warm vertical compaction technique.
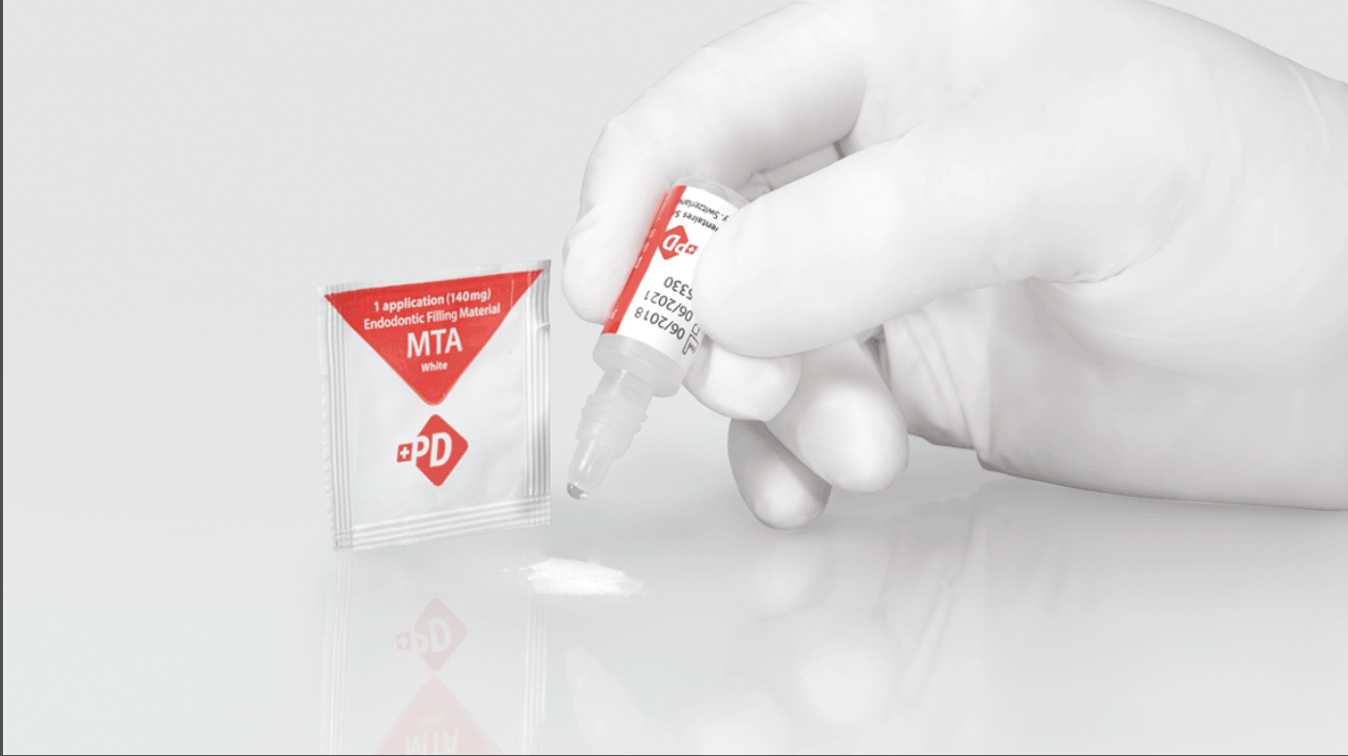
Fig. 9
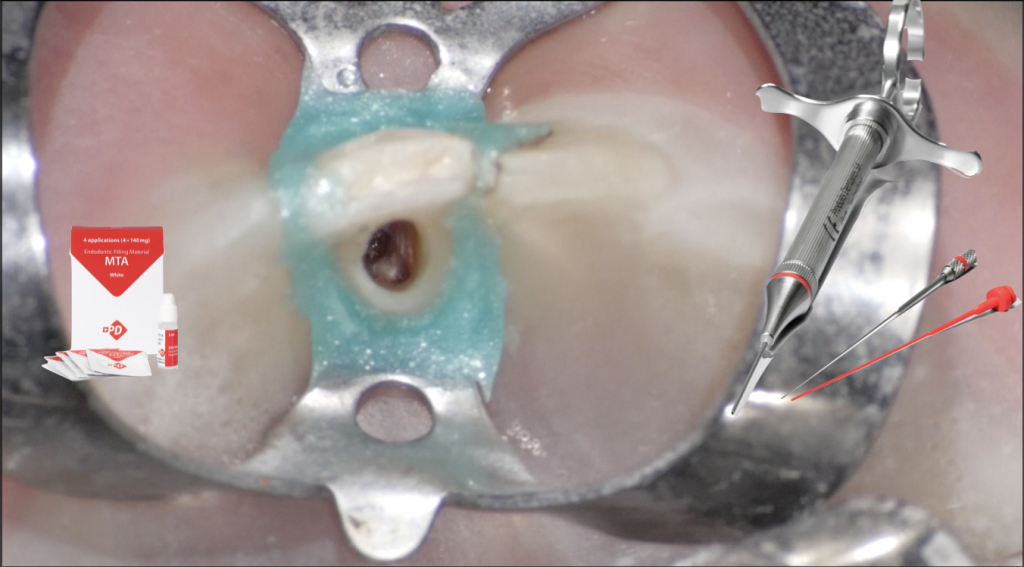
In order to seal the perforation I chose a bismuth-free MTA (MTA White, Produits Dentaires SA) and mixed it according to the manufacturer's instructions.
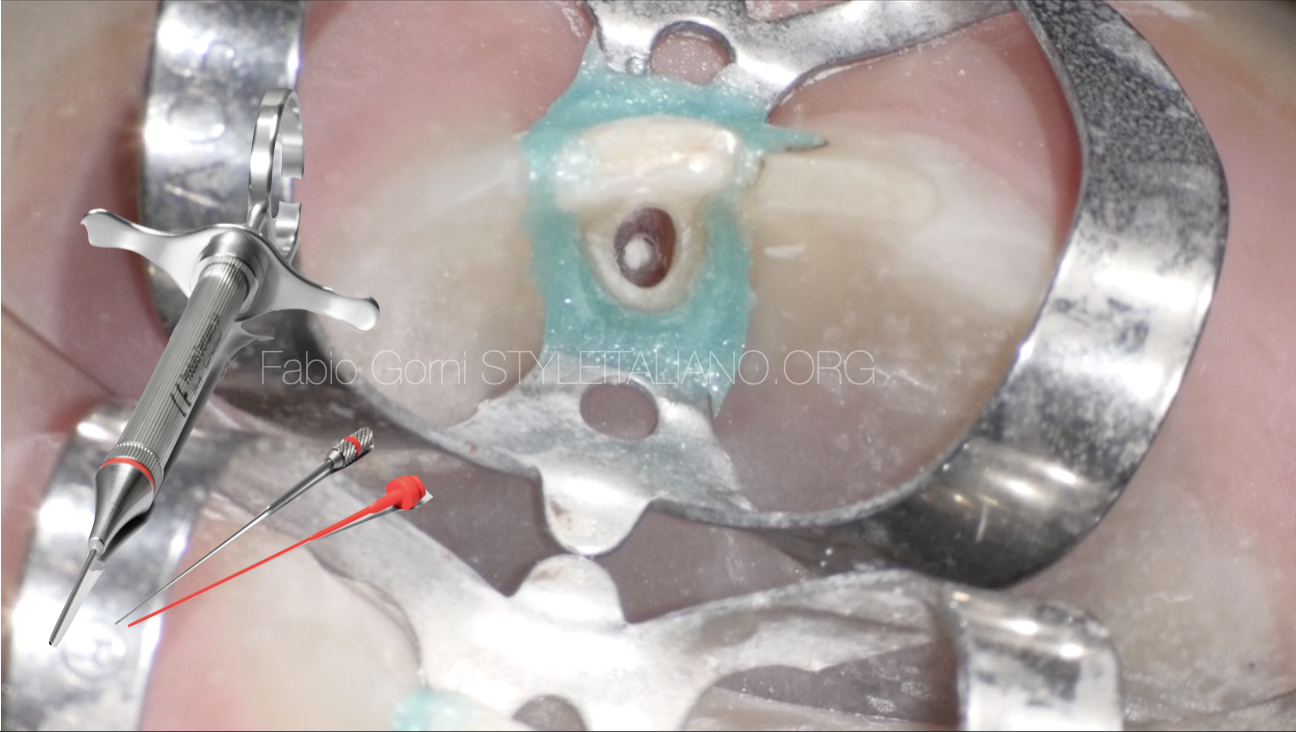
Fig. 10
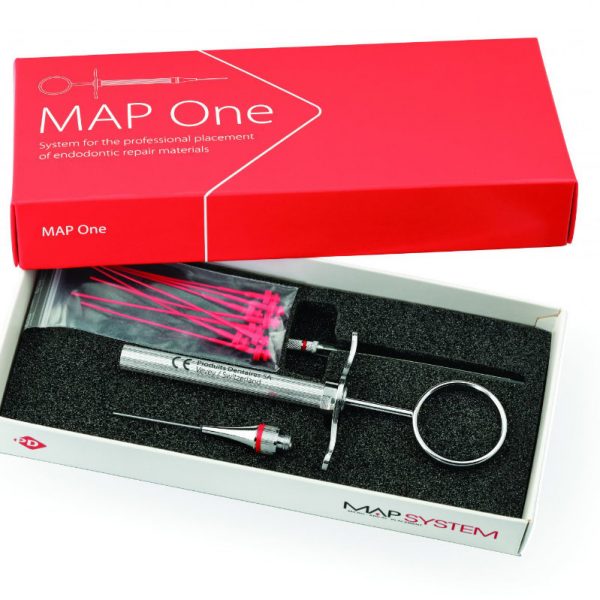
A precise positioning of the MTA is crucial to seal perfectly the perforation. I chose to use a dedicated carrier (MAP System, Produits Dentaires SA) to easily deliver the MTA in the perforation site. The flexible tip of the MAP System made it easier for me to bring a sufficient amount of filling material in the perforation site.
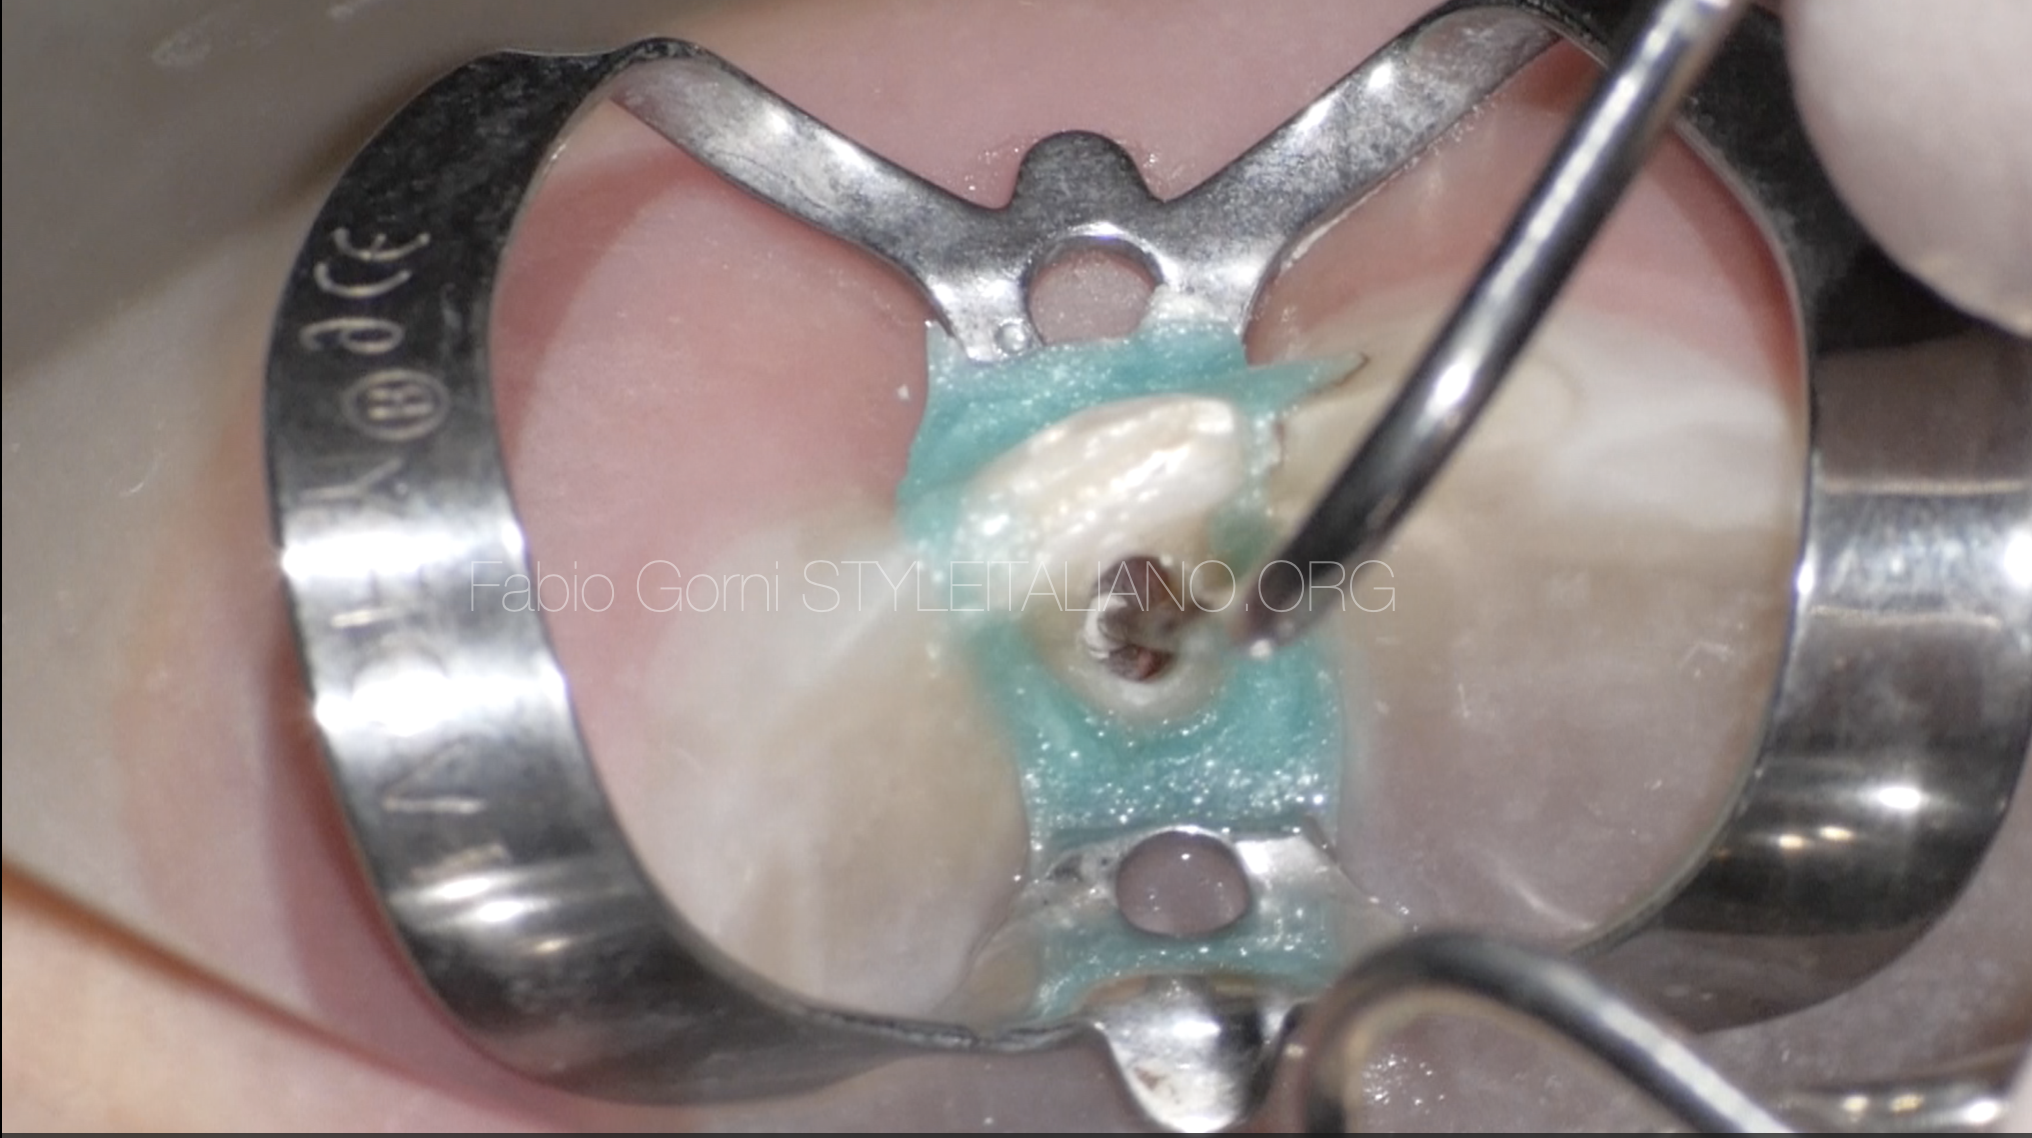
Fig. 11
I packed the MTA with a plugger first
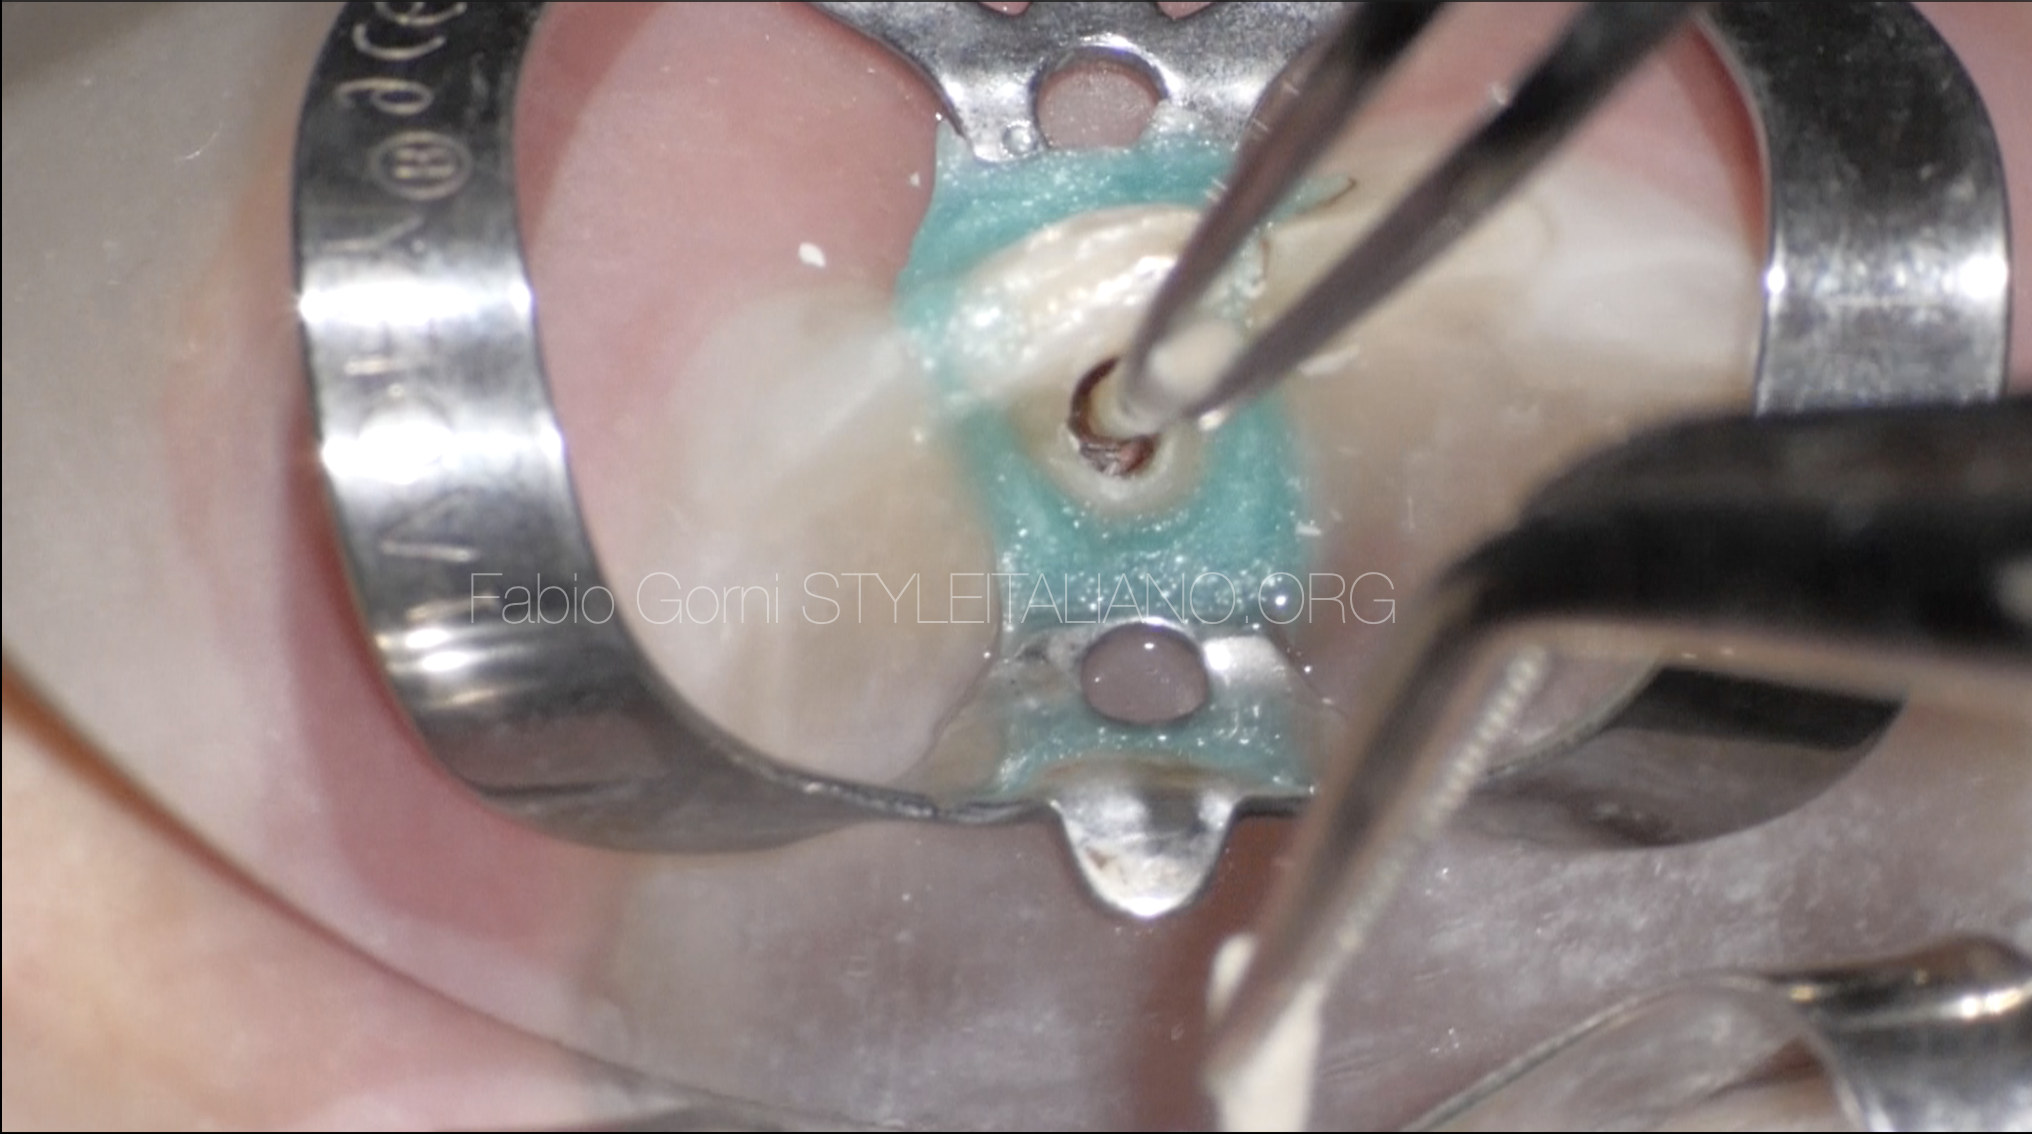
Fig. 12
then I used a paper point.
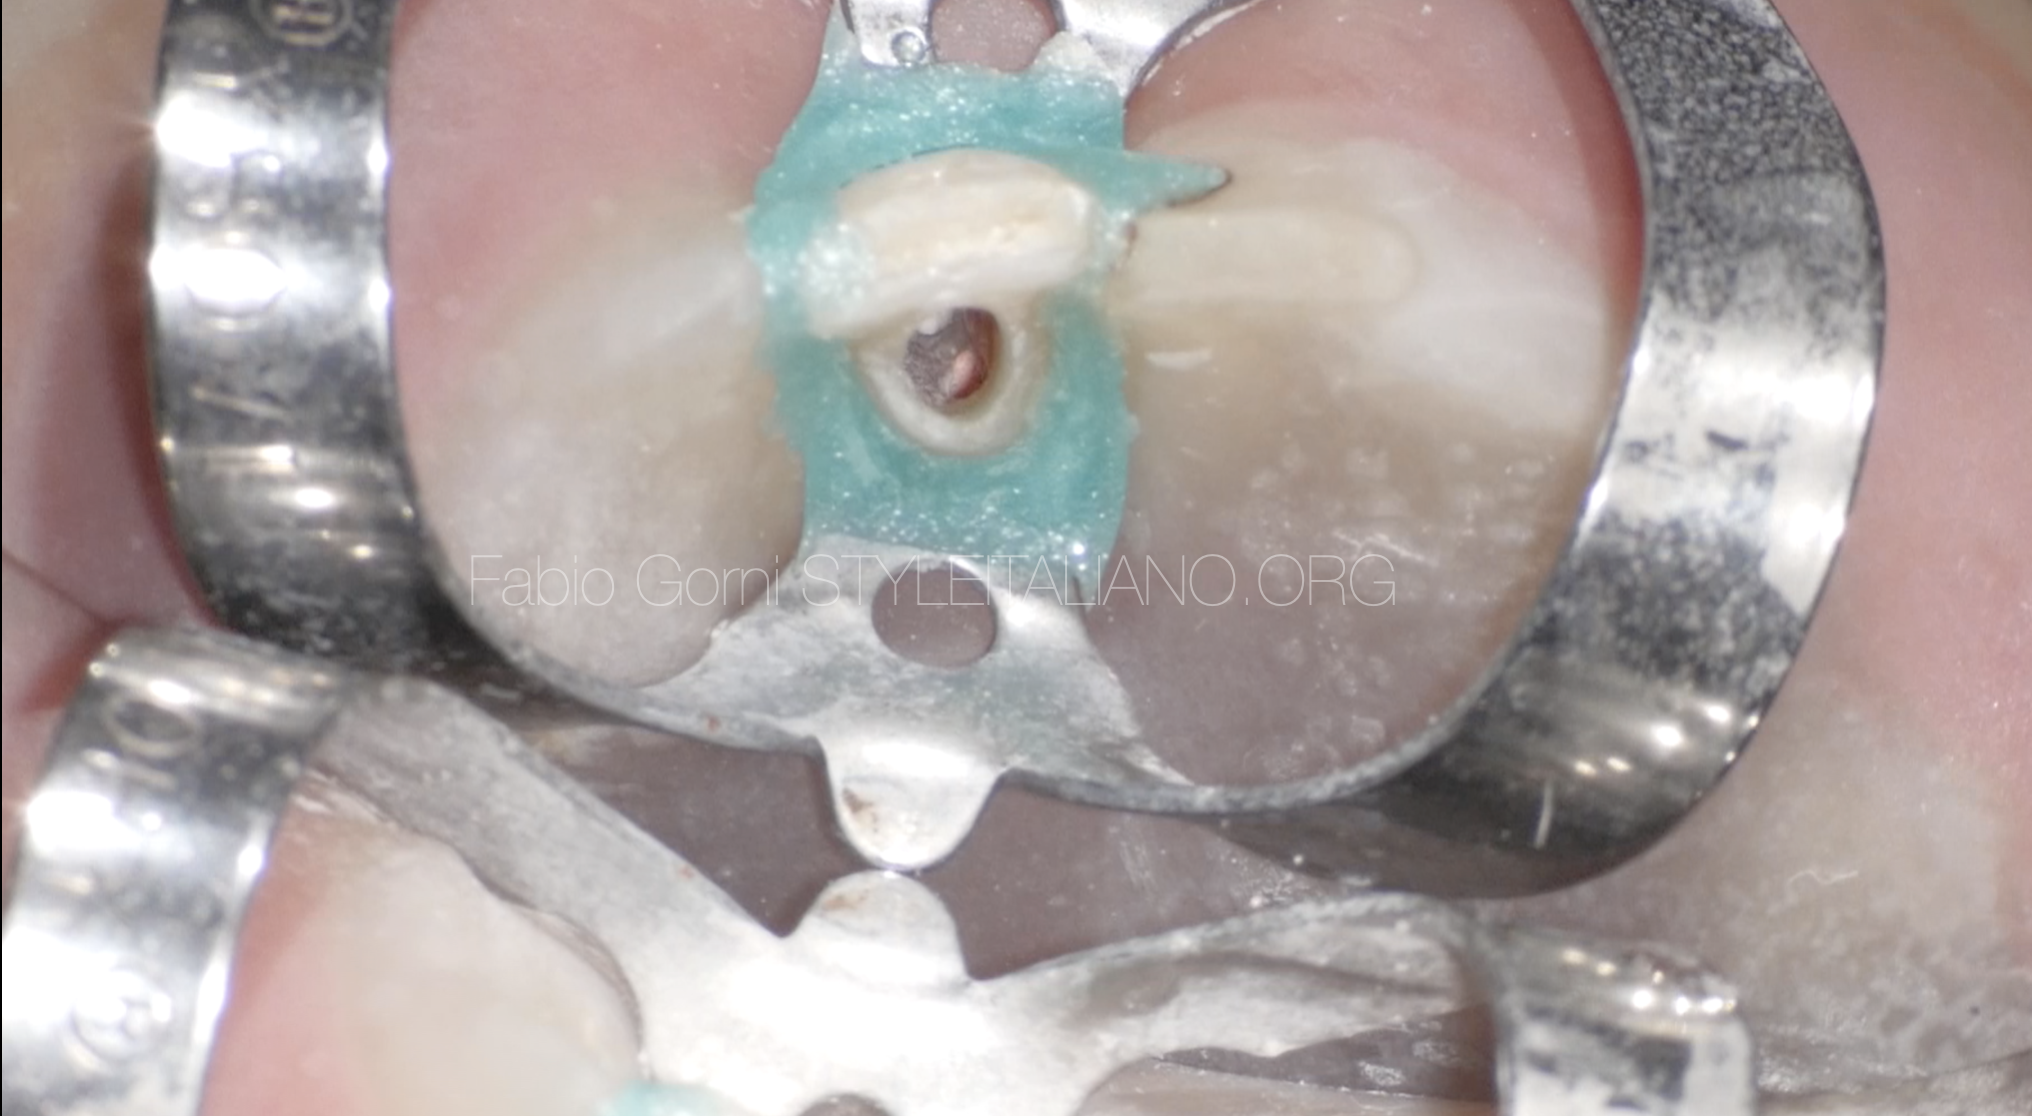
Fig. 13
At the end, the aspect of the cavity was as shown in the picture. One can see the root canal filled with gutta percha and the perforation sealed with MTA.
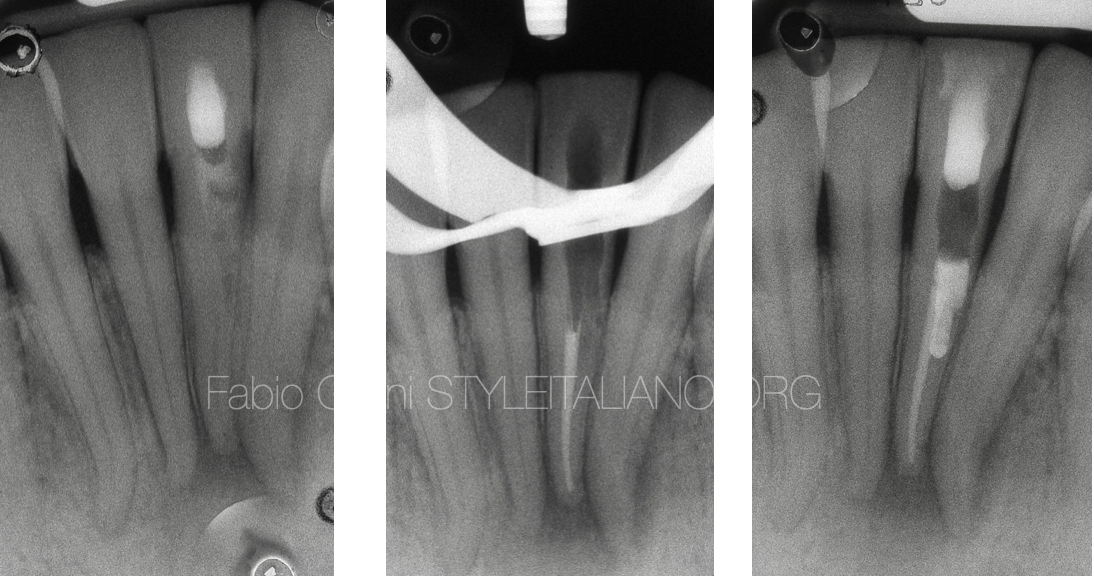
Fig. 14
Here is the radiographic aspect of the tooth before the procedure, after the root canal filling with gutta percha and after the sealing of the perforation with White MTA.
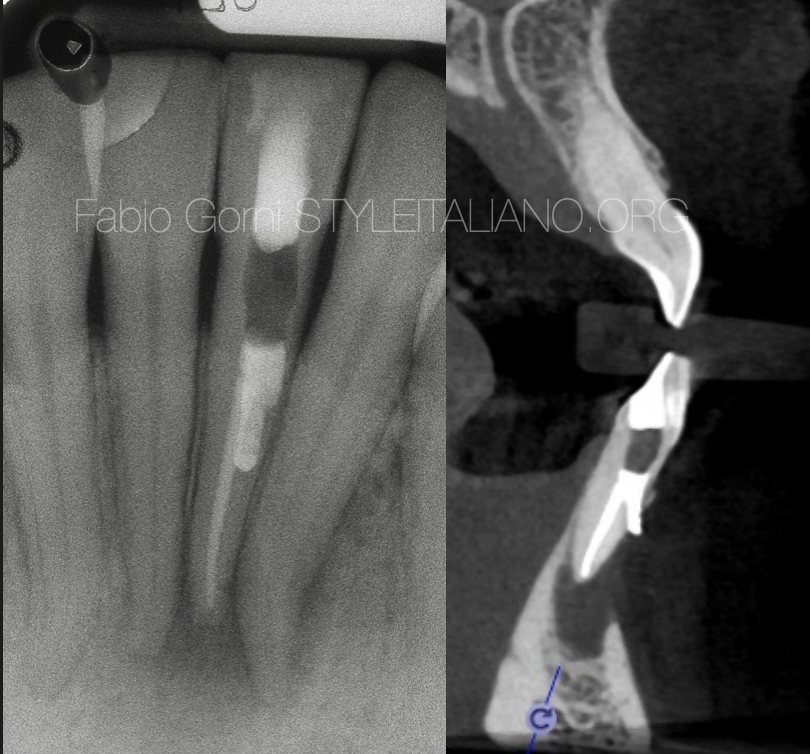
Fig. 15
The post operative CBT confirmed the goodness of the seal. The patient was sent back to the referring dentist for the restoration.
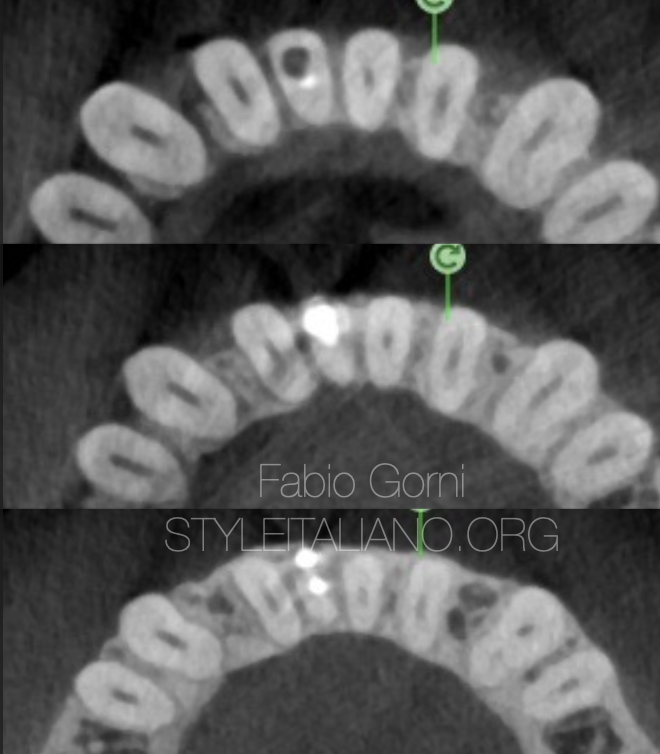
Fig. 16
CBCT scans showing the perforation sealed
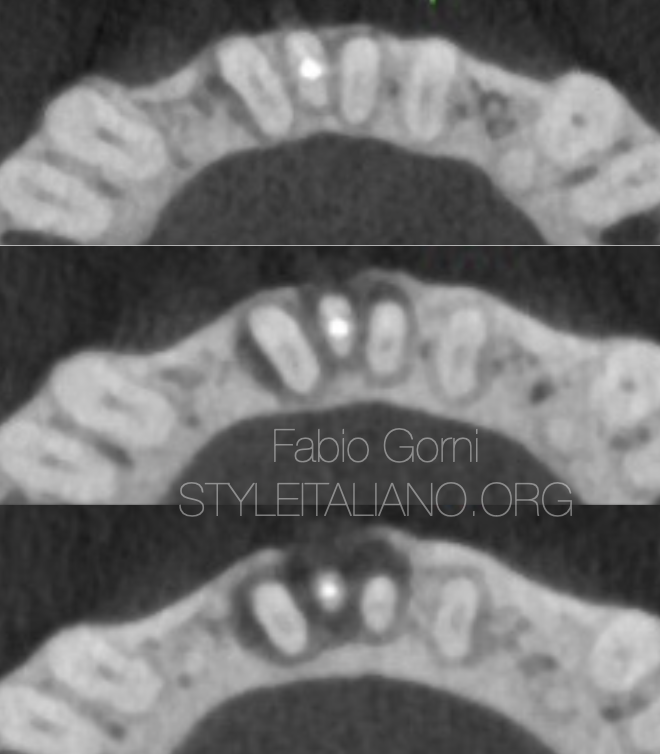
Fig. 17
CBCT scans showing the apical seal obtained with gutta percha.
Conclusions
Using a dedicated carrier like MAP System (Produits Dentaires SA) helps effortlessly positioning MTA precisely where needed, improving the workflow in perforation repair.
Bibliography
Giovarruscio M, Tonini R, Zavattini A, Foschi F. Reparative procedures for endodontic perforations: towards a standardised approach. ENDO EPT. 2020;14(3):217-28.
Clauder T, Shin S-J. Repair of perforations with MTA: clinical applications and mechanisms of action. Endo Topics. 2006;15:32-55.
de Chevigny C, Dao TT, Basrani BR, Marquis V, Farzaneh M, Abitbol S, et al. Treatment outcome in endodontics: the Toronto study--phases 3 and 4: orthograde retreatment. J Endod. 2008;34(2):131-7.
Fuss Z, Trope M. Root perforations: classification and treatment choices based on prognostic factors. Endodontics & dental traumatology. 1996;12:255–64.