Nonvital tooth bleaching and composite restorations
06/02/2017
The Community
Warning: Undefined variable $post in /home/styleendo/htdocs/styleitaliano-endodontics.org/wp-content/plugins/oxygen/component-framework/components/classes/code-block.class.php(133) : eval()'d code on line 2
Warning: Attempt to read property "ID" on null in /home/styleendo/htdocs/styleitaliano-endodontics.org/wp-content/plugins/oxygen/component-framework/components/classes/code-block.class.php(133) : eval()'d code on line 2
The restoration of endodontically treated anterior teeth presents several different mechanical and esthetic challenges. Before choosing the best treatment solution, several aspects have to be considered, such as:
Patient age and esthetic demands vs. conservative treatment
Functional loads, type of occlusion
Remaining tooth structure influencing biomechanical resistance
Presence or absence of periodontal and periapical pathology.
We have to balance these determinants by choosing direct or indirect restorations with or without post placement.
A further factor complicating the clinicians life is the possible discoloration of endodontically treated teeth, what is commonly discussed in the literature. A conservative and commonly used treatment option in these cases is nonvital internal bleaching, however the long term success of this treatment modality is inferior compared to other everyday procedures, and relapse occurs frequently. In my clinical experience, the most common reasons for failure or relapse are insufficient radicular and coronal seal, and inadequate bleaching procedures. This means most of the time that the bleaching material was not applied long enough.
In the following case presentation, a conservative treatment of endodontically treated incisor is presented, pointing out difficulties, sequence and treatment decisions.
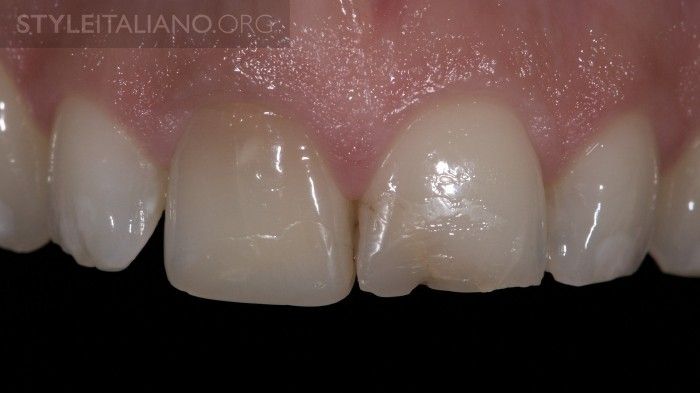
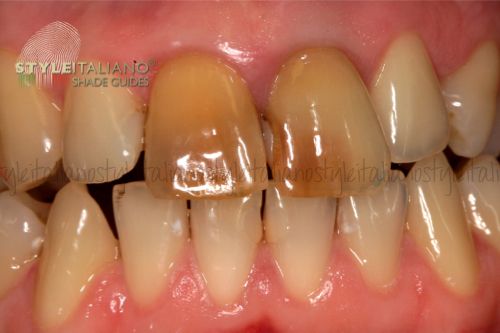
Fig. 1
Initial situation. Patient presented with esthetically insufficient direct restorations on both upper central incisors, discolored and root canal filled right central incisor, due to a previous trauma. Different treatment options were discussed with the patient, who preferred a conservative treatment option. The initial plan was to bleach the right central with the walking bleach technique, and replace the composite restorations .
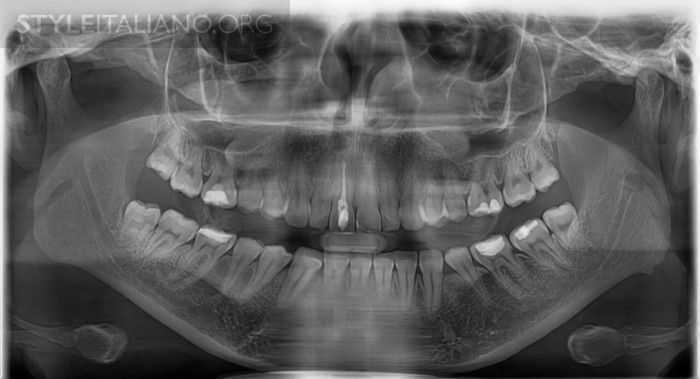
Fig. 2
During the initial examination, an OPG was made to have a general overwiev of the situation. Looking at tooth 11, the root filling seems to be correct and no periapical pathology is visible. Furthermore, we can see a very large coronal access cavity, partially filled by guttapercha, what can presumably cause the coronal discoloration.
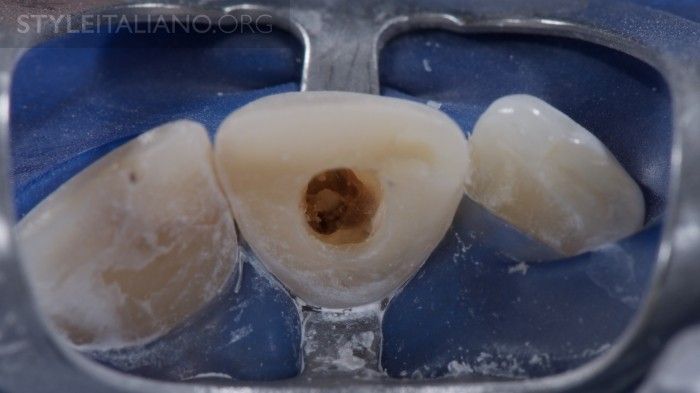
Fig. 3
At the first appointment, the coronal restoration was removed from tooth no. 11 to prepare the space for the internal bleaching. Tip: Make sure that all composite material is removed from the pulp chamber, what could otherwise inhibit proper penetration of bleaching material to the dentin. Upon visual inspection, the apical part of the pulp chamber was filled with guttapercha, the root canal filling was done with single cone technique, and the rest of the canal was full of softened sealer material. Therefore I decided to proceed with root canal retreatment prior to further treatment. As there was no visible periapical pathology present, the new root canal filling was done straight after shaping and desinfection of the canal.
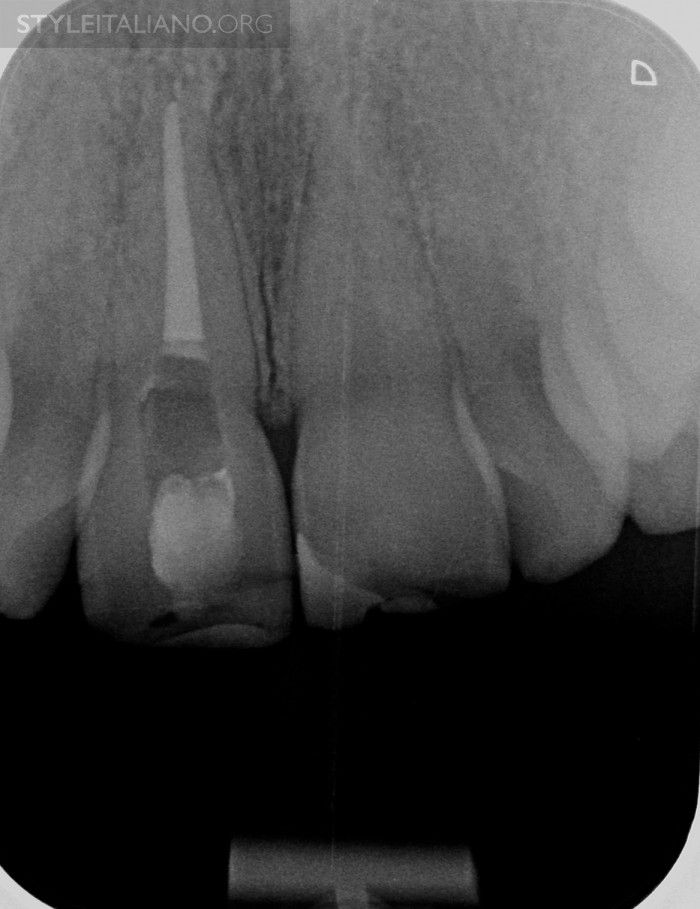
Fig. 4
The canal was shaped with reciprocating instruments, and filled with warm guttapercha and vertical condensation technique. At the same visit, a rmGIC (Fuji II LC, GC) barrier was placed 1.5 mm apically from the mid-facial FGM to prevent apical penetration of the bleaching material and minimize the possibility of internal resorption. Internal bleaching gel (Opalescence Endo, Ultradent) was placed in the pulp chamber and a rmGIC temporary filling was placed.
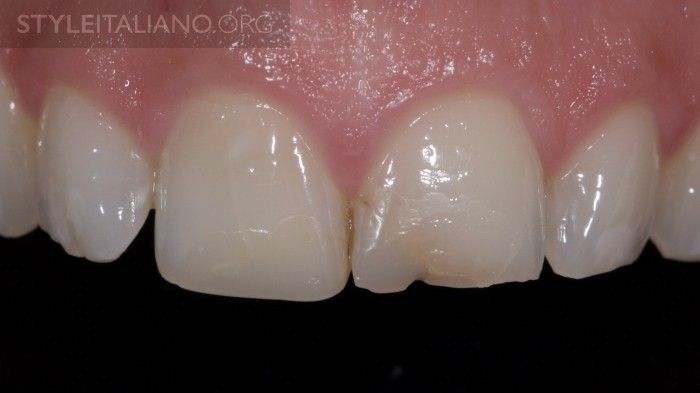
Fig. 5
The bleaching material was left in place for 5 days and replaced 2 times. After sufficient bleaching effect was achieved, 2% CHX soultion was placed in the pulp chamber for 2 weeks to prevent possible negative effects of the bleaching material on bond strength. This was the situation before replacement of composite restorations. Possible changes of tooth shape were discussed with the patient, who preferred not to change the length of the central incisors. Therefore I decided to make a silicon impression from this situation and used it as a palatal silicon index after smoothing it with diamond burs.
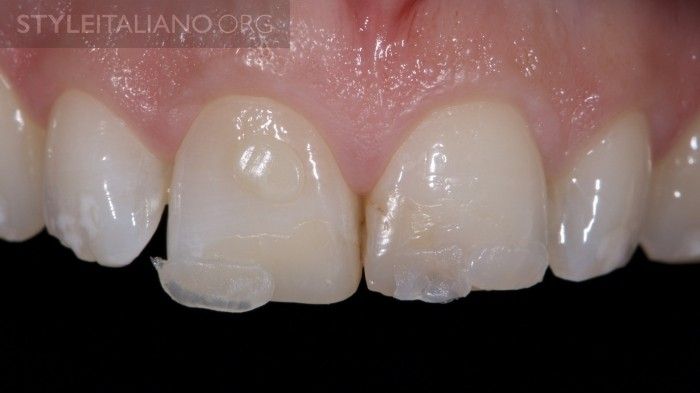
Fig. 6
Shade selection was done prior to dehydration of teeth. Small composite samples were placed on tooth surfaces, light cured and assessed.

Fig. 7
Lateral view. Note the white spots on the adjacent teeth.
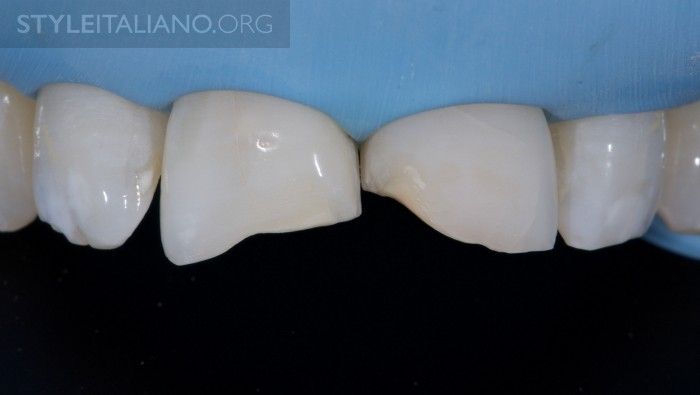
Fig. 8
After rubber dam placement, the remaining old restorations are completely removed. A palatal butt joint margin is prepared, however on the vestibular side, a 1-1.5 mm long bevel is prepared and finished. Remaining unsupported enamel prisms are removed.
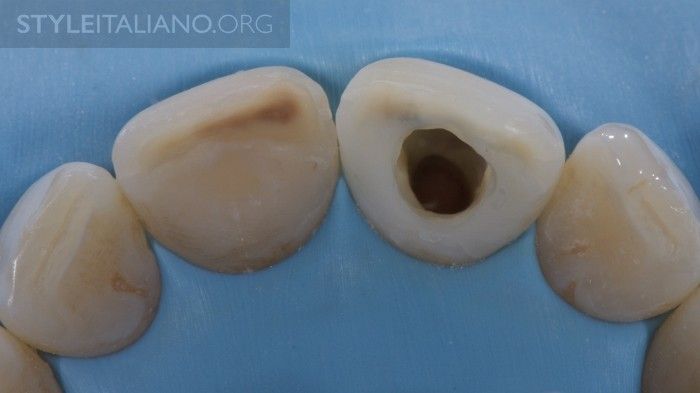
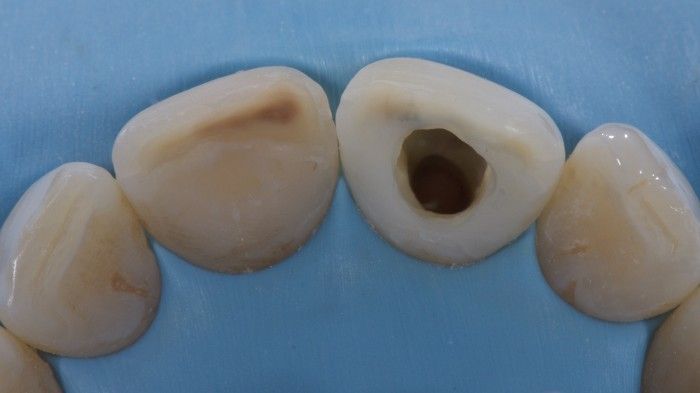
Fig. 9
Incisal view after removal of old restorations. After careful functional assessment and analysis of the remaining tooth substance, I decided not to place a fiber post. Tip: In order to have a comfortable access on the palatal part and a precise seating of the silicone index, make sure the rubber dam is perfectly invaginated arount the teeth with floss.
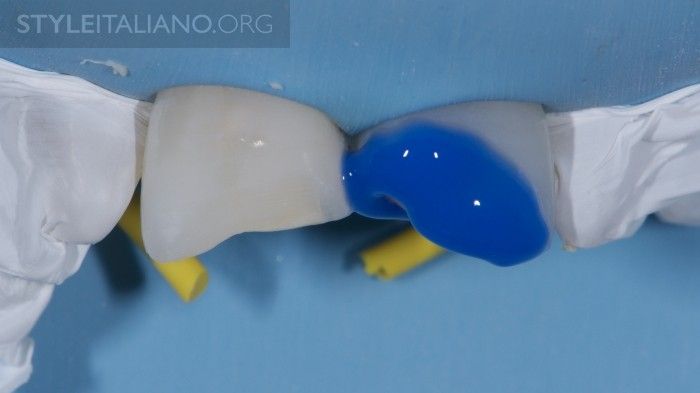
Fig. 10
Adjacent teeth are protected with teflon tape from etchant and adhesive. Enamel and dentin surfaces are etched for 30s and 15s respectively and rinsed thoroughly. Tip: Extending the etching a little beyond the prepared surface prevents discoloration or damage of restoration margins without clinically compromising the integrity of the tooth.
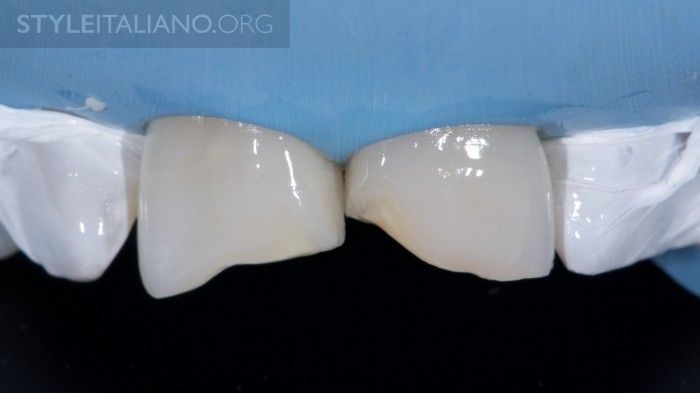
Fig. 11
A 4th generation adhesive is used (Optibond FL, Kerr).

Fig. 12
After the endodontic access cavity is filled with dentine composite, the palatal enamel layer (Essentia LE, GC) is placed with the help of the silicone index.
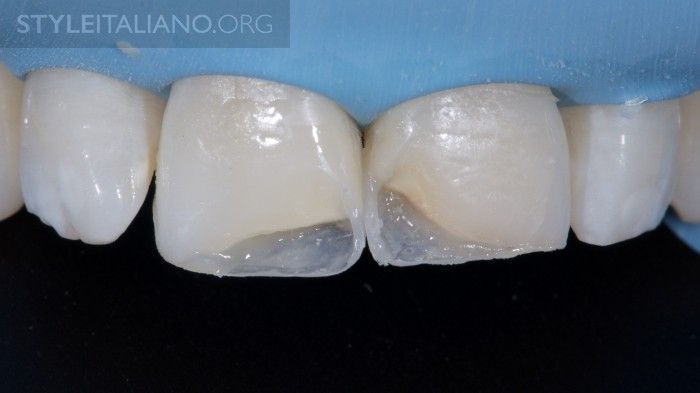
Fig. 13
Next, the interproximal enamel is placed.
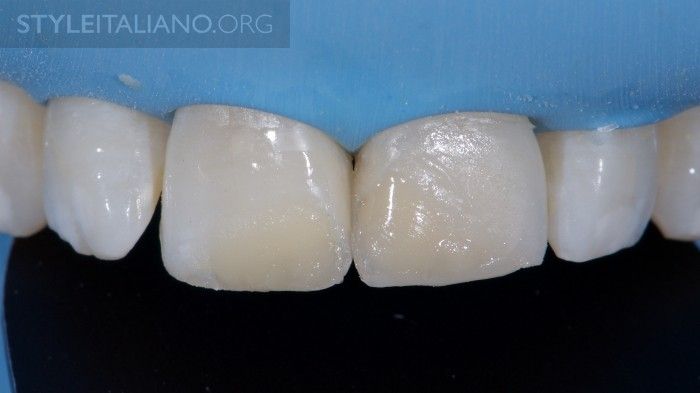
Fig. 14
The dentin composite (Essentia MD, GC) is placed in one increment due to the favourable C-factor and improved physical properties of the material. Sufficient space for enamel is controlled with the LM Arte Misura instrument. In this case, the dentin layer is extended almost to the incisal edge to imitate slight wear present in adult teeth.
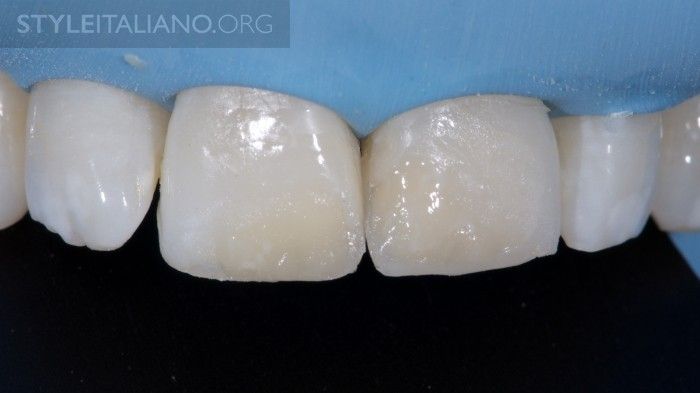
Fig. 15
Small white spot effects are imitated with tints. Composite tints have to be used wery sparingly, as they become more evident after final polishing of the restoration.
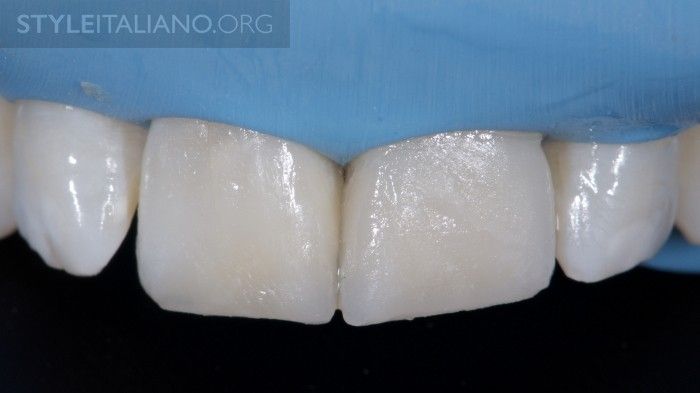
Fig. 16
Final enamel layer (Essentia LE, GC) is placed. Material is shaped with a flat brush to achieve proper facial anatomy. This way, less finishing will be needed and a more compact surface can be achieved.
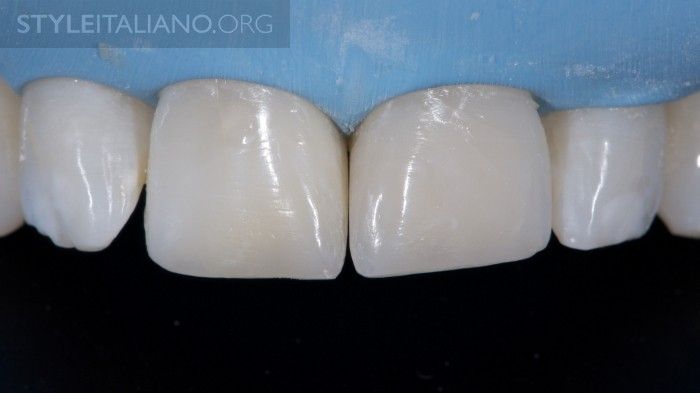
Fig. 17
The restorations are finished and polished. By creating a natural surface texture, we can hide the transition between the tooth and the restoration.
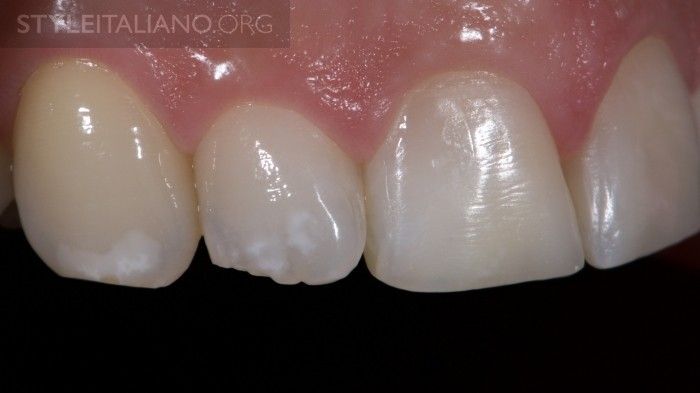
Fig. 18
Final result after rehydration of the teeth.
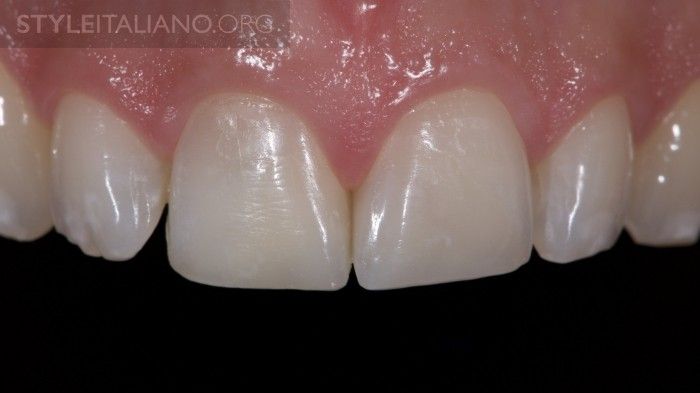
Fig. 19
Final result after rehydration of the teeth.
Conclusions
In my practice, patients with discolored endodontically treated teeth are often aiming for more invasive treatments to solve their problems, mostly due to repeated failure of direct resin restorations and internal bleaching attempts.
However the literature shows us, that by following proper indications and strict clinical protocols, these teeth can be treated succesfully with conservative direct restorations. The advantage of such treatment option in young patients is, that more invasive treatments can be delayed for later.
Bibliography
Paolone G, Saracinelli M, Devoto W, Putignano A. Esthetic direct restorations in endodontically treated anterior teeth. Eur J Esthet Dent. 2013 Spring;8(1):44-67.
Dietschi D. Nonvital bleaching: general considerations and report of two failure cases. Eur J Esthet Dent. 2006 Apr;1(1):52-61.
Uysal T, Ertas H, Sagsen B, Bulut H, Er O, Ustdal A. Can intra-coronally bleached teeth be bonded safely after antioxidant treatment? Dent Mater J. 2010 Jan;29(1):47-52.
Magne P, Belser U. (eds) Bonded Porcelain restorations in the Anterior Dentition: A Biomimetic Approach. Chicago: Quintessence Publishing, 2002
Paolone G, Orsini G, Manauta J, Devoto W, Putignano A. Composite shade guides and color matching. Int J Esthet Dent. 2014 Summer;9(2):164-82.
Devoto W, Saracinelli M, Manauta J. Composite in everyday practice: how to choose the right material and simplify application techniques in the anterior teeth. Eur J Esthet Dent. 2010 Spring;5(1):102-24.
Dietschi D, Duc O, Krejci I, Sadan A. Biomechanical considerations for the restoration of endodontically treated teeth: a systematic review of the literature, Part II (Evaluation of fatigue behavior, interfaces, and in vivo studies). Quintessence Int. 2008 Feb;39(2):117-29. Review.