Management of broken files - A clinical approach - Part 2
25/07/2020
Zaher Al-taqi
Warning: Undefined variable $post in /home/styleendo/htdocs/styleitaliano-endodontics.org/wp-content/plugins/oxygen/component-framework/components/classes/code-block.class.php(133) : eval()'d code on line 2
Warning: Attempt to read property "ID" on null in /home/styleendo/htdocs/styleitaliano-endodontics.org/wp-content/plugins/oxygen/component-framework/components/classes/code-block.class.php(133) : eval()'d code on line 2
We have discussed in the part 1 of this article how to remove broken files using ultrasonic technique (https://endodontics.styleitaliano.org/management-of-broken-files-a-clinical-approach/ ) but sometimes the ultrasonic (US) technique is useless when the broken file (BF) is LONG, ENGAGED or has a BIG MASS of METAL .
So we need another technique to hold the broken file then pull it out which is called GRASPING OR HOLDING TECHNIQUE .
TYPES OF GRASPING TECHNIQUES :
1- micro-tube technique
2- wedging-tube technique
3- loop technique
4- micro tweezers , pliers / forceps technique
WHEN TO USE THOSE TECHNIQUES ?
We have to know that there is no one device or technique to remove all broken files because we have many factors affecting the removal process. Mainly, these techniques are suggested with such kind of cases :
1-When the BF is long (more than 4.5 mm).
2-With very well or fully engaged BF to canal walls.
3-When the coronal portion of the BF is located at the coronal third of the canal or at the middle third.
4-With wide or large cross section broken files ( Big metal mass ) , usually with 4 and 6% taper files when more than 7-9 mm is separated .
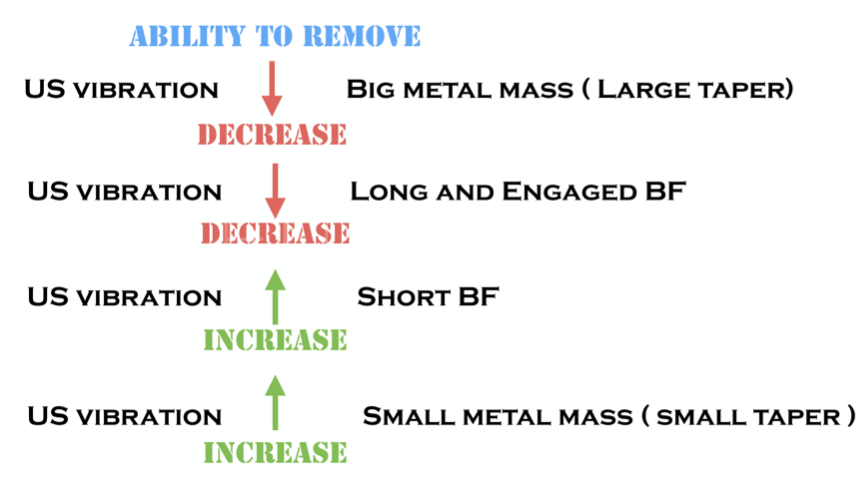
Fig. 1
Vibration ability of ultrasonics to remove broken files
 : eval()'d code</b> on line <b>11</b><br />
)
Fig. 2
GENERAL CONCEPT AND STEPS OF GRASPING TECHNIQUE :
1- Radiographic evaluation ( instrument location, length , curvature ).
2- Instrument Exposure ( straight line access to the instrument with GG.2 ,3 without modification to preserve more tooth structure , or with large size rotary files until the instrument become visible under the microscope )
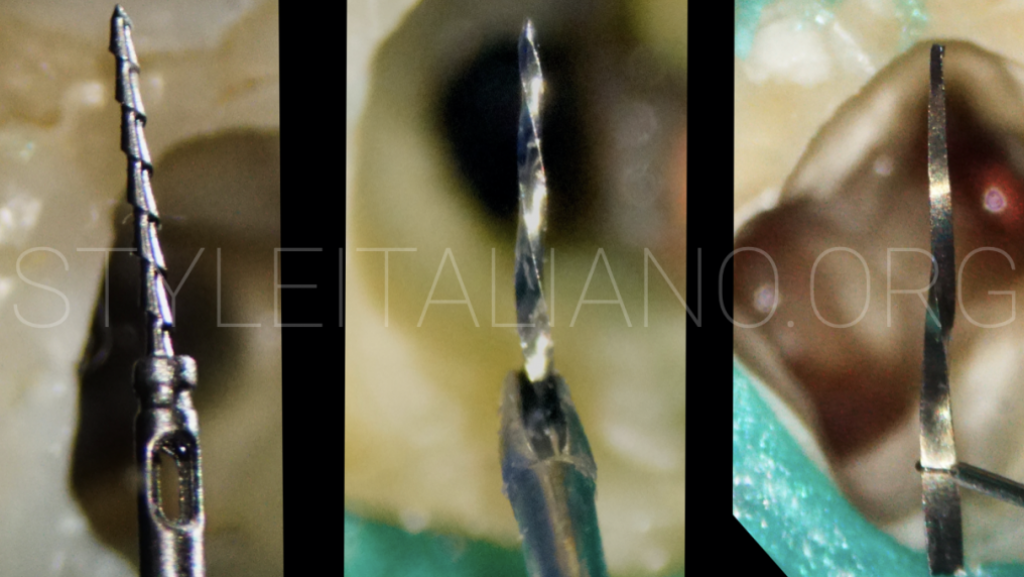
3- Thin ultrasonic tips should be used to expose 1-2 mm of the coronal part of the fractured instrument , or we can use the special trephine bur to drill and expose 1-2mm BUT it will remove more dentine structure .
4- Instrument grasping : place the micro tube , extractor (wedging tube), or the loop devices over the exposed 1-2 mm of the instrument , activate the device to engage the coronal part firmly and ten pull out .
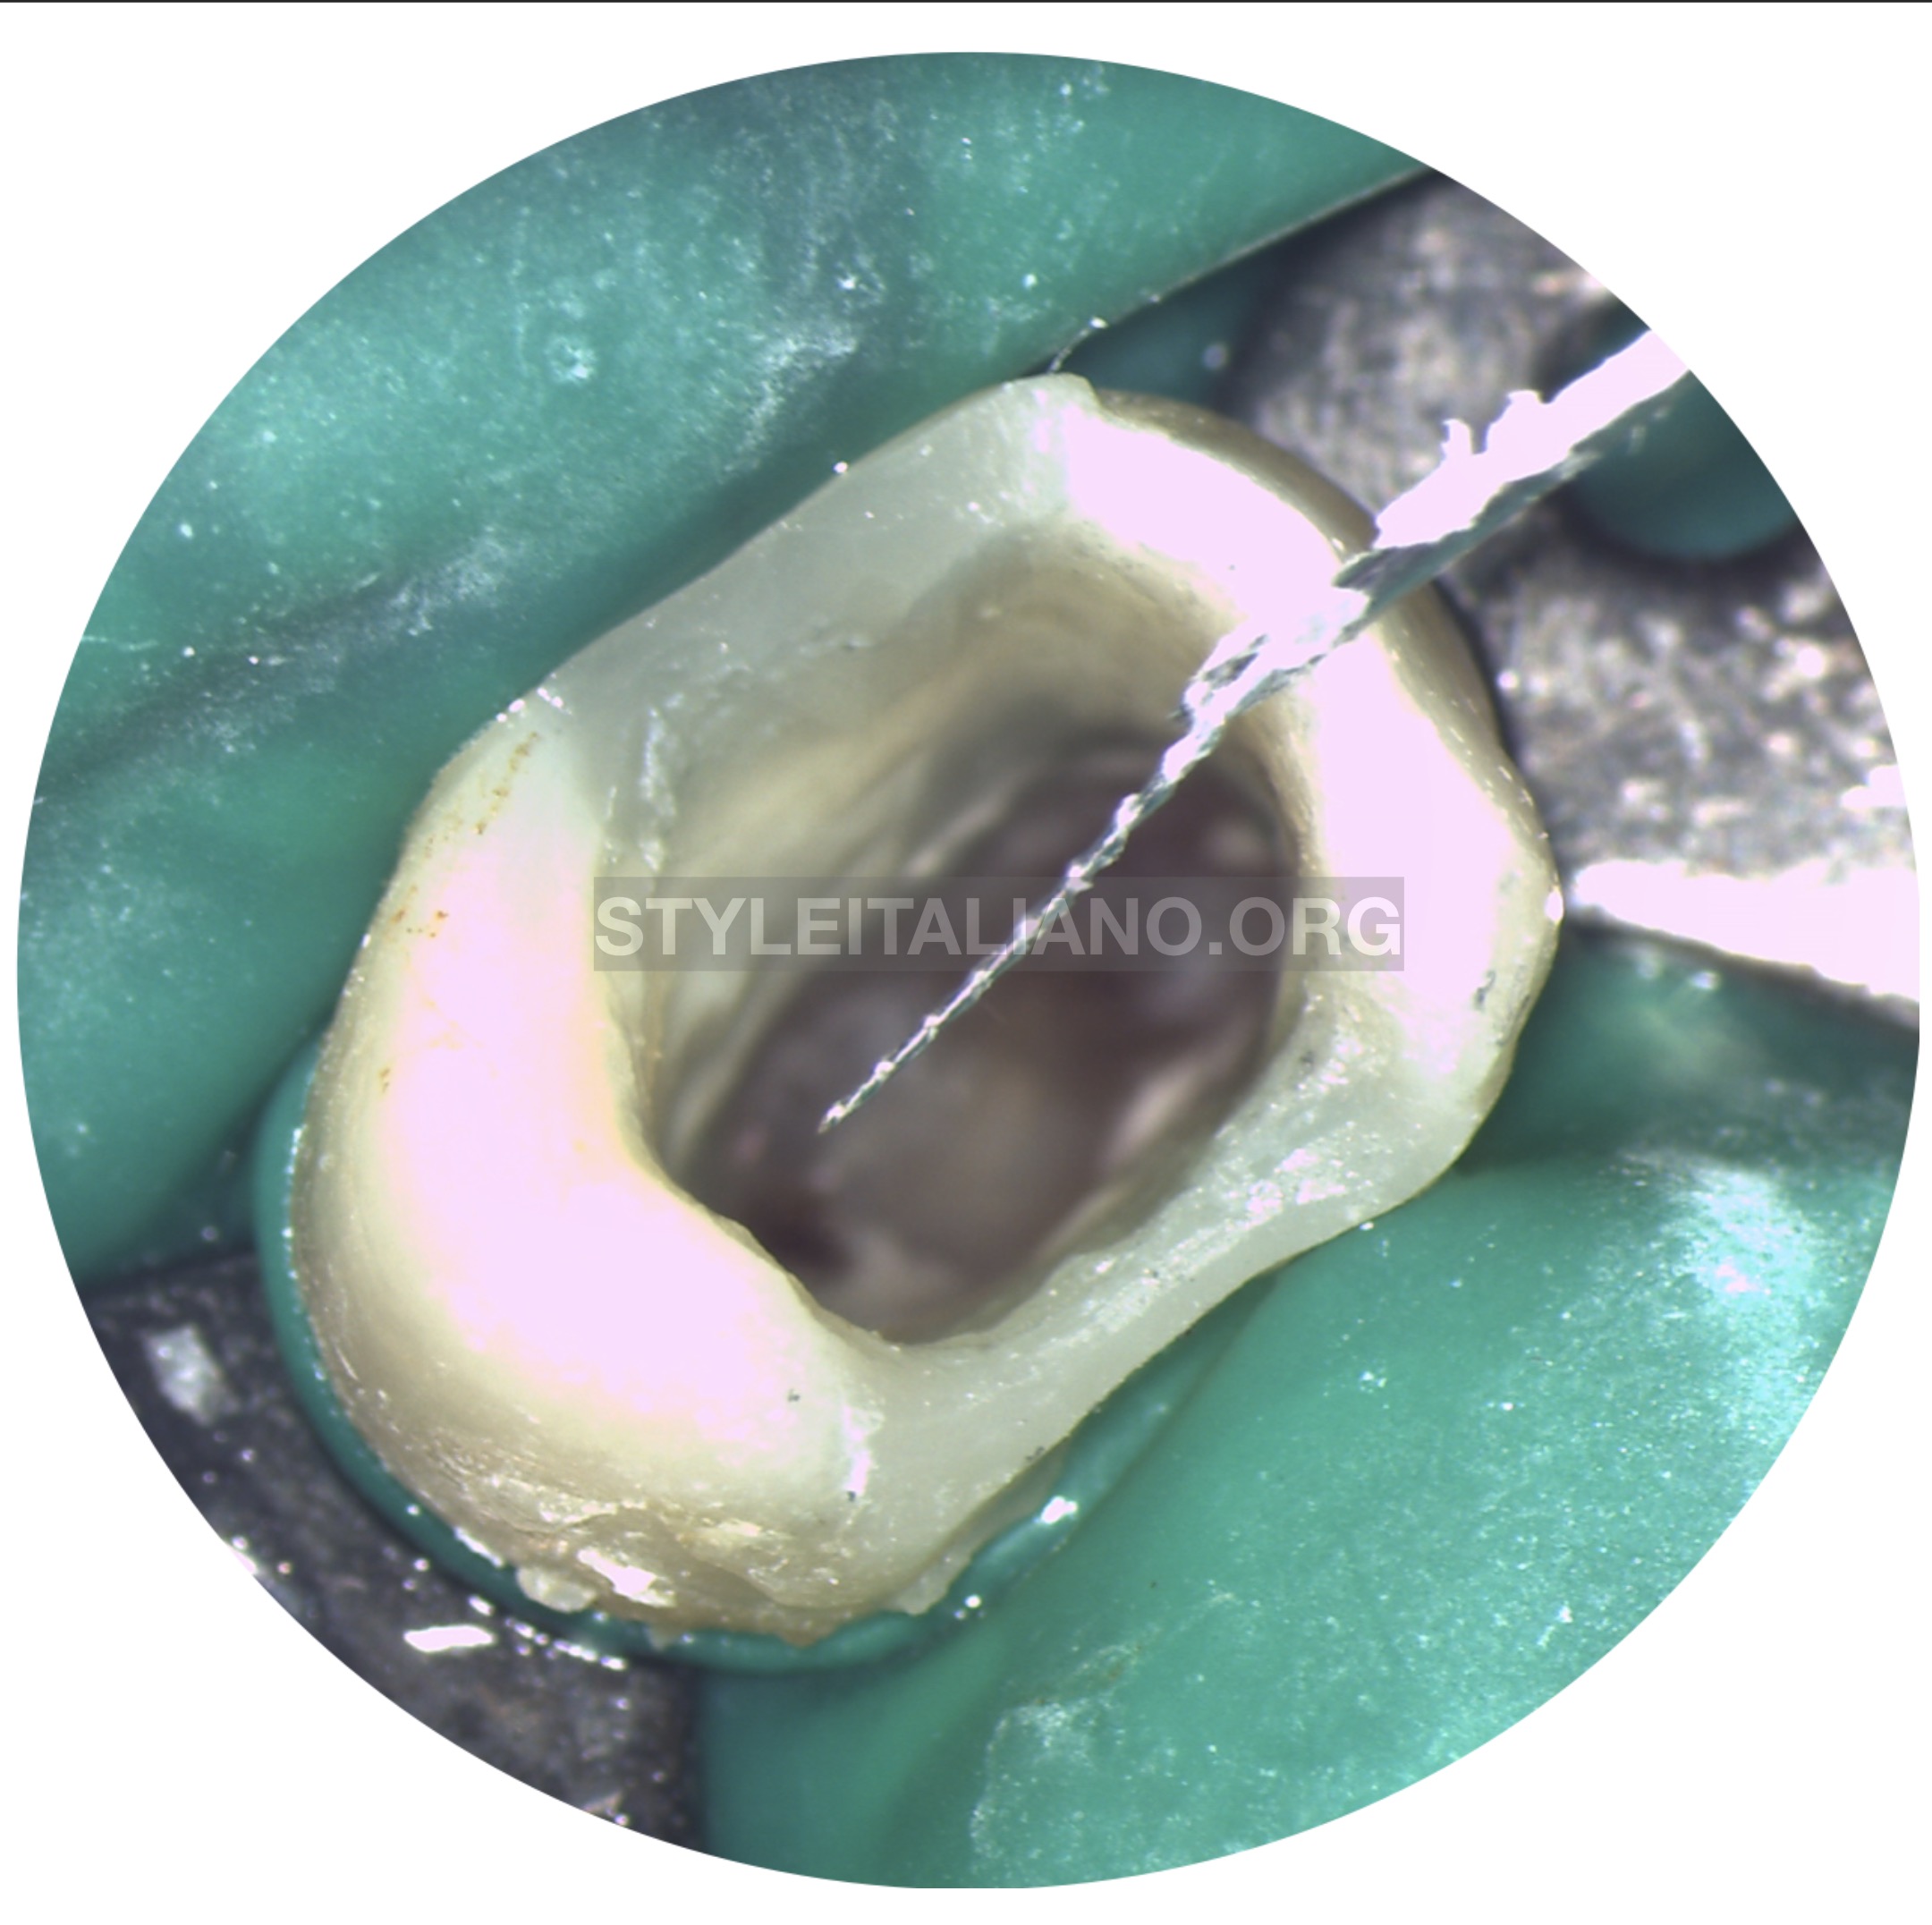
Fig. 3
Microtube Technique : it depends on using a tube ( ex: flowable composite tip ) to engage the already exposed 1-2 mm of the BF by ultrasonics or trephine burs , then injecting dual cure resin cement or super glue(cyanoacrylate glue) inside the tube and wait for 3-5 minutes then pull it out . The broken file should came out attached to the tube. Read the following article by João Meirinhos for more information.
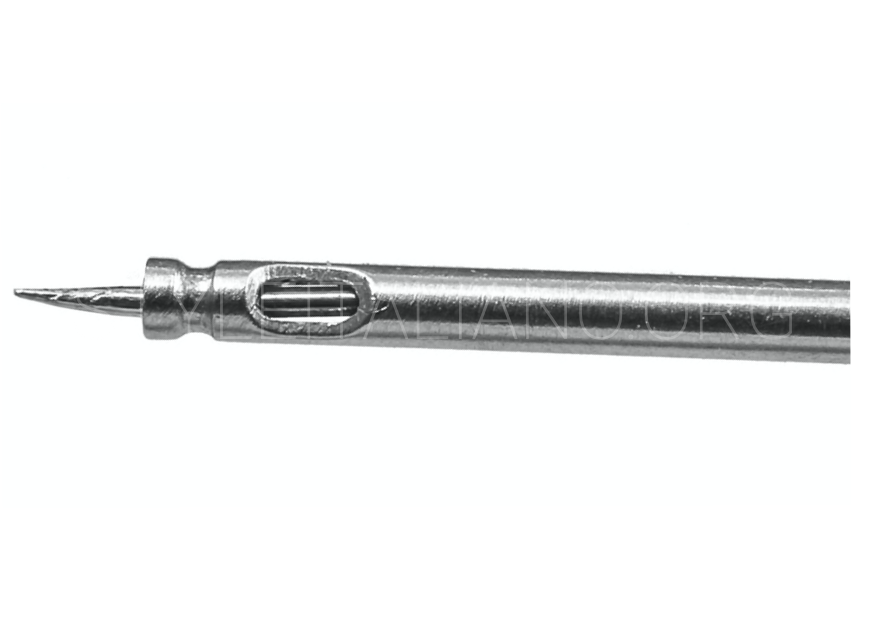
Fig. 4
Wedging tube technique:
The same concept of micro tube but the difference here is that there is no need for a cement or glue because the tube (extractor) contains a metal wedge inside it that will fit in the space between the BF and the tube wall , So the wedge will engage the BF allowing to pull it out .
This technique works well with :
1- HIGH canal engagement broken files
2- long and large taper broken files
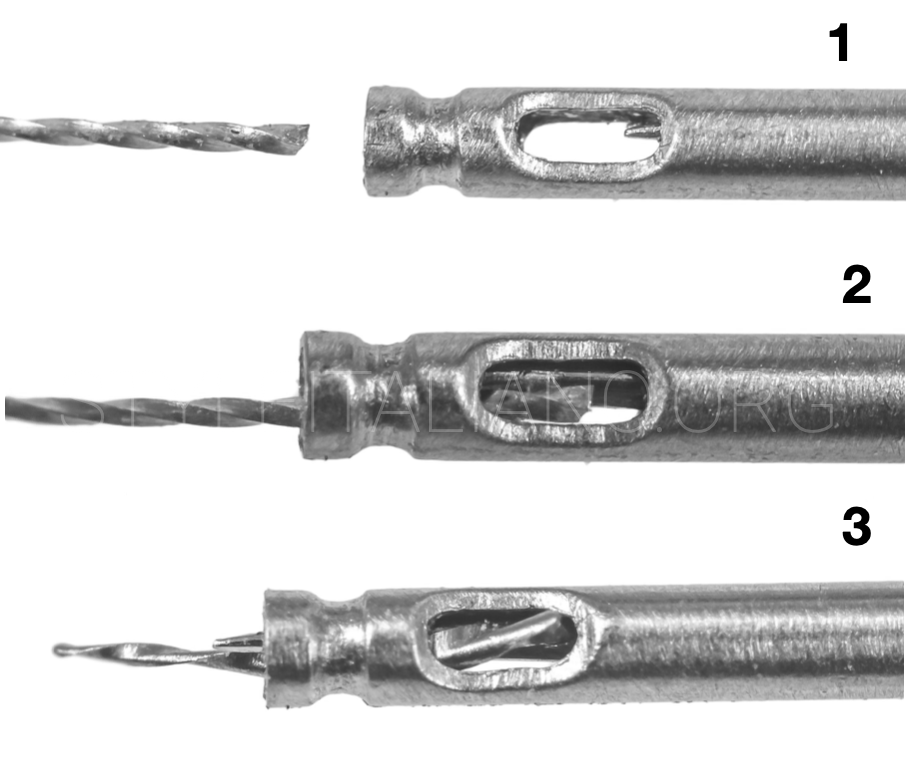
Fig. 5
WEDGING TUBE :
1- The tube is placed over the exposed BF
2- activate the metal wedge
3- hold and pull out .
The concept of wedging tube
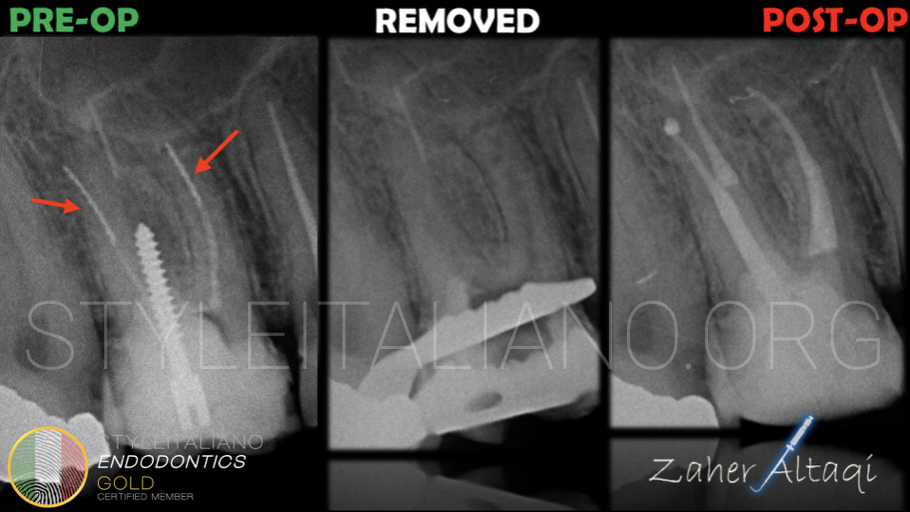
Fig. 6
The tooth 1.6 had 2 broken files in MB and DB. The long and well engaged H files couldn't respond to US vibration, so they were removed using wedging tube technique
The video shows how the files were removed with the wedging tube technique
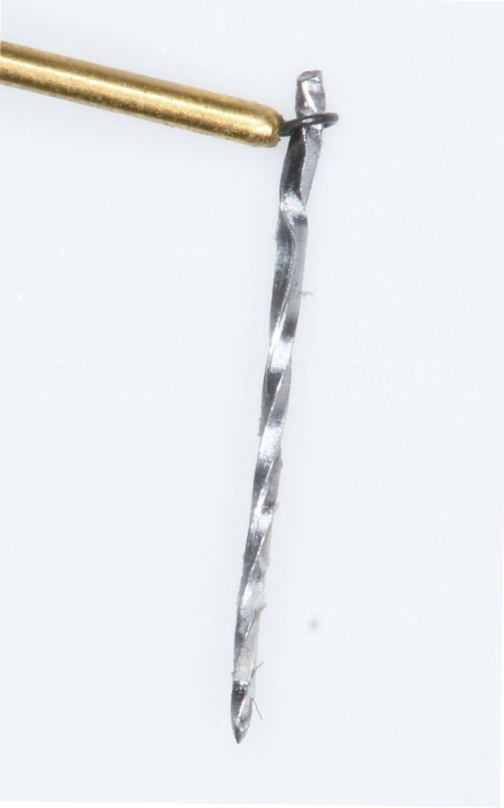
Fig. 7
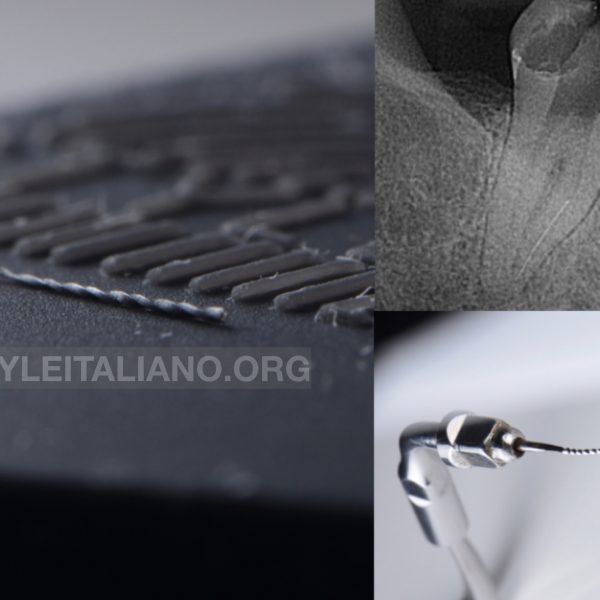
Loop technique:
The concept here is a little bit different than the previous techniques and more conservative because we don't need to insert the extractor or the tube but we can insert a needle with small sizes ( 0,5 , 0,4 , 0,3 ) which is really small compared to the size of the extractors . Inside those needles we have the wire loop also with small sizes equivalent to the needle size . The loop should circle the exposed 0.7-1mm of the BF then tighten the loop to pull out the BF . The difference nowadays is in the size and material of the loop which allow us to be more conservative and effective in removing medium to slightly high engaged broken files .
This technique works well with :
1- MEDIUM canal engagement broken files
2- long broken files more than 4,5 mm
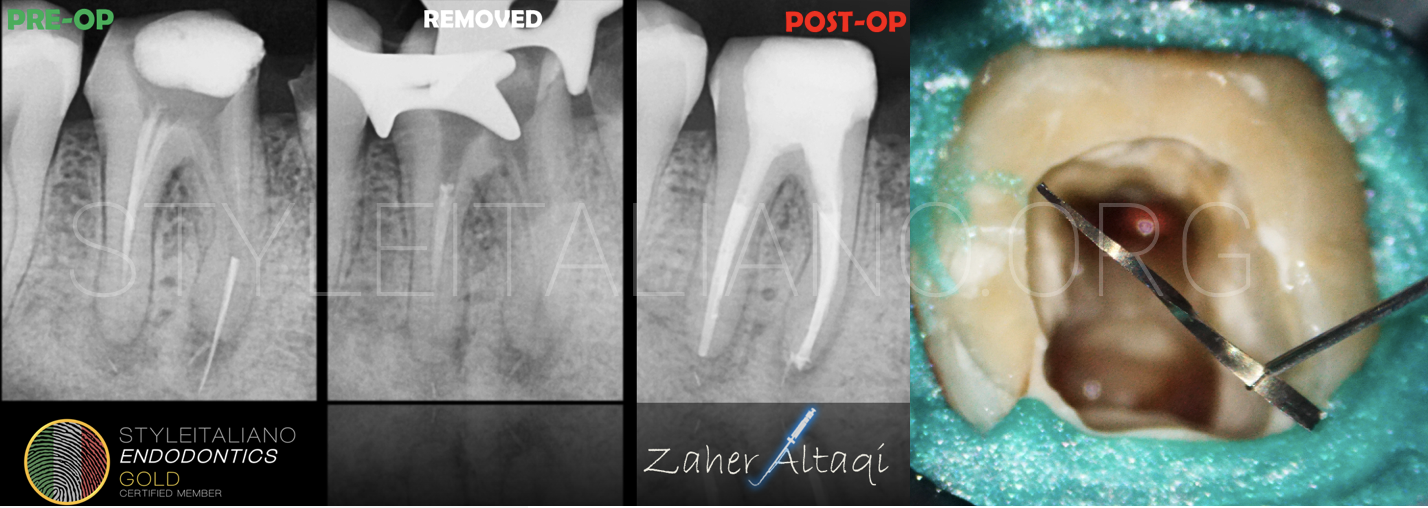
Fig. 8
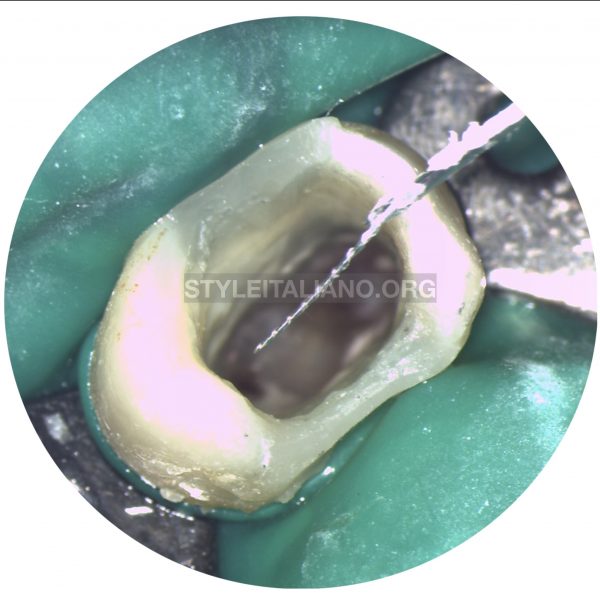
The lower 1st molar had a long and extruded broken file outside the apex: the file was removed using loop technique .
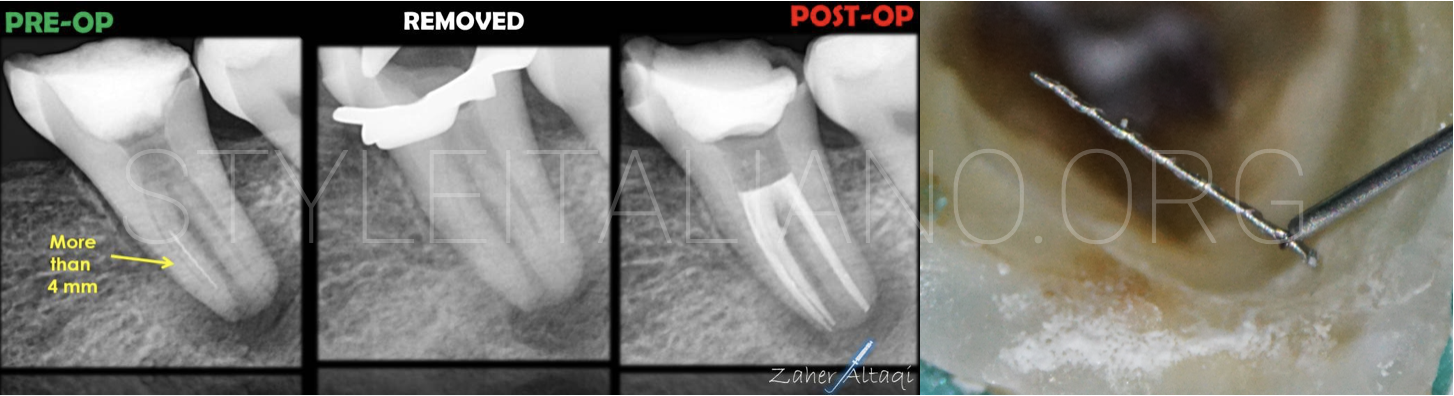
Fig. 9
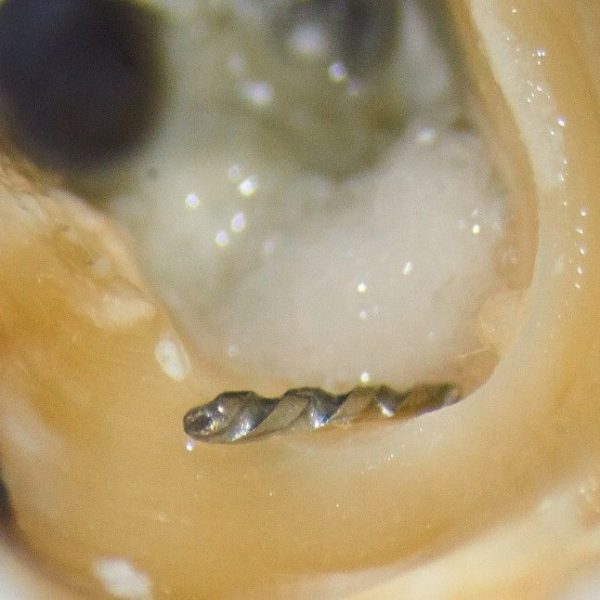
A lower 2nd molar presented a broken H-file (more than 4mm) , well engaged to the canal walls. First of all the coronal 1-2 mm of the BF were exposed, then inserting the loop was inserted and closed. Last, the tube was pulled out together with the file.
The video shows how the file was removed with the loop technique

Fig. 10
Micro tweezers, pliers/forceps technique:
This technique uses the same concept of holding the broken file to pull it out, but we need to loosen the file with ultrasonic before using it. This is valid especially with the micro tweezer, where it is necessary exposing 1-2 mm of the BF, then inserting the tweezer to catch the file and remove it .
This technique works well with :
1- MEDIUM to LOW canal engagement broken files
2- long broken files more than 4,5 mm
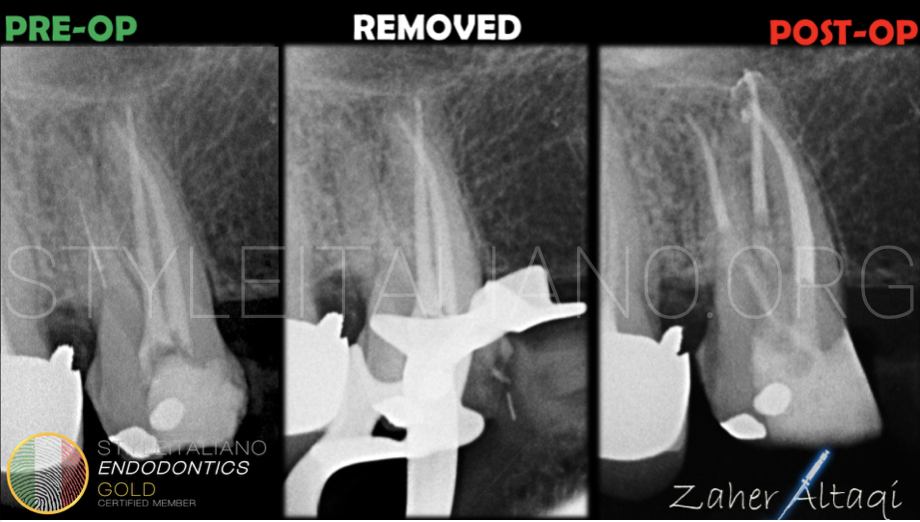
Fig. 11
This upper 1st molar shows 2 broken files in the DB canal, with previous attempts failed to remove it . Unfortunately the coronal third of the canal was already sacrificed. The two BF were removed with help of ultrasonics and MIRCO TWEEZERS technique.
Broken file removal with micro tweezers technique
Conclusions
The most contributory factors to endodontic instrument fracture removal are related to operator’s clinical capacity and skills and can be increased by proper training and extensive ex vivo practice prior to clinical application.
Nowadays, the procedure of broken files removal become easier, conservative and more predictable, thanks to the technology and devices improvement over the time, especially in the sizes and materials of the extractors and loop wires. At the end of this article, always think and imagine that this procedure is easy and you will do it .
Bibliography
1-Lambrianidis, Theodor. (2018). Management of Fractured Endodontic Instruments: A Clinical Guide. 10.1007/978-3-319-60651-4.
2-Suter B, Lussi A, Sequeira P. Probability of removing fractured instruments from root canals. Int Endod J 2005; 38: 112123.
3- Ward JR, Parashos P, Messer HH. Evaluation of an ultrasonic technique to remove fractured rotary nickel-titanium endodontic instruments from root canals: clinical cases. J Endod. 2003b;29(11):764–7
4- Shahabinejad H, Ghassemi A, Pishbin L, Shahravan A. Success of ultrasonic technique in removing fractured rotary nickel-titanium endodontic instruments from root canals and its effect on the required force for root fracture. J Endod. 2013;39(6):824–8.