Blue under the bridge
19/06/2023
Francesca Cerutti
Warning: Undefined variable $post in /home/styleendo/htdocs/styleitaliano-endodontics.org/wp-content/plugins/oxygen/component-framework/components/classes/code-block.class.php(133) : eval()'d code on line 2
Warning: Attempt to read property "ID" on null in /home/styleendo/htdocs/styleitaliano-endodontics.org/wp-content/plugins/oxygen/component-framework/components/classes/code-block.class.php(133) : eval()'d code on line 2
Non surgical endodontic treatment of teeth with prosthodontic works can present some difficulty mainly due to the necessity to disassemble the existing restoration and to the loss of the anatomic references that guide the clinician to find the root canal openings.
When getting ready to treat a crowned tooth, the clinician must read carefully the pre operative X-ray in order to find out pre-operatively the difficulties that one will be facing during the root canal treatment.
In case of an initial treatment, it will be necessary to choose if keeping the crown or removing it: the thing to be considered is essentially the goodness of the coronal seal and how long before has the crown been made. Once gained access to the tooth, the hardest part will be to find the root canals.
In case of retreatment, the choice will be first of all between non surgical and surgical approach: in case of a lesion in a tooth with a good root canal therapy (or a hardly improvable root canal therapy) and with a good restoration, endodontic microsurgery will be the preferable choice. In case of poor coronal restoration and poor endodontic treatment, non surgical retreatment will be the first option.
A long list of aspects to be considered in the decision making process has been investigated in previously published articles and will not be discussed here.
This case report will show an initial treatment on the second premolar and on the second molar of a patient with a fixed partial prosthesis.
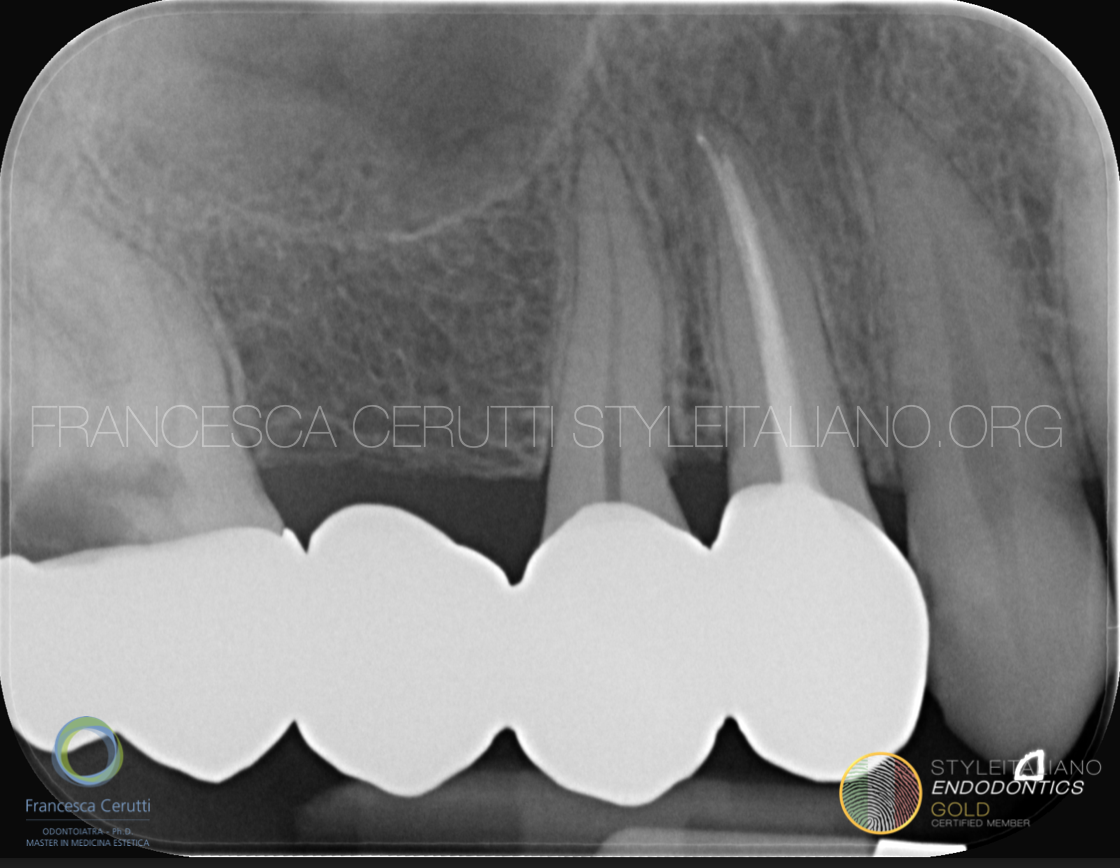
Fig. 1
A young woman was referred to me by a colleague asking to do the endodontic treatment of toot 1.5 and 1.7. The patient was in pain and the pre operative x-ray showed a large decay on the 1.7.
Surprisingly, the tooth responsible for most of her pain was tooth number 1.5, which had an irreversible pulpitis.
In this case, since the treatment could not be postponed and the bridge obviously did not fit properly, my choice was to remove it.
Due to the large decay, it was a quick procedure: I was able to remove the bridge without damaging it and I used it as a provisional restoration in the time needed by the dental technician to make a provisional resin partial prosthesis.
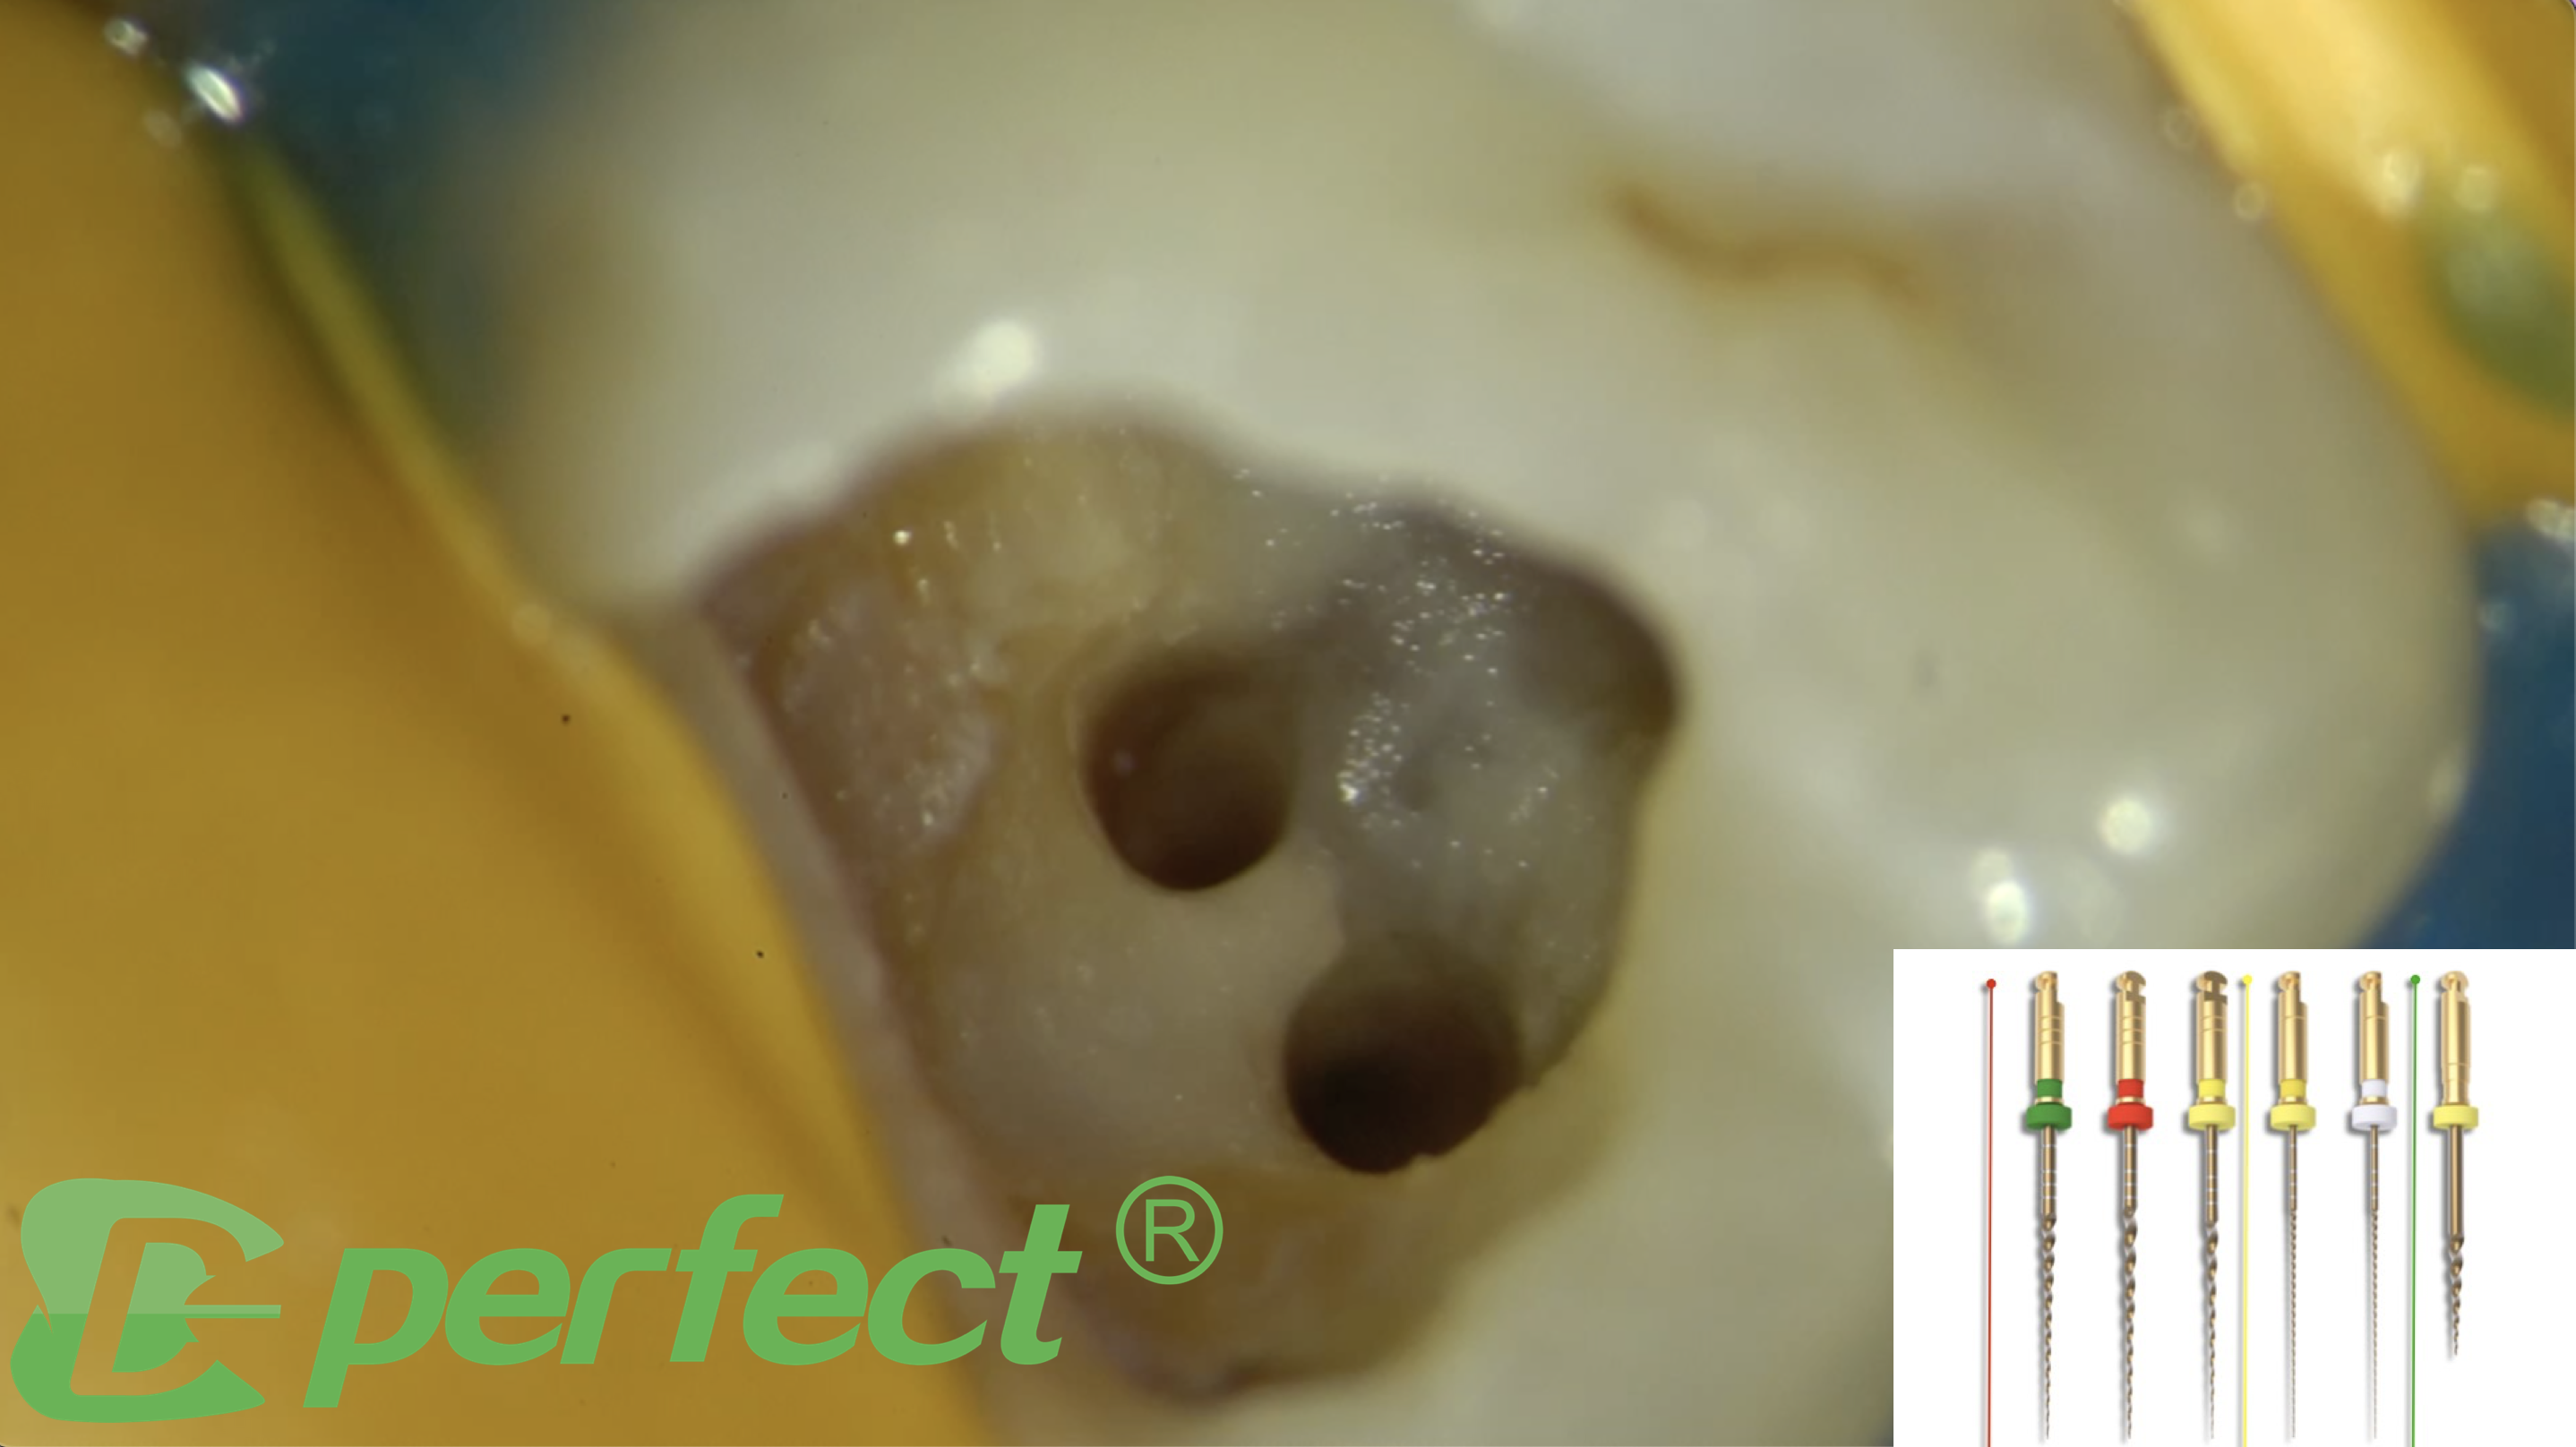
The access cavity was done following at first the decay present on the occlusal surface of the tooth. The outline of the cavity was designed, always checking the inclination of the tooth and of the bur in order to avoid mishaps.
Once the root of the pulp chamber was reached, an ultrasonic diamond-coated tip was used to do the finishing of the access cavity and to find the root canal openings.
Since the mouth opening of the patient was small and I wanted to keep my shaping as conservative as possible, I chose the MG3 Blue sequence by Perfect Endo.
These are martensitic files, heat treated, with a controlled memory and a high resistance to cyclic fatigue.
I did not use the orifice opener, SV, because I had enlarged the root canal opening with US tips.
The first file of the sequence is a glider, called PX, whose tip diameter is .15 and the taper is .03. The cross section is parallelogram, in order to reduce torsional load and to allow the debris go outside the root canal.
It has to be used at 300-350 rpm with a torque of 2 N*cm.
First I used PX into the root canal to create my glide path. Since I found some resistance I decided not to try immediately to reach the apex, but to adapt a step-down approach.
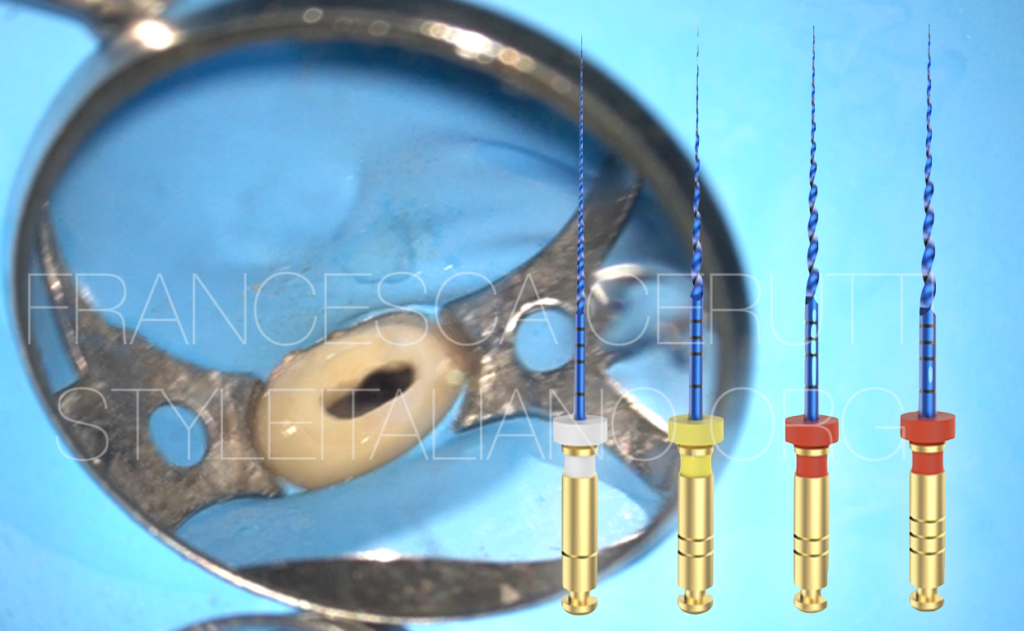
The second instrument of the MG3 blue kit is a shaper called G1, 20/.04, with a triangular cross section. The blue alloy and the heat treatment make it extremely flexible and avoid restoring forces that could bring to the transportation of the root canal. The cross section allows it to have a good cutting efficiency.
The settings are 300-350 rpm and 2 N*cm torque.
The finishers, called G2, are .25 in tip and can be found in .04 or .06 taper. The choice of the instrument will depend on the original anatomy of the root canal.
The alloy is always the same, so the instruments maintain a good cutting efficiency despite being extremely flexible.
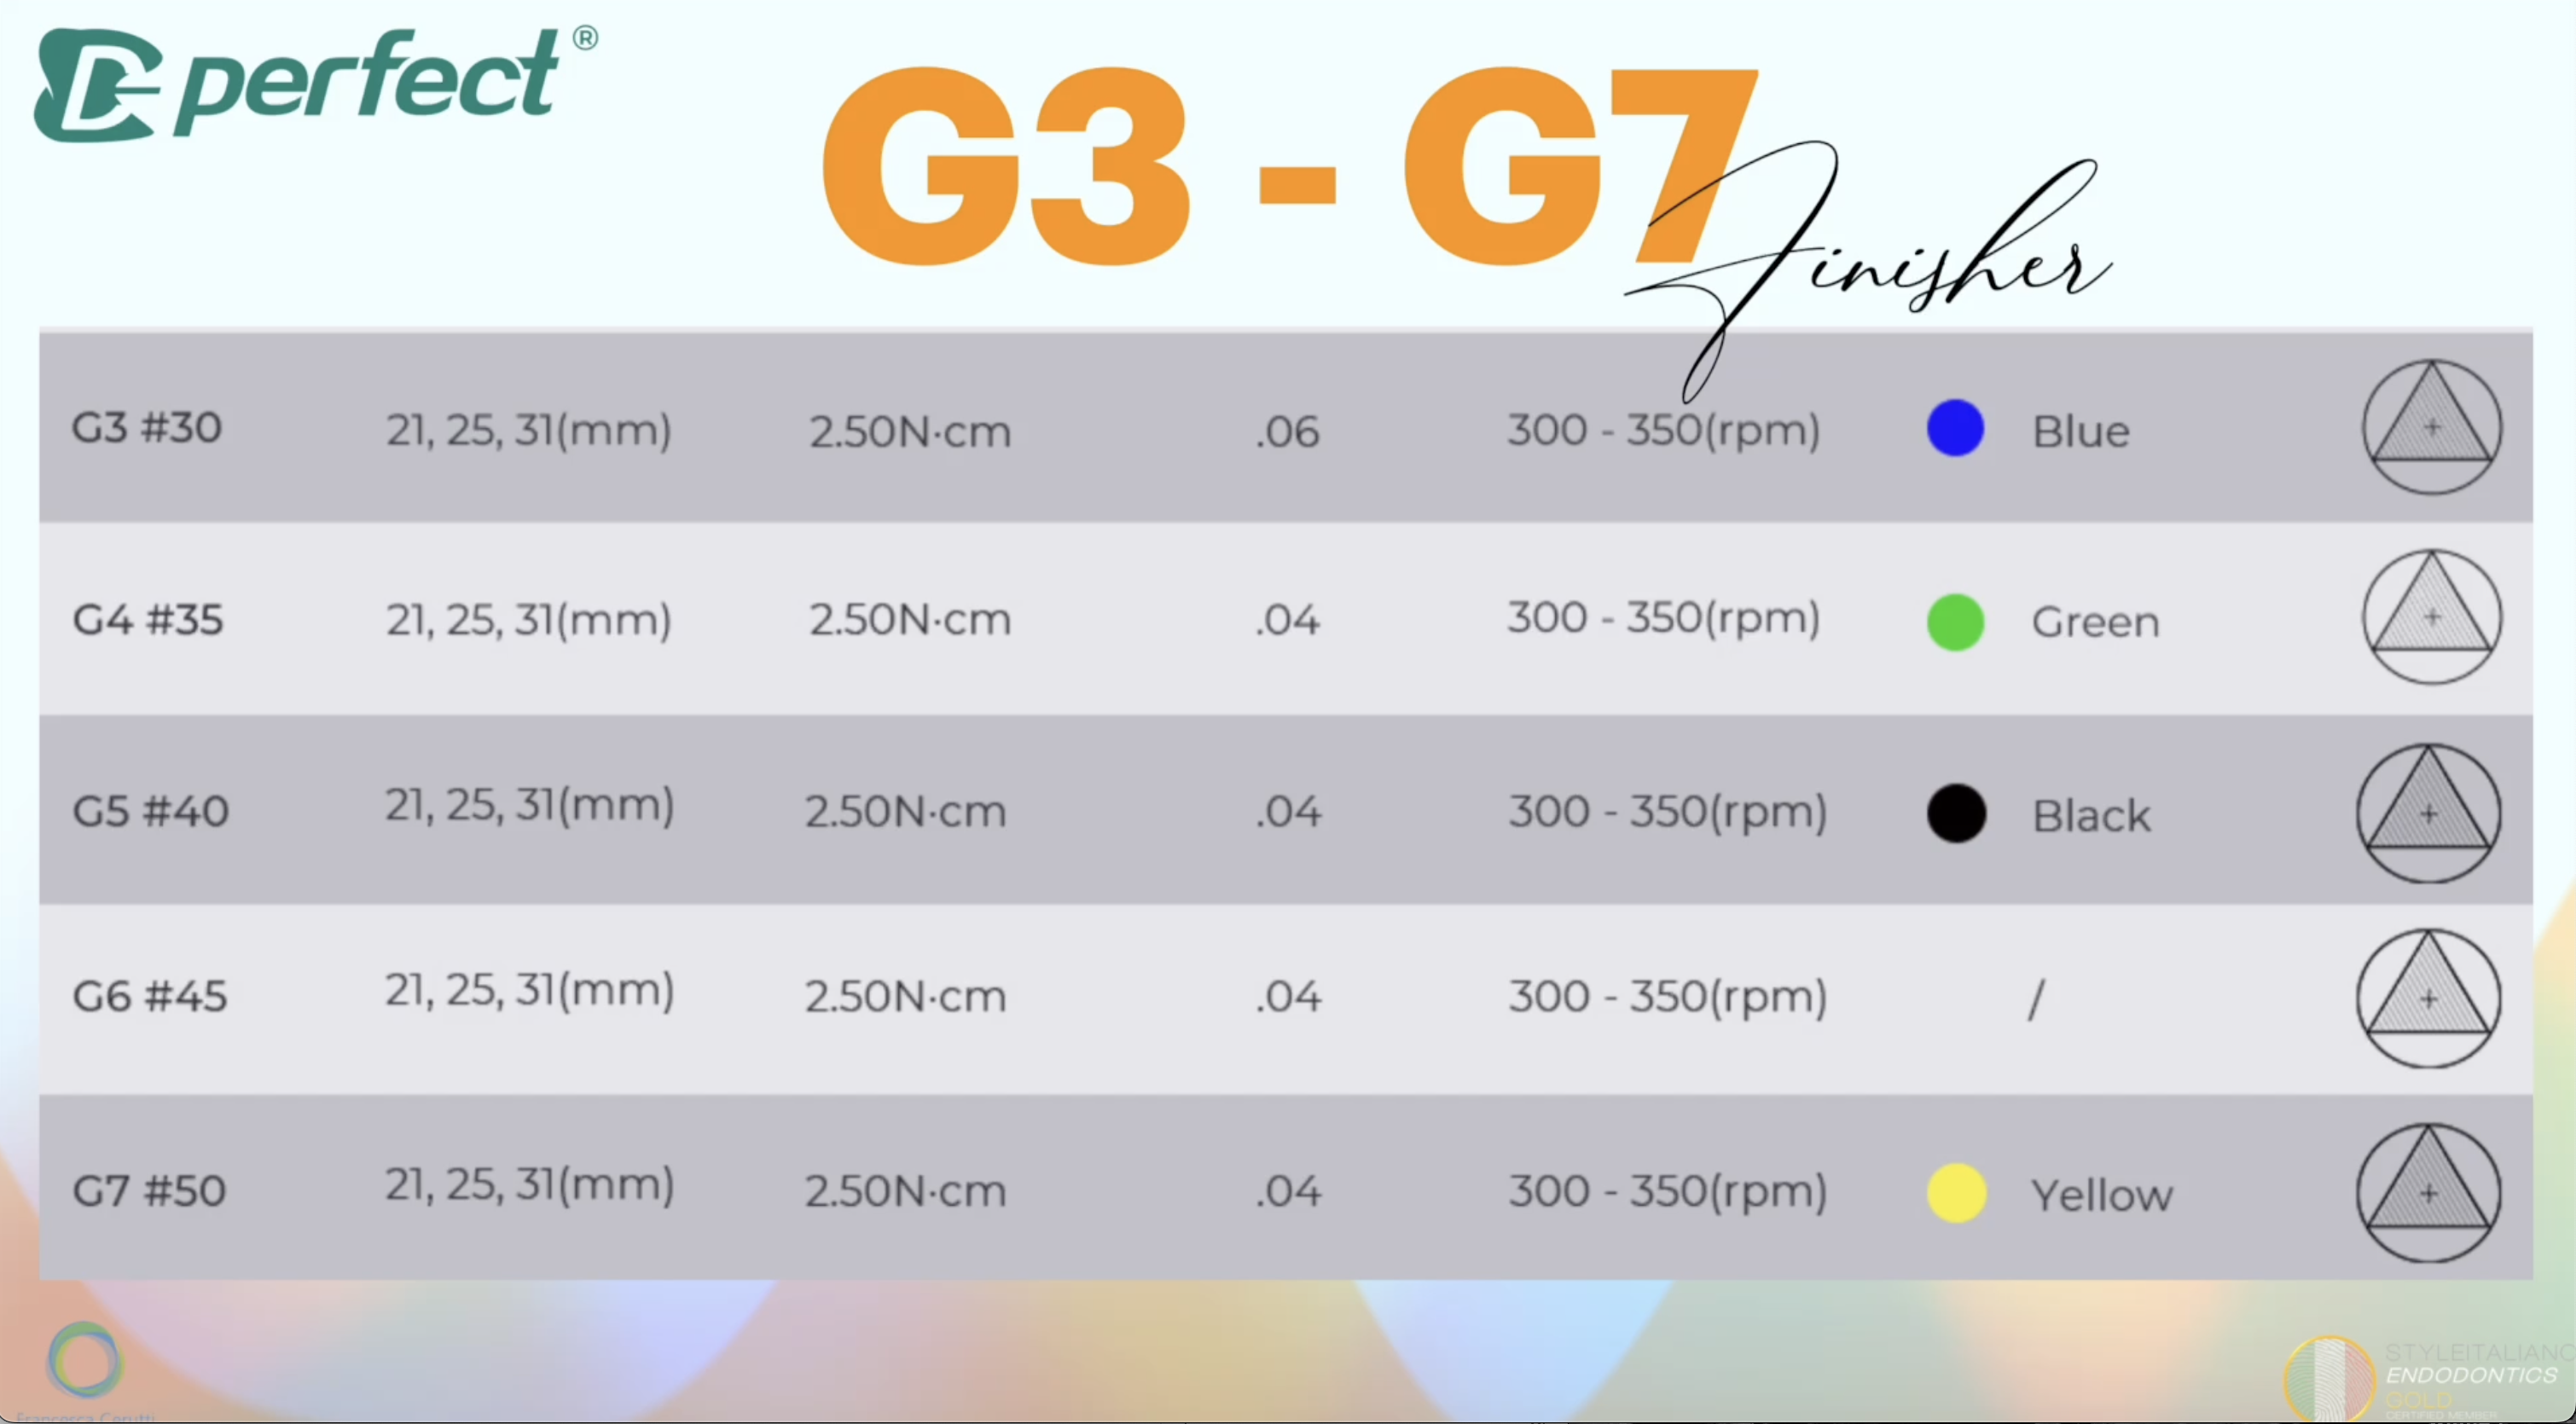
Fig. 2
If the apex of the root canal is bigger than .25, the MG3 blue files can be found in sizes arriving to .50. The taper is always .04.
In order to remove the coronal interferences, I used G1 and G2 short to the working length at 350 rpm and 2 N*cm torque with the BR Rap Endomotor.
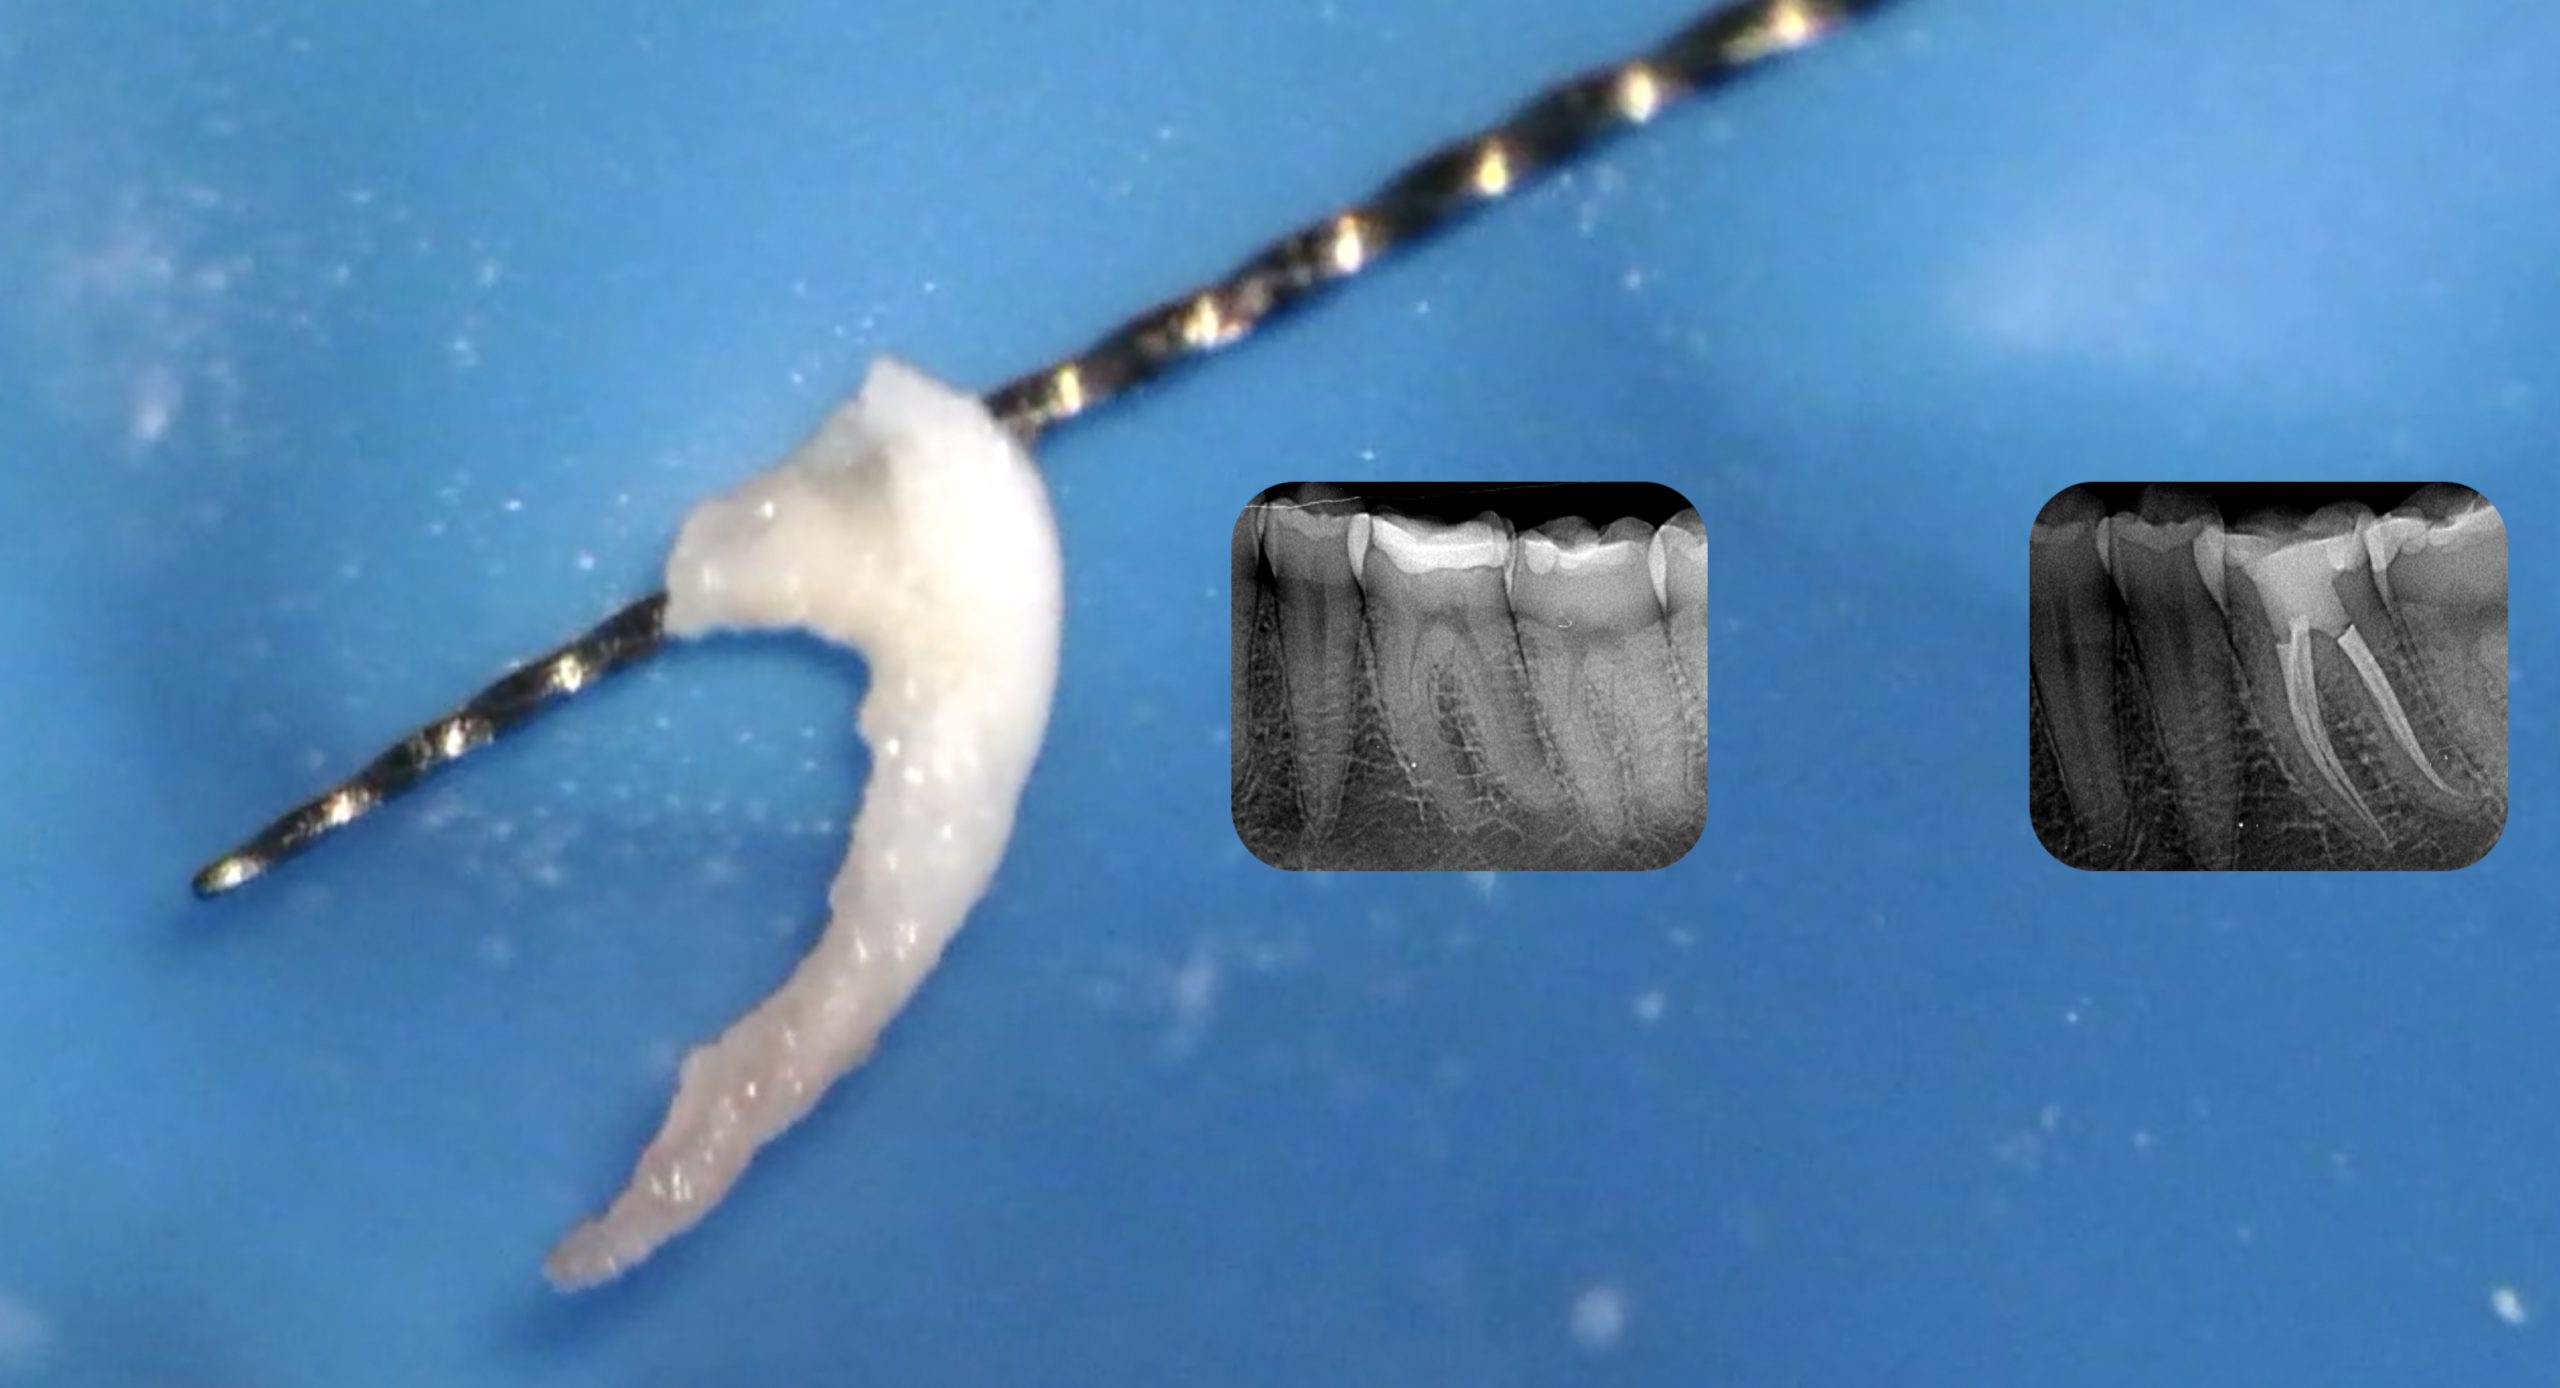
After this phase I recorded the working length with a #10 K. file and I was able to bring to the working length the basic sequence of MG3 blue: PX, G1 and G2. Since the apex was .25 but the root canal allowed me to shape to a larger taper, I finished my shaping with the G2 25/.06 file.
Irrigation is an important step of the root canal treatment, that has to be done accurately and for a sufficient amount of time. Activation of the irrigant helps improving the effect of Sodium Hypochlorite.
The fit of the gutta percha point is checked: the tug back seems good.
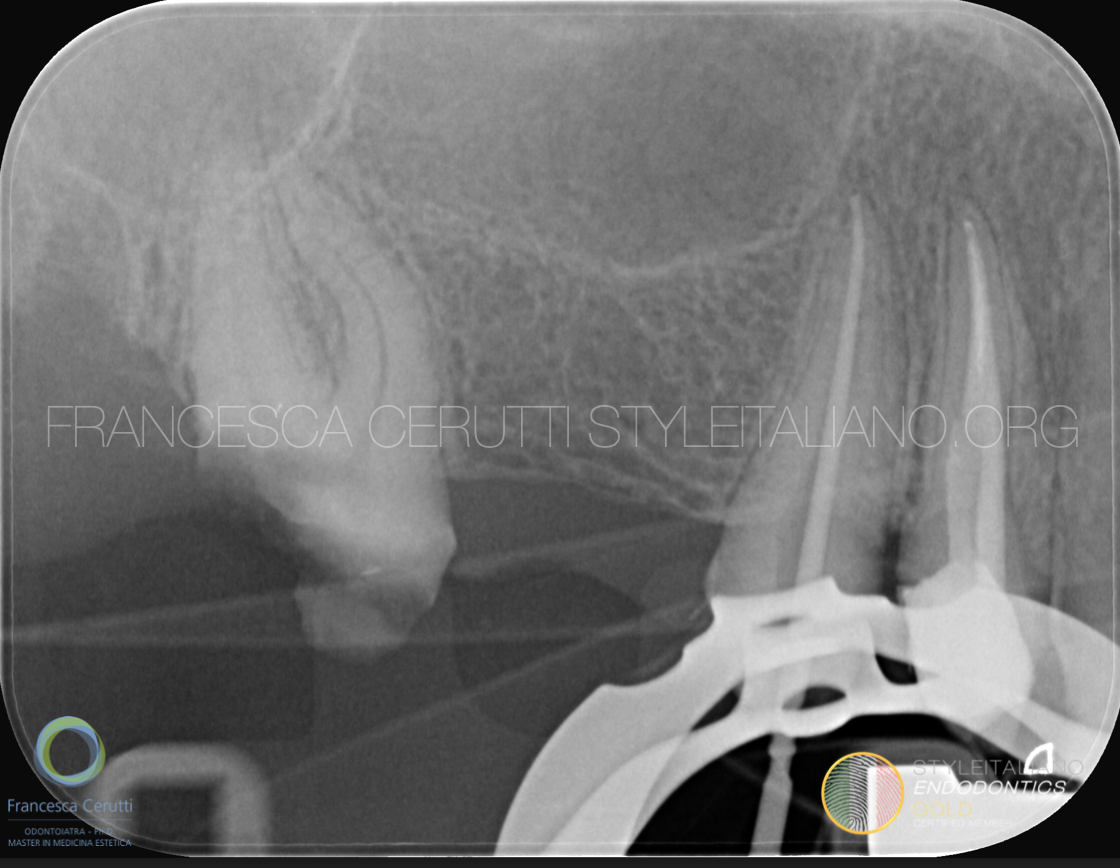
Fig. 3
An intra-operative radiograph confirms the good adaptation of the gutta percha point to the preparation.
After irrigating with sodium hypochlorite and rinsing with sterile water, a final irrigation with EDTA is done.
Some bio ceramic sealer is put directly on the gutta percha point in oder to decrease the risk of sealer extrusion, then a modified warm gutta percha compaction technique is applied to fill the tooth. Since the prosthodontist requested a restoration with glass fiber post, only the down-packing phase is done, leaving the rest of the root canal empty to facilitate the fitting of the post.
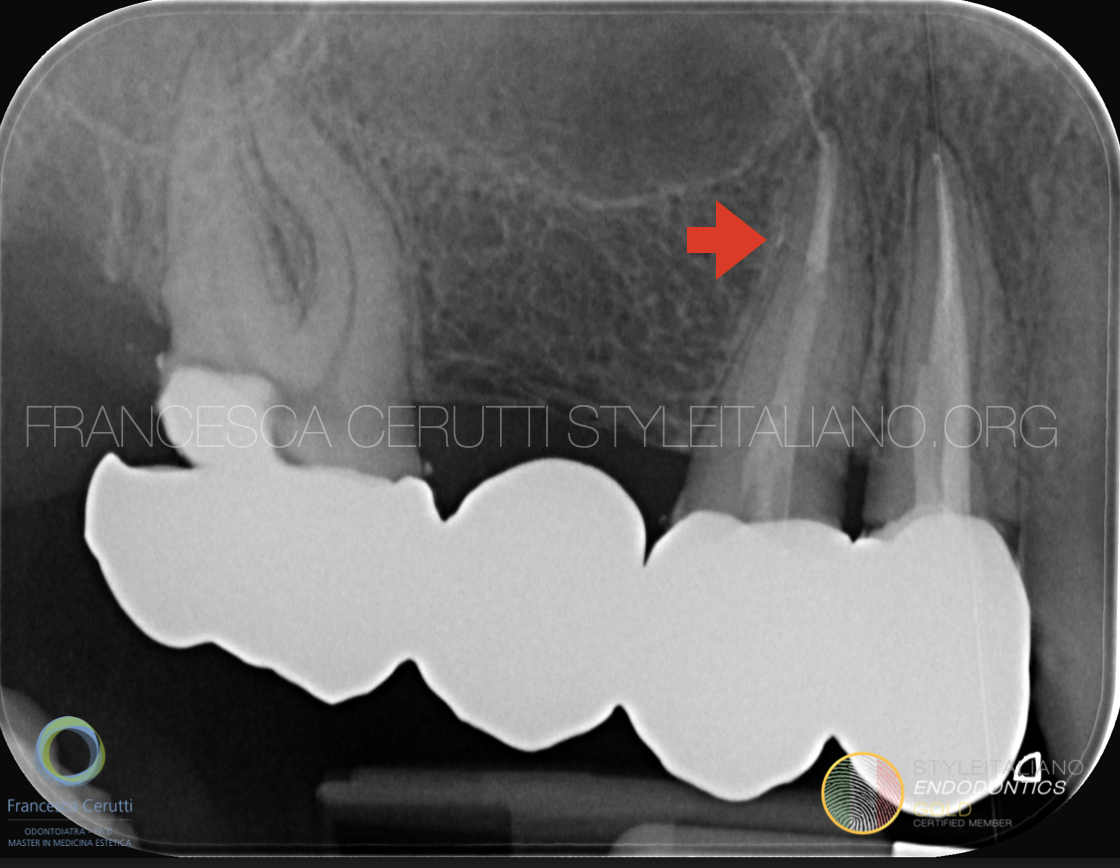
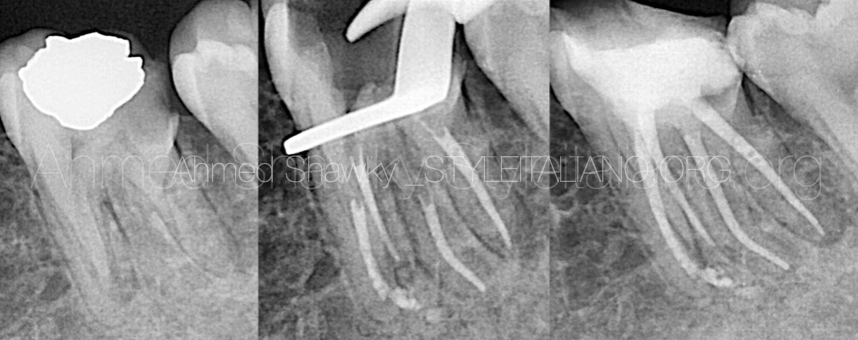
Fig. 4
After the restoration, the original bridge of the patient is temporarily cemented.
The red arrow shows a lateral canal that has been filled.
The patient, in the following appointment, undergoes crown lengthening of the second upper molar.
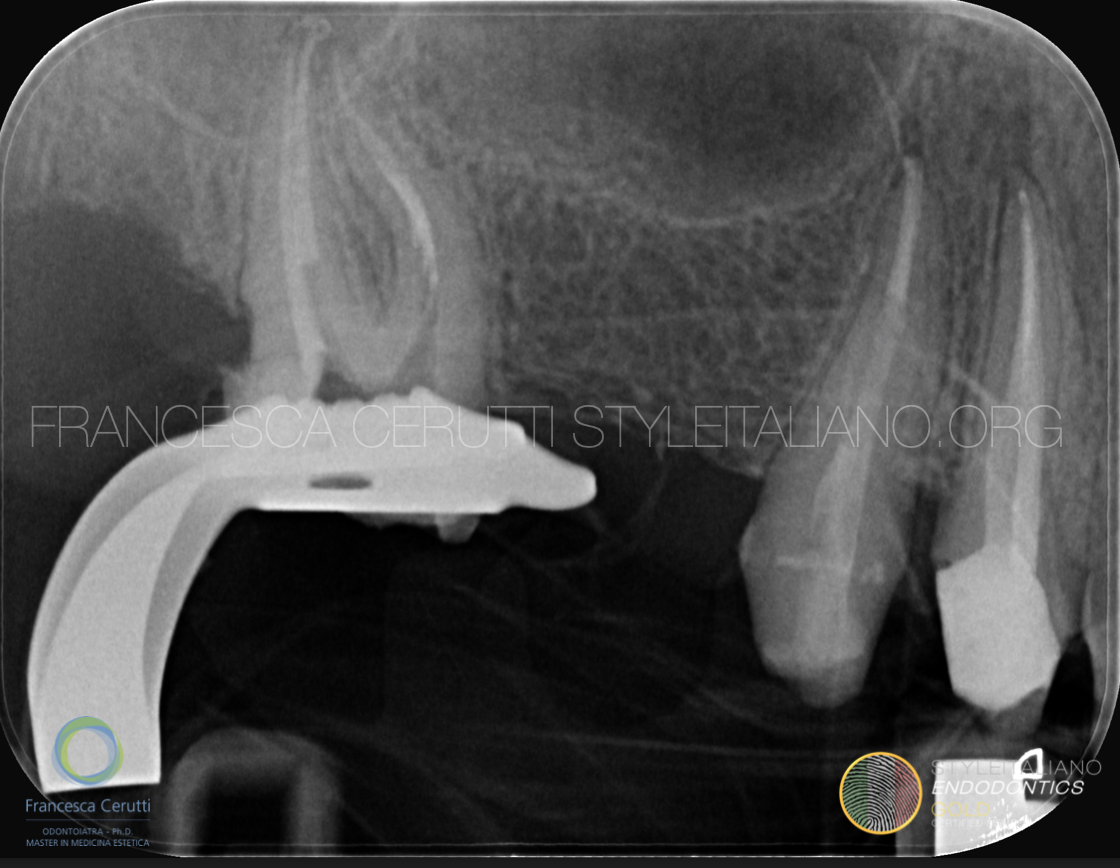
Fig. 5
After a pre-endodontic build-up, which was necessary in order to place the rubber dam, the second upper molar is treated and the patient is sent back to the referring dentist for the prosthodontic part of the treatment plan.
Conclusions
The heat treatment makes MG3 Blue files a good solution for cases in which we want to respect the original shape of the root canal, since they can be pre bent and have a nice cutting efficiency.
Bibliography
Bhuva B, Ikram O. Complications in Endodontics. Prim Dent J. 2020;9(4):52-8.
Zitzmann N, Krastl G, Hecker H, Walter C, Weiger R. Strategic considerations in treatment planning: deciding when to treat, extract, or replace a questionable tooth. J Prosthet Dent. 2010;104(2):80-91.
Burry JC, Stover S, Eichmiller F, Bhagavatula P. Outcomes of Primary Endodontic Therapy Provided by Endodontic Specialists Compared with Other Providers. J Endod. 2016;42(5):702-5.
Capar ID, Uysal B, Ok E, Arslan H. Effect of the size of the apical enlargement with rotary instruments, single-cone filling, post space preparation with drills, fiber post removal, and root canal filling removal on apical crack initiation and propagation. J Endod. 2015;41(2):253-6.