Continuous Wave of Condensation
03/02/2017
Calogero Bugea
Warning: Undefined variable $post in /home/styleendo/htdocs/styleitaliano-endodontics.org/wp-content/plugins/oxygen/component-framework/components/classes/code-block.class.php(133) : eval()'d code on line 2
Warning: Attempt to read property "ID" on null in /home/styleendo/htdocs/styleitaliano-endodontics.org/wp-content/plugins/oxygen/component-framework/components/classes/code-block.class.php(133) : eval()'d code on line 2
Developed in 1987, the Continuous Wave of Condensation Obturation Technique was born out of Stephen Buchanan desire to simplify warm gutta-percha downpacking of Schilder's Warm Vertical Condensation.

Fig. 1
The main difference between these two techniques is that we have a unique continous wave of condensation done by a single hot plugger, instead of the alternate movement of heat plugger/ cold plugger 3 or 4 times until reach 3-5 mm from the apex. Continuous wave of condensation is an obturation technique that applies a heated “plugger” into a single custom fit greater tapered master cone of gutta-percha. The heat plugger is placed through the master cone to within 3-5mm of the predetermined working length.

Fig. 2
This creates a 3-5mm apical plug of gutta-percha. The apical plug of gutta-percha is then condensed with a hand plugger creating an extremely reliable apical sealing. Gutta-percha cones matching the taper size of the final shaping instrument need to be used. Gutta-percha cones will be prepared as described in the previous article about cone fit

Fig. 3
There are several electric heat carriers available to perform the continuous wave down pack of gutta-percha. One example of a heat source is the System B.

Fig. 4
Now the new Element Free is available, with a cordless system of downpacking and backpacking.
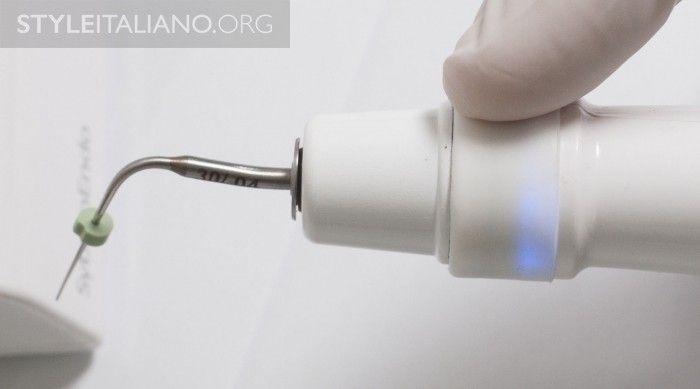
Fig. 5
In System B and in Element Free there is an activation button that is raised 2 mm so it is easily located by touching. In Element Free there is also an indicator light just ahead of it so the operator can see when the heat source is activated and a sound system control, which is very helpful for beginners: after activation the operator has 10 sec of continuous wave during which he can compact the gutta-percha to the 5mm-apex region; here comes the first beep that tells the clinician he can stop compacting and should hold the instrument at a constant pressure untile the second beeb (two beeps, after 10 sec) tells it is possible to remove the device.
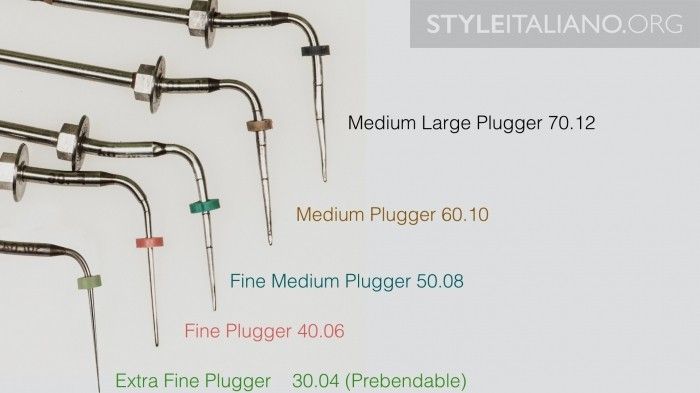
Fig. 6
The stainless steel Continuous Wave electric heat pluggers have been around since the first introduction of the System-B Heat Source in 1996 but the geometry of these pluggers has been changed, and an .04 taper. CW plugger has been added for a full range of .04 to .12 tapers in the standard shapes. In a big improvement, the tip diameters now vary with the tapers to more consistently fit in canals shaped to those tapers. The plugger geometries, listed with tip diameters first and their tapers second, are 30-.04, 40-.06, 50-.08, 60-.10, and 70-.12, each having continuous tapers. The most utilized are 40. 0,6 and 50.0,8. 30.04 is very flexible dedicated at curved canals. Each of these tips has an hexagonal angle that allows quick insertion and directional stability without tightening a collet like the previous System-B Heat Source.
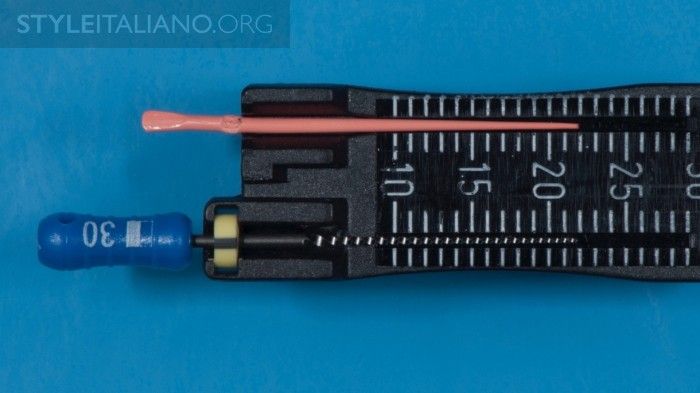
Fig. 7
A Master cone should be selected according to the last article about cone fit. http://styleitaliano.hime.host/obturation-step-no-1-cone-fit
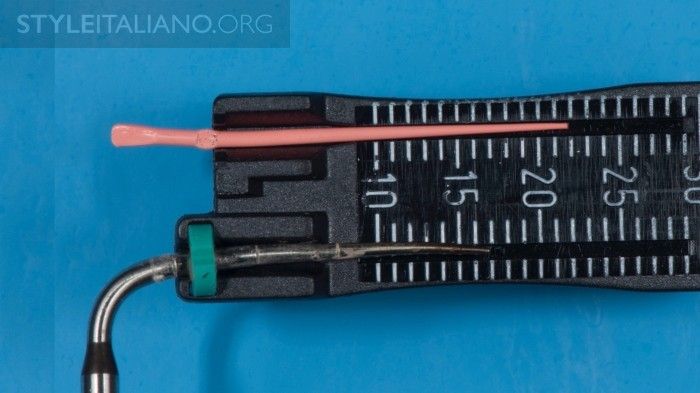
Fig. 8
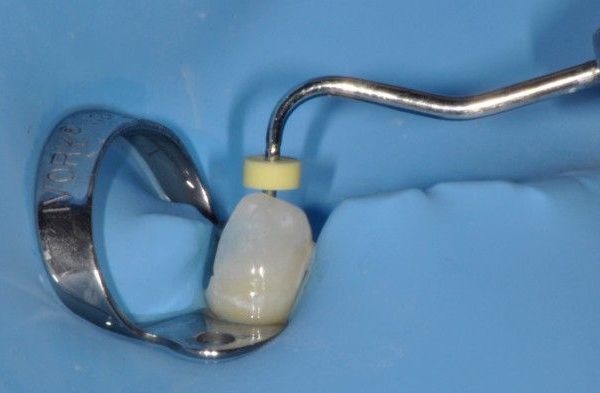
It is important for the clinician to pre-fit the heat plugger prior to performing the down pack. In order to determine the appropriate plugger size, the clinician is looking for the largest tapered plugger that fits to within 3-5mm of the predetermined working length. The clinician should pre-fit also a hand plugger with an appropriate diameter so that the apical extent of gutta-percha can be reached passively without binding on the lateral walls of the root canal system. Vertical pressure is applied to the gutta-percha during the cooling process thus creating a reliable apical seal. The theory behind this technique is directly related to the thermo-mechanical properties of guttapercha. The thermo-mechanical properties of gutta-percha dictate that the heat will carry several millimeters beyond the apical extent of the heat source. This will allow the apical 3-5mm of gutta-percha to be softened and condensed for a better adaptation of material. The application of heat and apical pressure to a well adapted master gutta-percha cone will also create hydraulic pressure within the canal. The hydraulic pressure created will in turn move the heated gutta-percha and sealer apically and laterally to further seal canal irregularities.

Fig. 9
The master cone is cut off generally 0,5 mm. During continous wave, it advances in a smaller portion of canal and will seal the apex like a champagne plug. The high heat downpack with the System-B device goes as follows:

Fig. 10
Sear the cone at the orifice with the tip of the activated System B plugger and remove.

Fig. 11
Use a wide plugger (pre-fitted) to compact the softened gutta-percha at the orifice.

Fig. 12
Hit the System-B handpiece switch and the plugger will immediately move down the canal. With one finger on the switch, drive the heated plugger through the downpack.

Fig. 13
With finger still off the switch, maintain apical pressure for a sustained 10-second push. This will take up any shrinkage that might occur upon cooling of the apical mass of gutta-percha ahead of the plugger. While still maintaining apical pressure on the plugger, activate the switch for a full 1-second period, release the switch and pause for another full second and withdraw the plugger.

Fig. 14
Usually a little amount of gutta-percha sticks onto the heat plugger. When this happens we have the proof of a correct obturation protocol. Instead, when the plugger is clean, it is possible that we made some mistake in plugger or in cone selection.

Fig. 15
Use a narrow plugger (pre-fitted) to compact the softened gutta-percha at the orifice.

Fig. 16
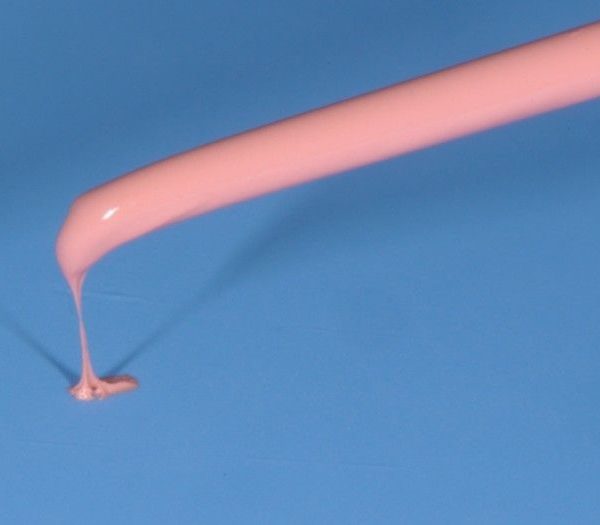
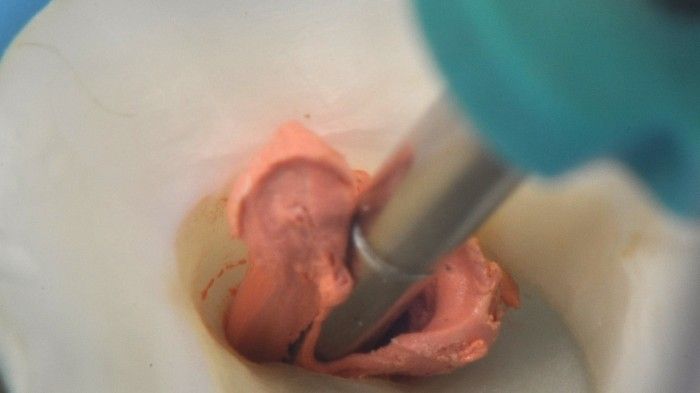
Once the apical plug of gutta-percha has been established, the remaining canal space can be obturated with thermo-plasticized injectable gutta-percha. This is termed the “backfill”.The tip of the backfilling device should be placed as apically as allowable (preferably butting up with the apical plug of GP). The tip is allowed to sit in the canal for few seconds and then press the button to start injection. Once the flow of gutta-perch is activated, the thermoplastic gutta-percha will automatically back the delivery unit out of the canal.

Fig. 17
Immediately following the backfilling process, larger hand pluggers are placed on the coronal extent of the warm gutta-percha and apical pressure is applied as the gutta-percha cools. This will vertically condense the gutta-percha, creating a homogeneous mass of obturation material. The gutta-percha should extend coronally to the orifice level at the extent of the pulpal floor, thus completing obturation.

Fig. 18
Img A Show a lateral canal in the middle third of a distal root of a first mandibular molar filled with a Continous Wave Condensation. Immediate post operative X-ray show the pre-endo restorations which will be changed in some weeks Img B, is a sample of an extracted tooth in which the lateral canal was 3D filled by guttapercha (courtesy of Dr.A.Iandolo) Continous Wave Condensation, is a valid technique to seal in 3D the endodontic space. We have the possibility to seal lateral canals in every part of the root if present and cleaned, and also we have the possibility to inject warm guttapercha in the isthmus. In this manner, bacteria present in the Root Canal System after cleanig procedure will be entombed by guttapercha and sealer.

Fig. 19
A contraindication of this technique is that, when the plugger can't reach 3-5 mm from the apex, we have to change obturation method

Fig. 20
In presence of cracks, it's better avoid any kind of force into the canal. In these situations Thermafil is the best solution.

Fig. 21
Open apex (left picture), Irregular apex (middle picture) or inverse taper (right picture) are contraindications to continuos wave. In this cases MTA is the right solution.
Conclusions
Due to the predictable nature of this obturation method, it remains the obturation technique of choice among most endodontic practitioners. Obturation is an important step of the treatment,that requires time, correct armamentarium and operator skills.
Remember: 3D Obturation isn't just a white line on an Rx!
Bibliography
Buchanan LS. Continous wave of condensation technique. Endod Prac. 1998 Dec;1(4):7-10, 13-6, 18
Buchanan LS.The continuous wave of obturation technique: 'centered' condensation of warm gutta percha in 12 seconds. Dent Today. 1996 Jan;15(1):60-2, 64-7.
Buchanan LS.The continuous wave of condensation technique: a convergence of conceptual and procedural advances in obturation.Dent Today. 1994 Oct;13(10):80, 82, 84-5.
Castellucci A. Endodontics vol II, edizione Il Tridente


