Endodontic Management of a Mandibular Molar with Iatrogenic Perforation, Ledges and Missed Canals
14/01/2026
Fellow
Warning: Undefined variable $post in /home/styleendo/htdocs/styleitaliano-endodontics.org/wp-content/plugins/oxygen/component-framework/components/classes/code-block.class.php(133) : eval()'d code on line 2
Warning: Attempt to read property "ID" on null in /home/styleendo/htdocs/styleitaliano-endodontics.org/wp-content/plugins/oxygen/component-framework/components/classes/code-block.class.php(133) : eval()'d code on line 2
Successful endodontic therapy begins with a properly designed access cavity, which is the foundation for locating, cleaning, and shaping the root canal system. Inadequate or misdirected access can lead to missed canals, ledge formation, and iatrogenic perforations, severely affecting the outcome of treatment [1]. Understanding the pulp chamber floor anatomy—including color changes, developmental grooves, and dentinal maps—is essential for identifying canal orifices, particularly in posterior teeth with indirect restorations or limited visibility [2].
Teeth treated under crowns or bridges pose additional challenges: altered reference points, restricted straight-line access, and reduced tactile feedback often contribute to deviation from the natural pulp chamber anatomy [3]. The use of magnification, enhanced illumination, and conservative access refinement allows clinicians to overcome these limitations, minimizing errors while preserving sound tooth structure [4,5]. This report presents the management of a mandibular molar with a pulpal floor perforation, ledges and missed canals, emphasizing the importance of anatomical orientation and careful interpretation of the pulp chamber map.
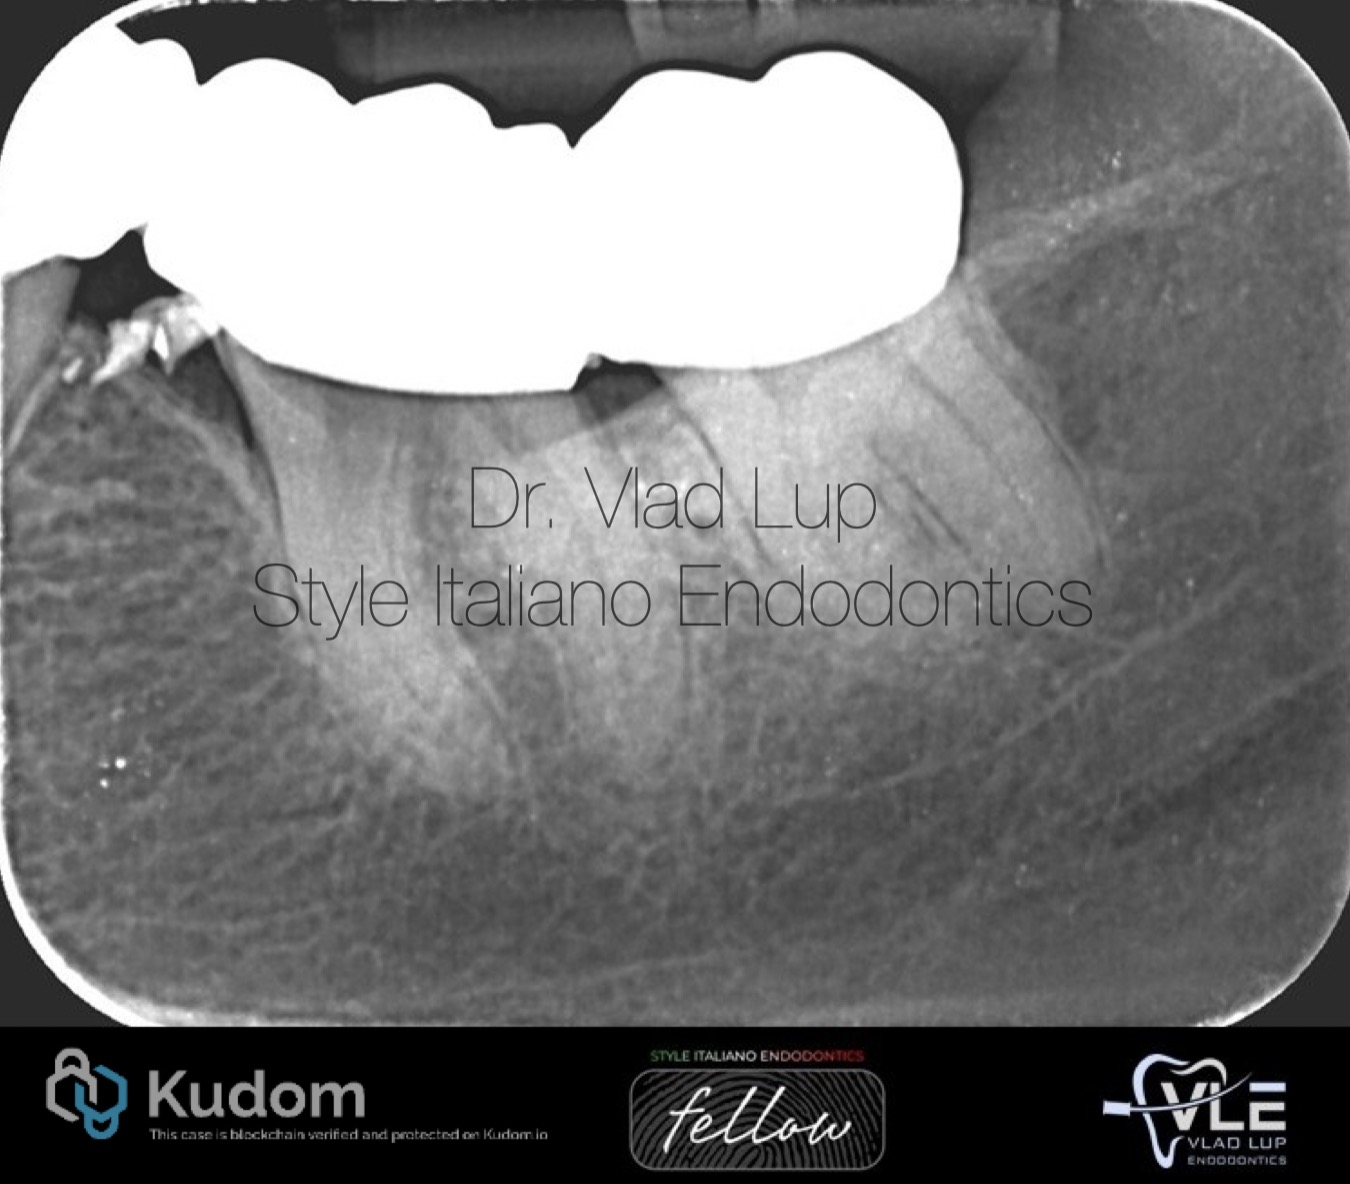
Fig. 1
A patient presented with irreversible pulpitis under an existing fixed bridge on the lower right quadrant. The referring general dentist reported difficulty in locating and accessing the canals of the mandibular first molar
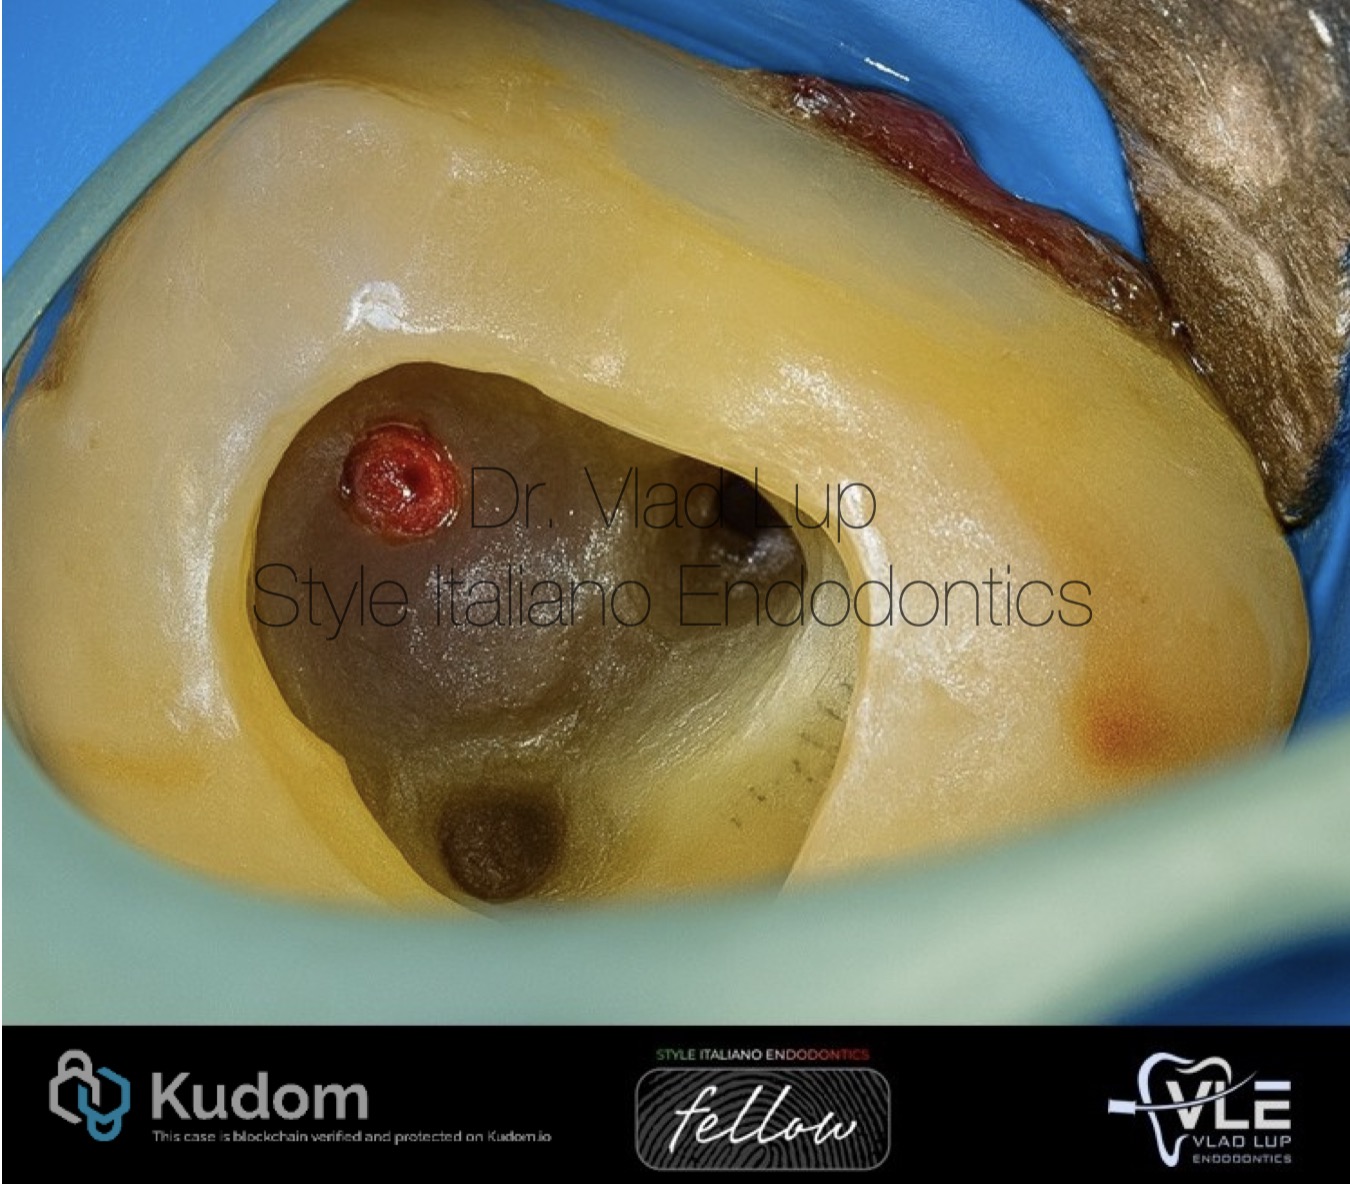
Fig. 2
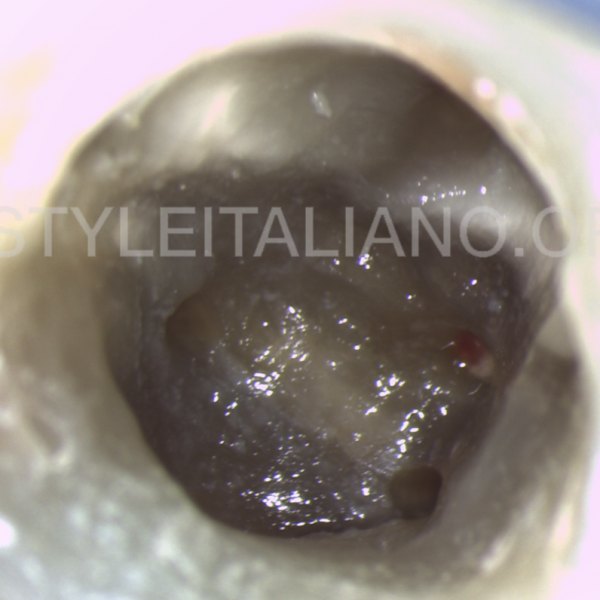
After removing the bridge, clinical inspection revealed a misdirected access cavity: the mesio-lingual canal was ledged, the mesio-buccal canal was searched for in an incorrect position, and the distal canals were not located. A perforation of the pulpal floor was observed, likely caused during the search for the distal canal orifices
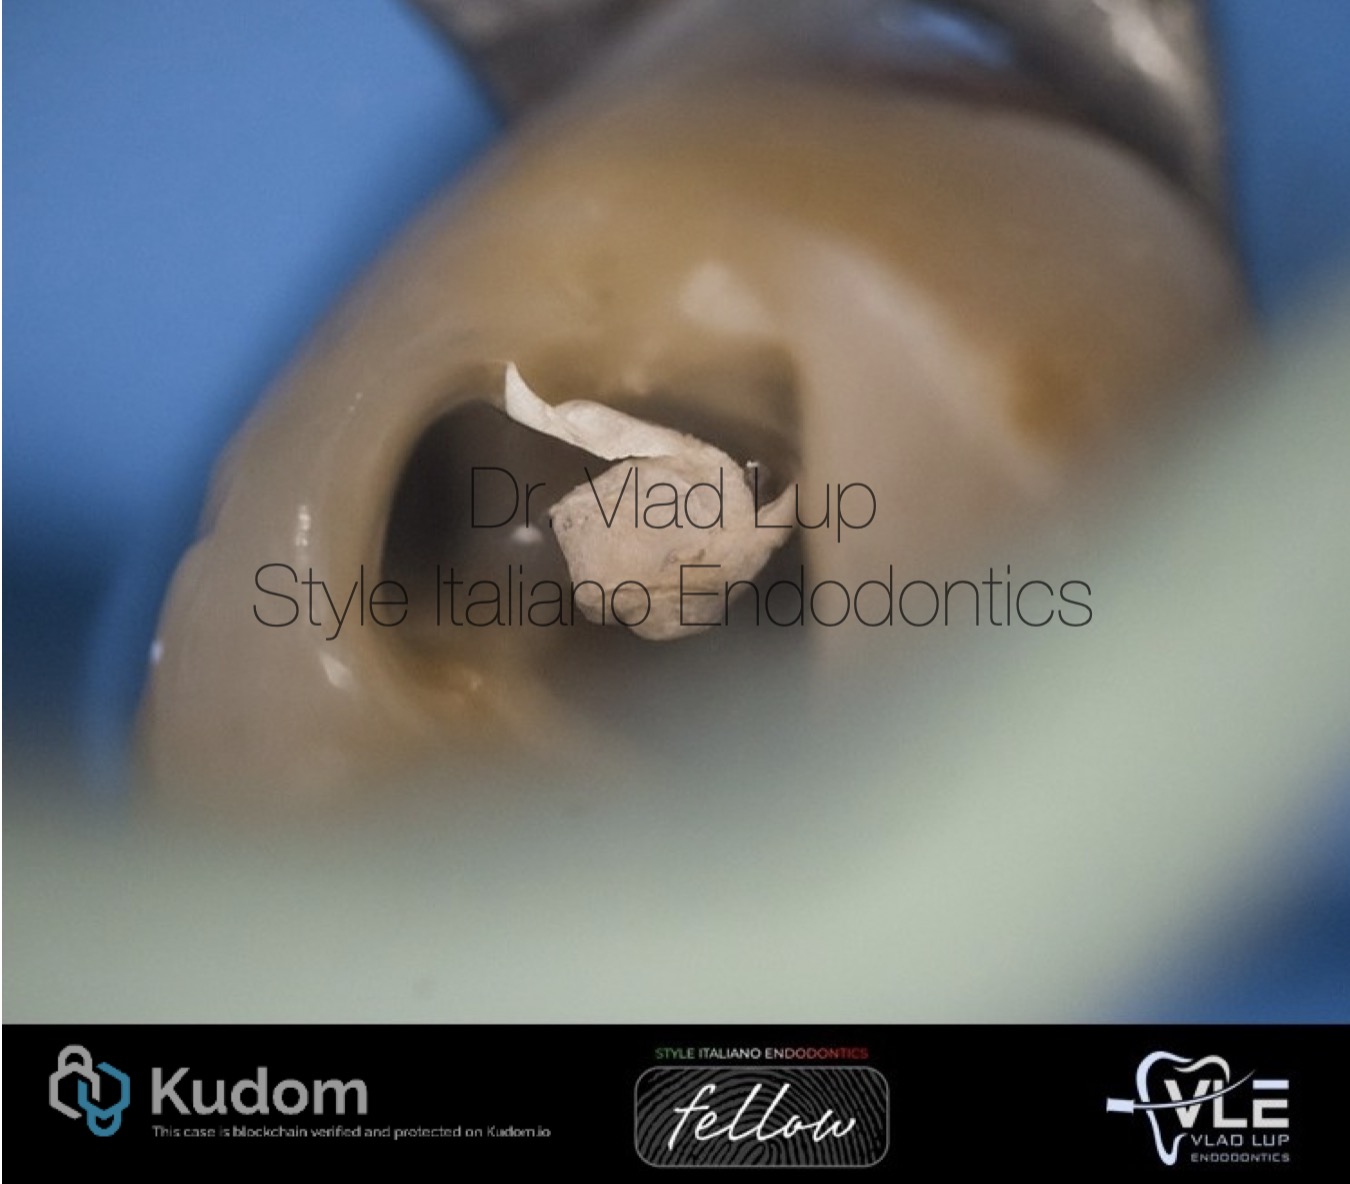
Fig. 3
To prevent irritation of the perforation site during irrigation, a Teflon tape barrier was placed temporarily to isolate the area from sodium hypochlorite contact

Fig. 4
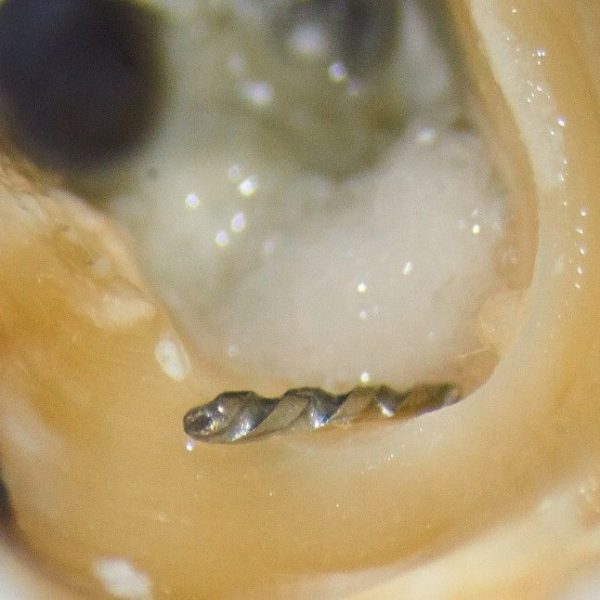
Using magnification, the chamber floor anatomy was carefully analyzed. Following the natural dentinal map and developmental lines, the true mesio-buccal was located and shaped using ProTaper Next instruments X1 and X2
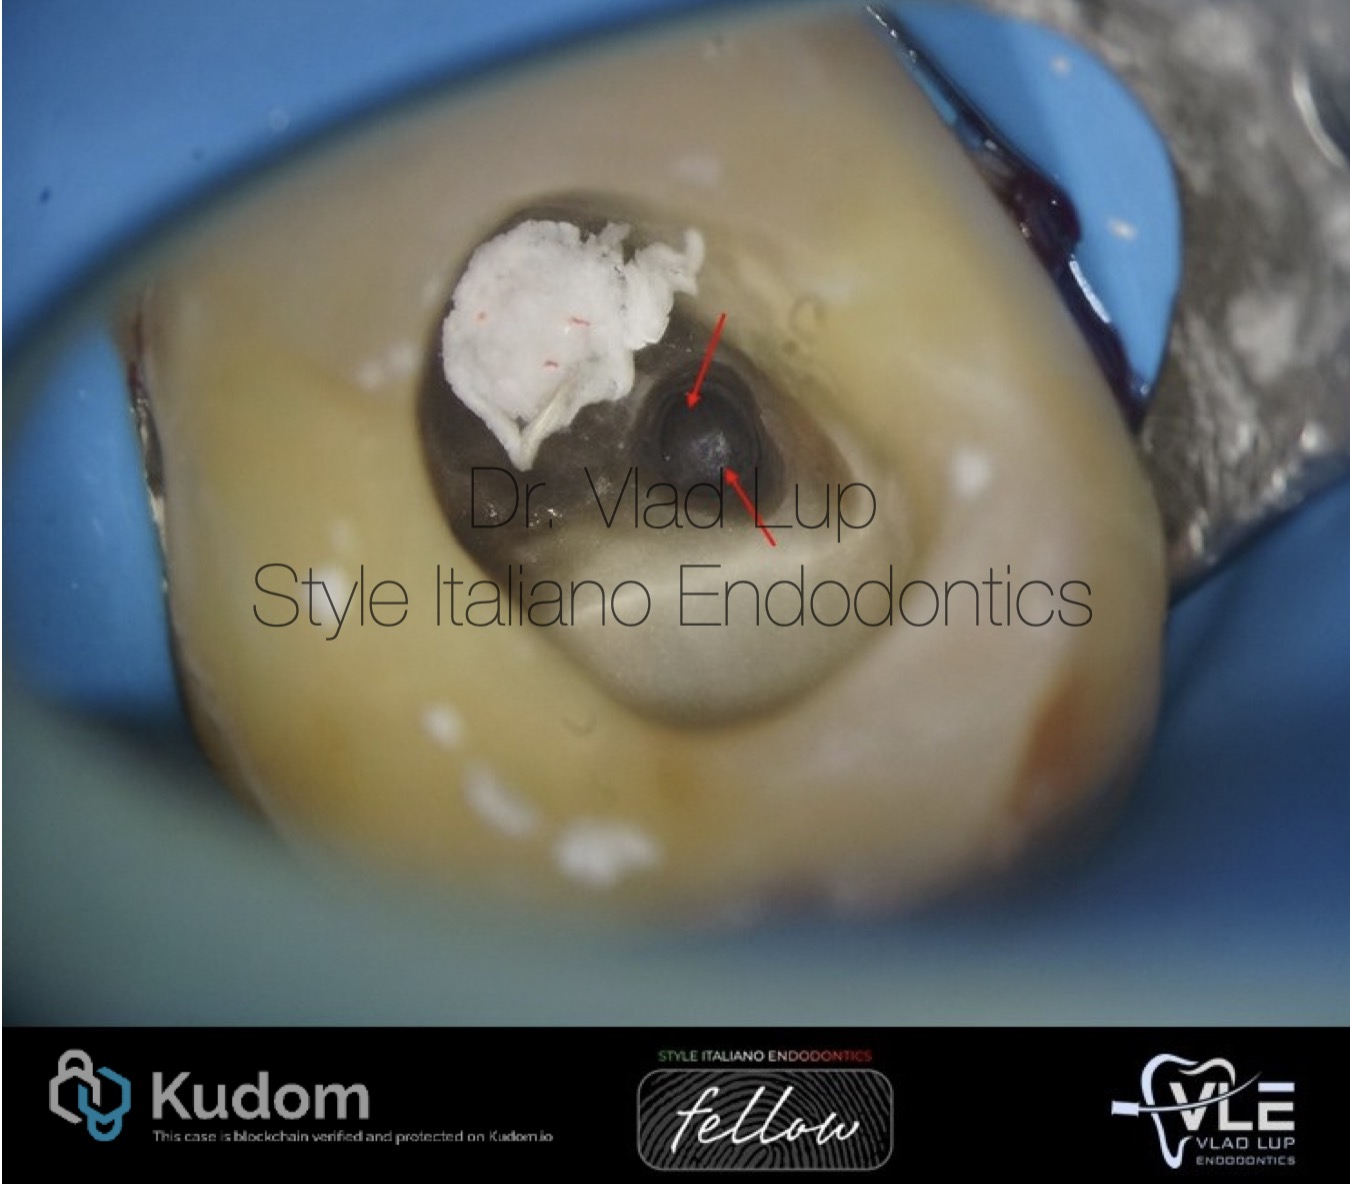
Fig. 5
With the aid of a Micro-Opener, the entrance in the mesio-lingual canal was located and the true path was shaped. Considering the extent of the ledge, removing it entirely was not a valid option

Fig. 6
The distal canals system was located and shaped with Protaper Next instruments
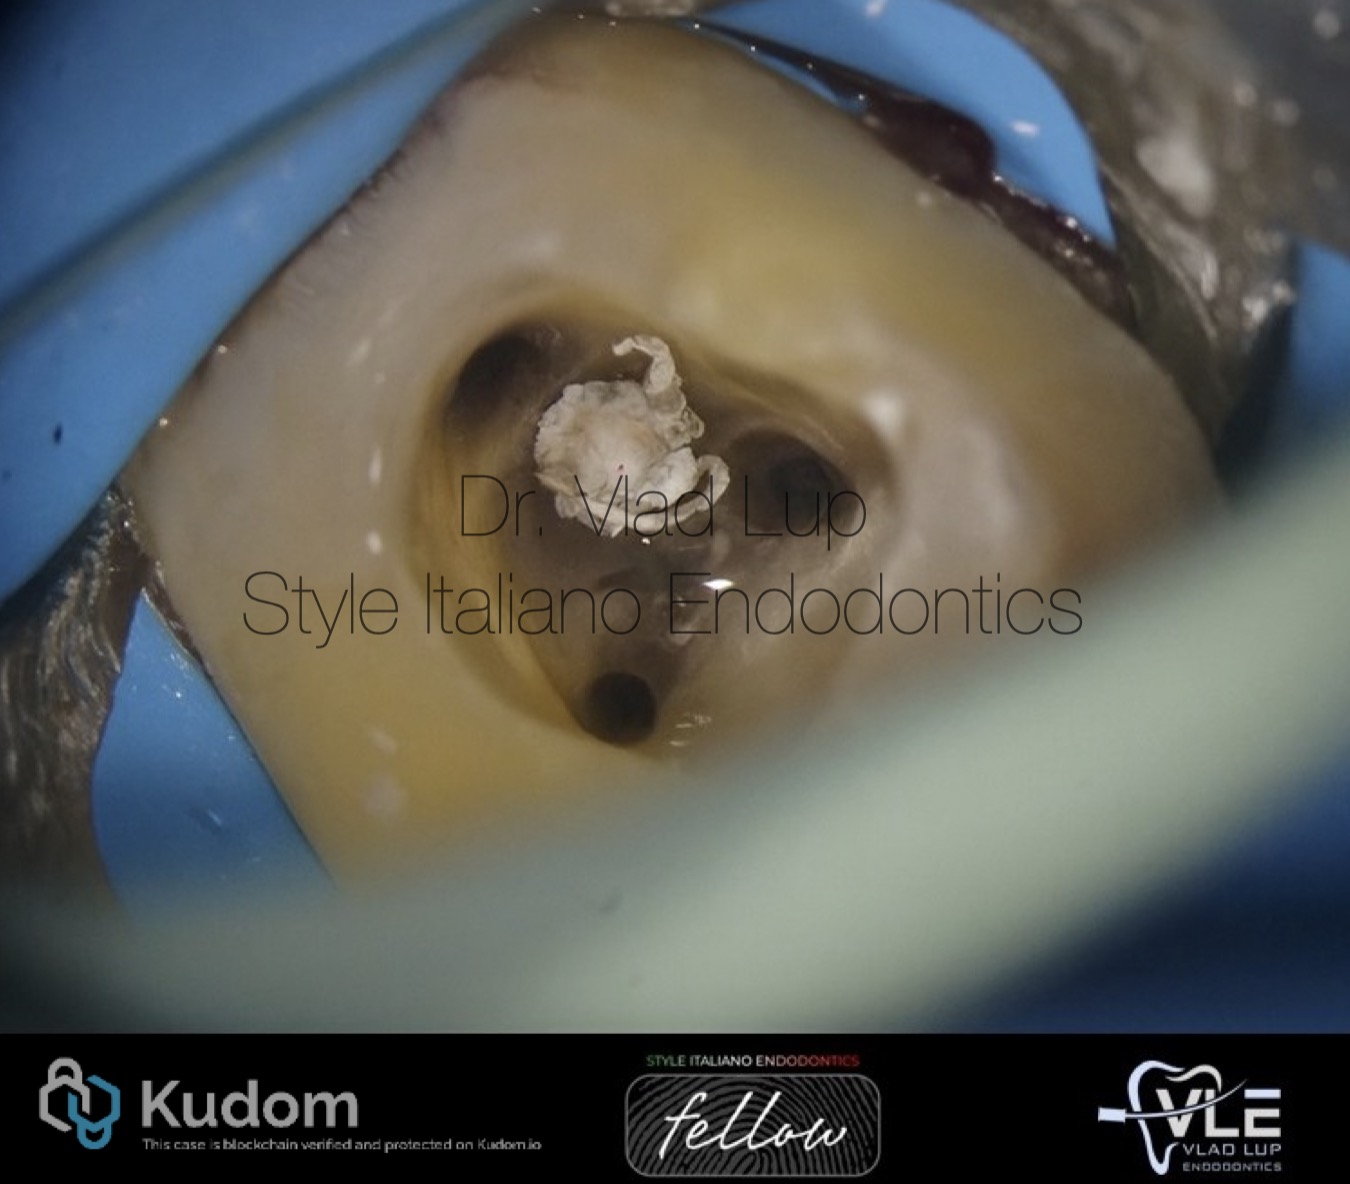
Fig. 7
Cleaning was performed using copious irrigation with 5.25% sodium hypochlorite and 17% EDTA, ensuring the removal of debris and smear layer
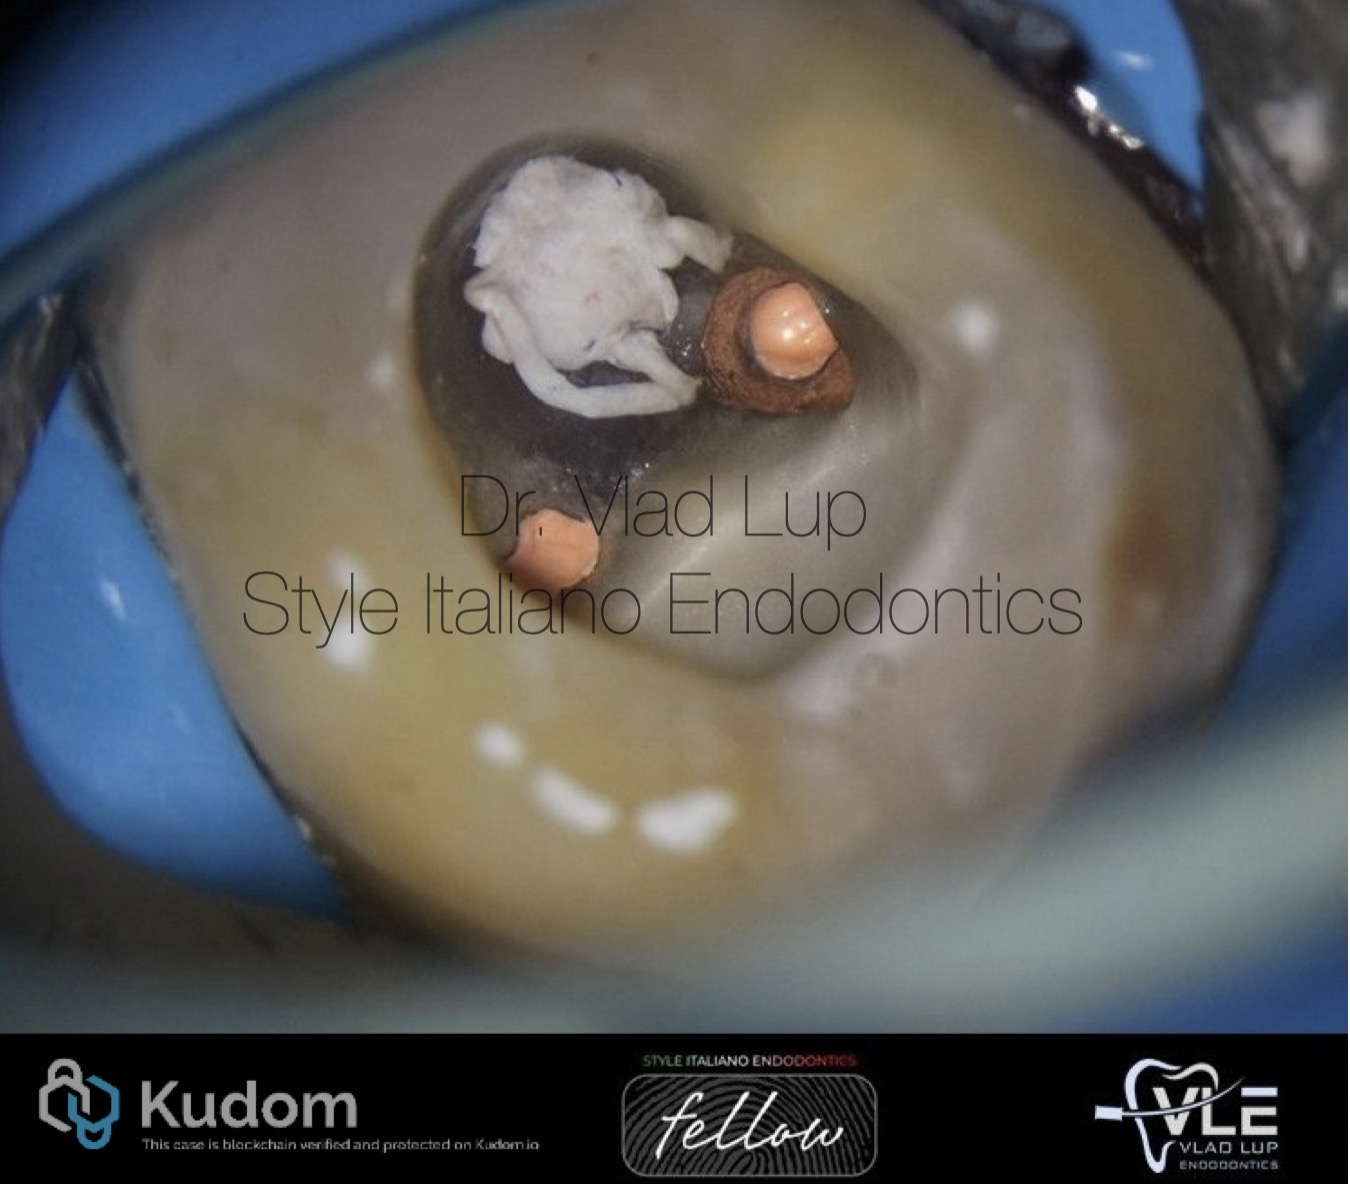
Fig. 8
The canals were then obturated with gutta-percha and epoxy resin sealer using warm vertical compaction (
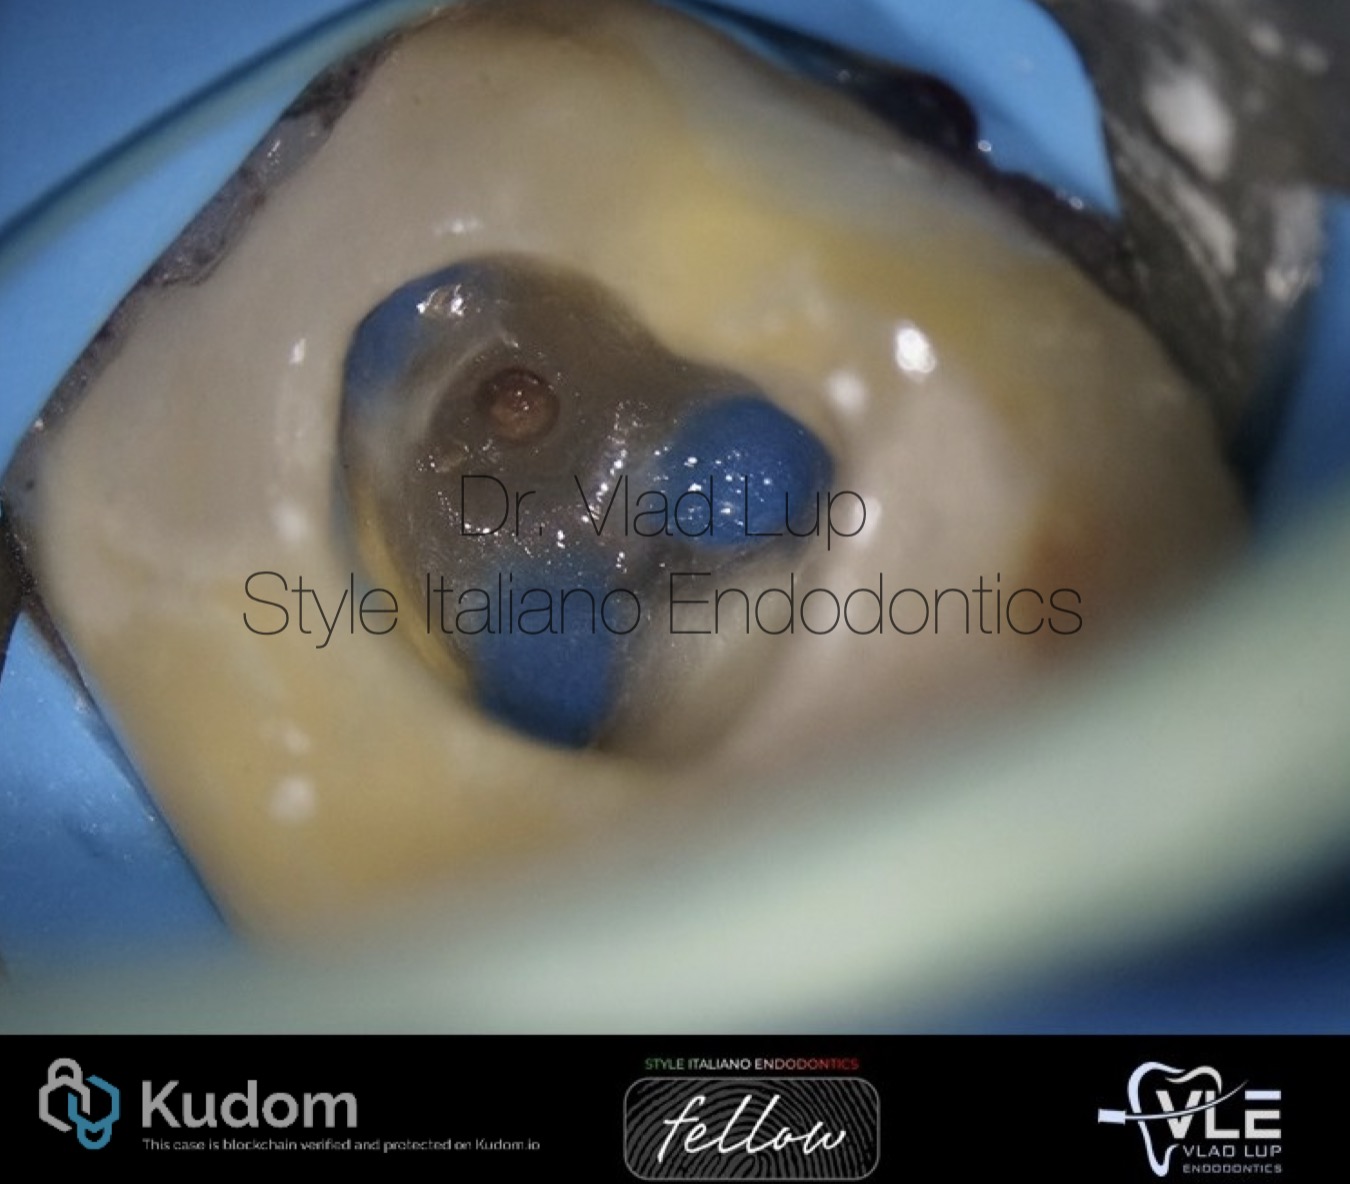
Fig. 9
Color flowable composite was used to seal canal entrances and the Teflon tape was removed showing the perforation site remained clean and not bleeding

Fig. 10
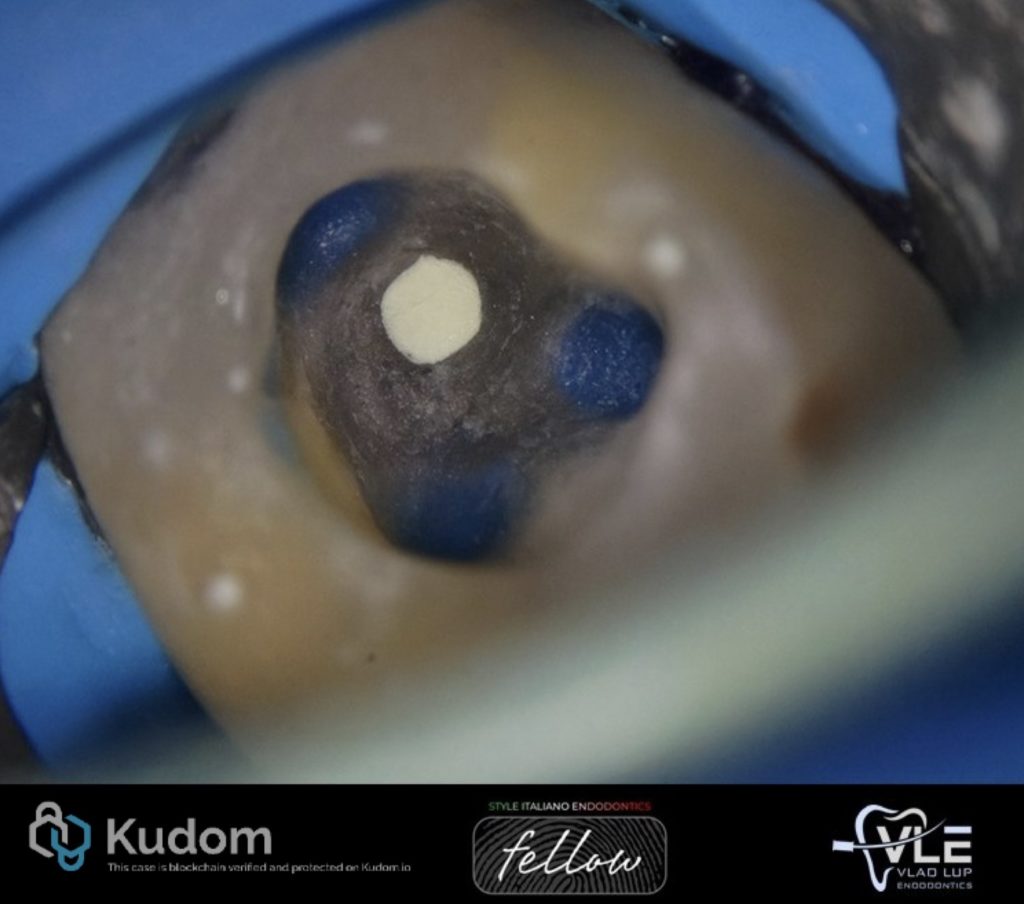
A resorbable collagen sponge was placed through the perforation in order to compact MTA without the fear of extrusion
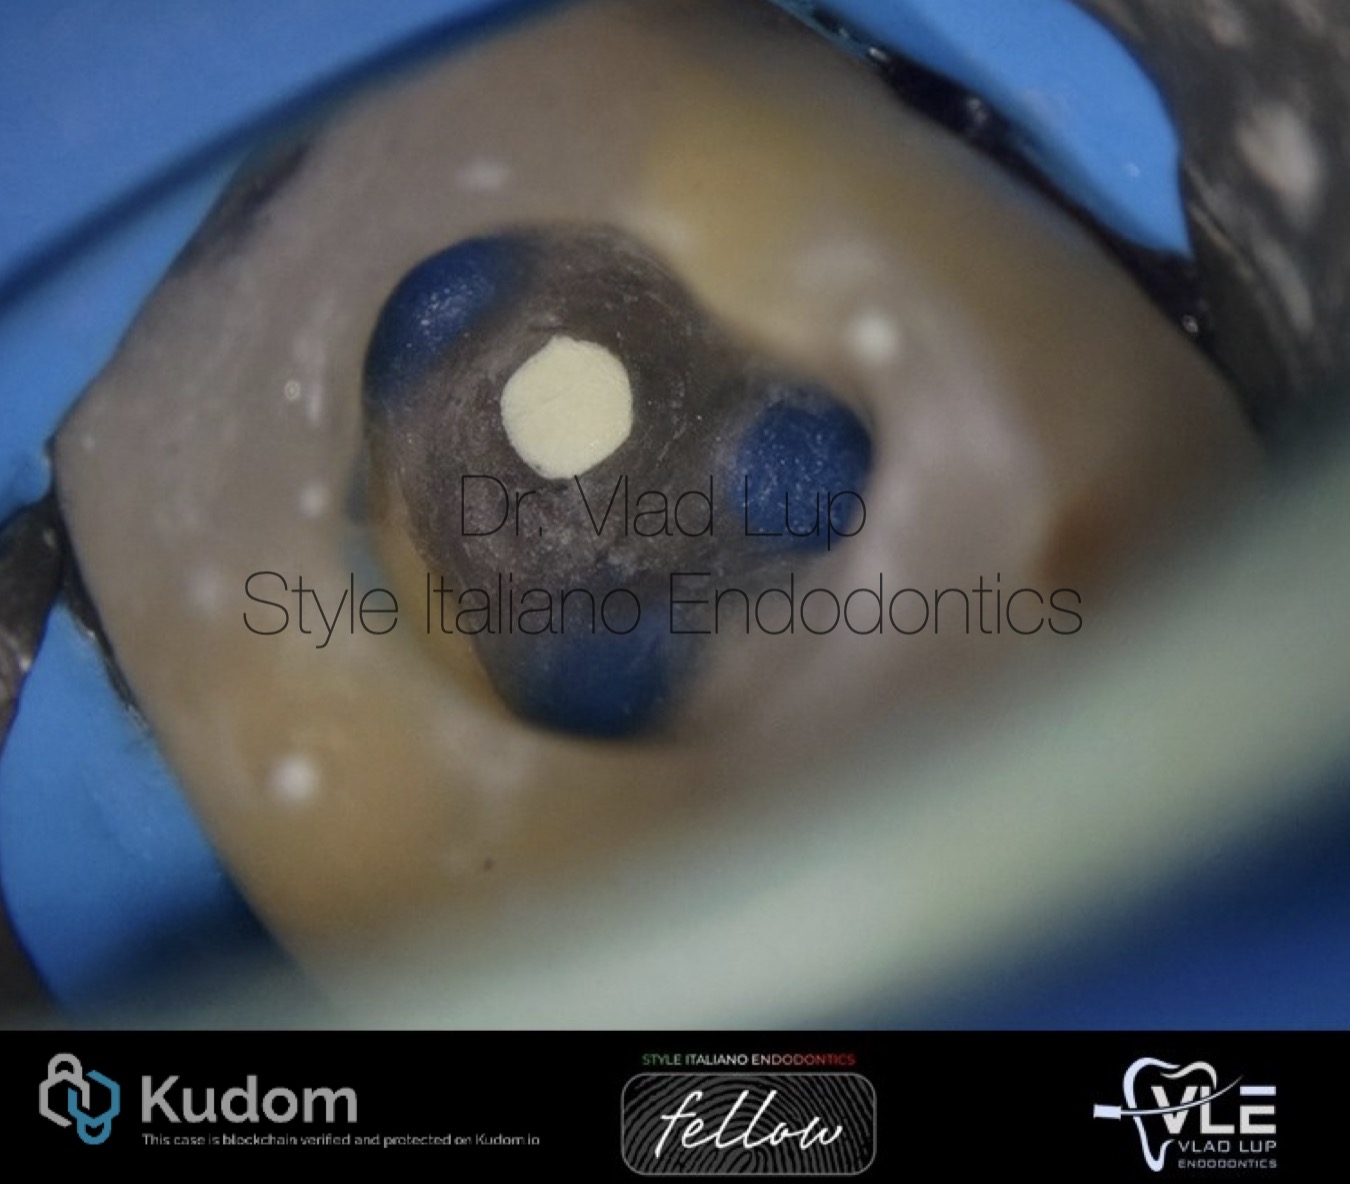
Fig. 11
White MTA was packed in the perforation, and a damp micro brush was used to clean the pulp chamber floor of any material
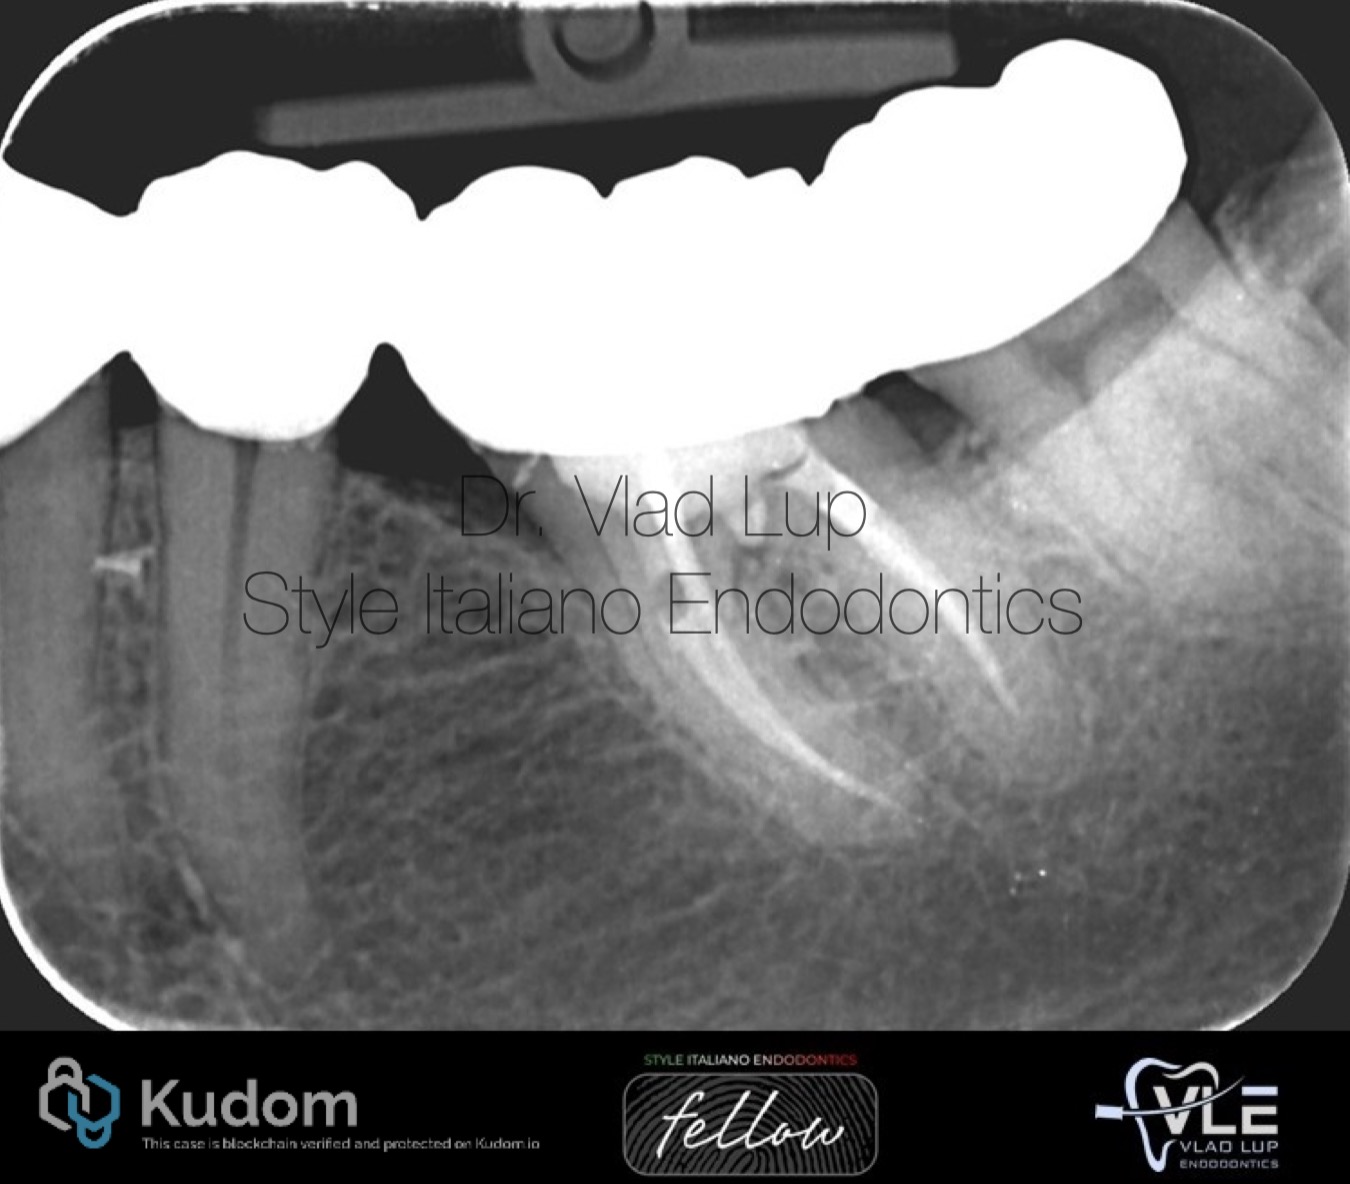
Fig. 12
The post operative radiograph shows the perforation site repaired without any extrusions. A little void in the obturation material can be seen in the mesio-lingual root canal maybe due to the ledge but considering the seal of the orifice under isolation, no problems should be expected
 : eval()'d code</b> on line <b>19</b><br />
)
Fig. 13
Conclusions
Proper access cavity design remains the cornerstone of predictable endodontic success. When access is misplaced, clinicians risk iatrogenic complications such as perforations and ledge formation, which compromise the long-term outcome [1,3]. The pulp chamber floor map, as described by Krasner and Rankow, provides a consistent guide for canal identification by following dentin color contrast, symmetry, and anatomical landmarks [2].
Under magnification, these visual cues become more distinct, helping clinicians navigate complex or calcified anatomy and minimize unnecessary dentin removal [4]. In cases of perforation, immediate sealing after proper disinfection is essential to prevent bacterial contamination and maintain a favorable environment for periradicular healing [6]. The use of a collagen barrier and MTA ensures a hermetic seal and promotes tissue regeneration, making it the material of choice for managing pulpal floor perforations
Bibliography
Clark D, Khademi J. Modern molar endodontic access and directed dentin conservation. Dent Clin North Am. 2010;54(2):249–273.
Krasner P, Rankow HJ. Anatomy of the pulp-chamber floor. J Endod. 2004;30(1):5–16.
Patel S, Rhodes J. A practical guide to endodontic access cavity preparation in molar teeth. Br Dent J. 2022;233(7):527–534.
Plotino G, Grande NM, Pecci R, Bedini R, Pameijer CH, Somma F. Three-dimensional imaging using microcomputed tomography for studying tooth macromorphology. J Am Dent Assoc. 2006;137(11):1555–1561.
Ahmed HMA, Versiani MA, De-Deus G, Dummer PMH. A new system for classifying root and root canal morphology. Int Endod J. 2017;50(8):761–770.
Sönmez IS, Oba AA, Küçükyilmaz E, Sönmez D. Repair of furcal perforations with different materials: a review of literature. Eur J Dent. 2020;14(3):465–472.
Torabinejad M, Parirokh M. Mineral trioxide aggregate: a comprehensive literature review—Part II: leakage and biocompatibility investigations. J Endod. 2010;36(2):190–202.